

AWS CDK for Frontend Developers: Multi-Stage Deploys with Github Actions
Throughout this series, we've discussed how to build backend infrastructure using the AWS CDK. In doing so, we've touched on several services and concepts. However, to make sure our application is working as intended, we'll need to deploy our environment to AWS.
Fortunately for us, we laid a solid foundation for deploying our application when we first set it up in an earlier lesson. For the most part, this chapter can stand alone from the other chapters, though we'll use the project we've built so far so that we have something to deploy. However, if simply wanting to know how to deploy a CDK application, this guide is still for you.
In that previous post, we used a combination of thegit-branch library and the app.node.tryGetContext() method to dynamically create a stack that was dependent on the environment we were in.
Due to our diligence in the beginning, in this chapter, we'll see how easy it is to not only deploy our backend to AWS with GitHub actions but what a basic setup will look like when wanting to have a separate deployment flow for our develop and main branches.
Automation made simple with GitHub Actions
GitHub Actions is a powerful tool that allows you to automate workflows. With GitHub Actions, you can create custom workflows that automatically build, test and deploy your code whenever you push changes to your repository.
A GitHub action is defined in YML and is picked up by GitHub by being placed in a .github/workflows folder.
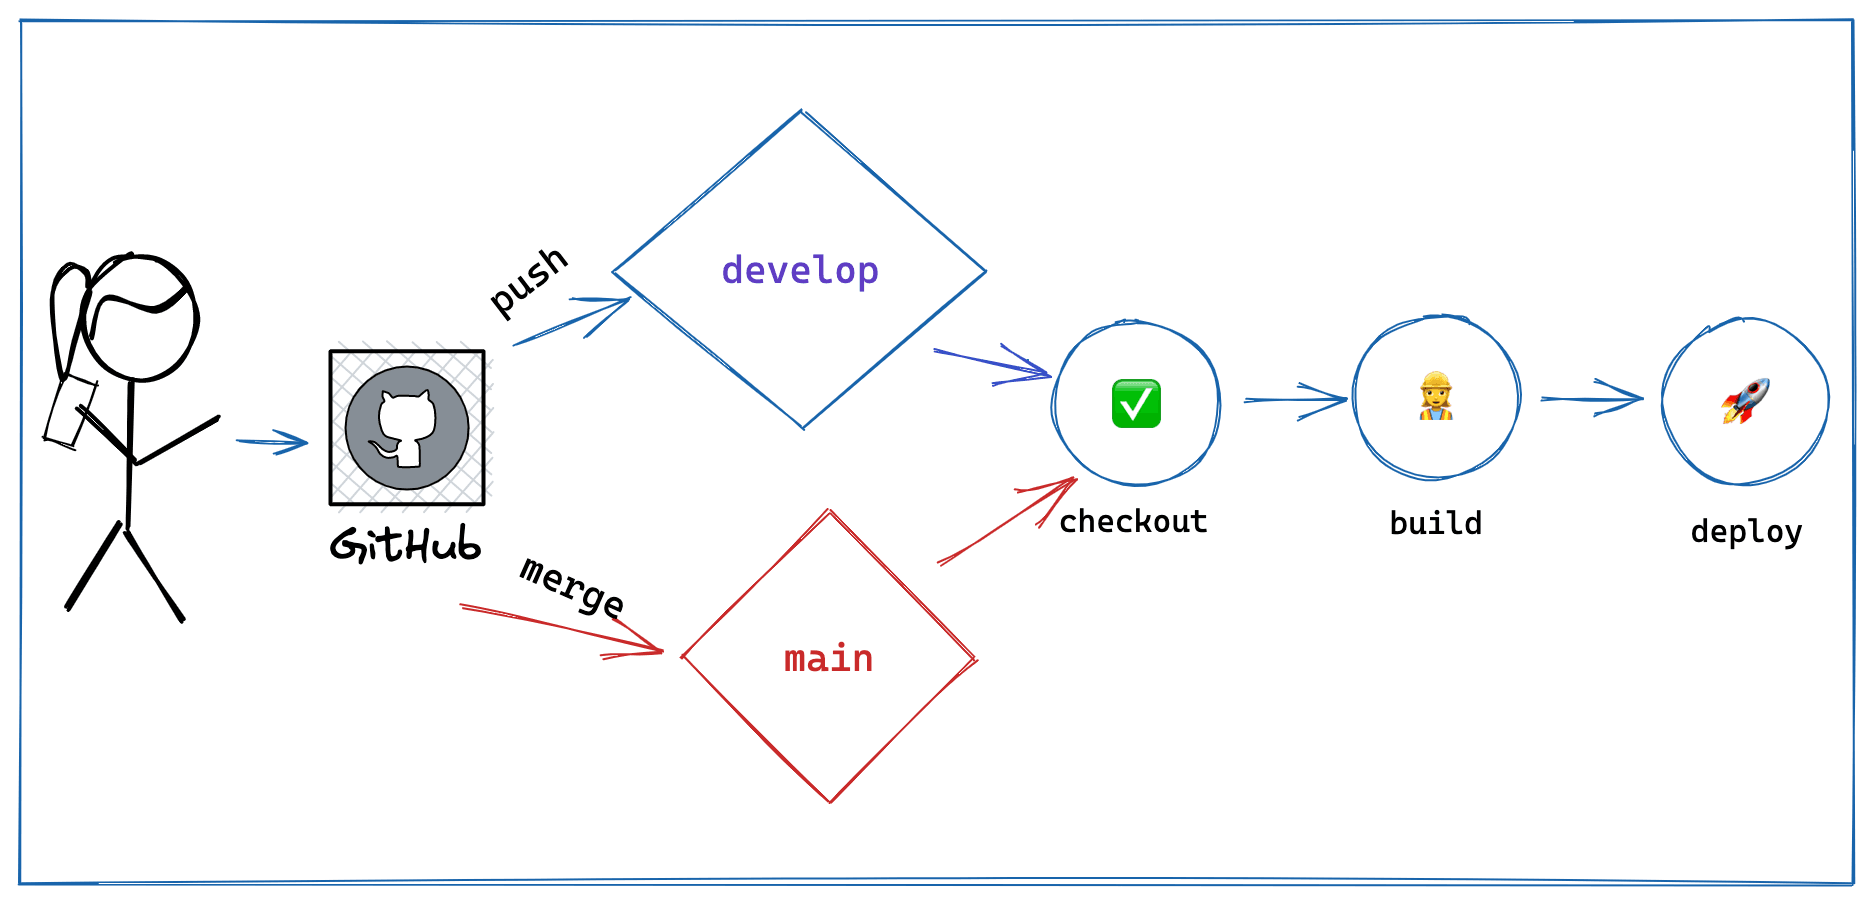
As seen in the image above, we'll take advantage of this by specifying a workflow with two different flows. In particular, depending on whether the event is a commit to our develop branch or a merge to our main branch, we'll do the following:
Checkout our application from GitHub
Perform the steps needed to build the application
Deploy the application
In your project, create the following directories and file: .github/workflows/aws.yml
In that file, paste the following.
🗒️ Because our deployment is dependent on the branch we are on, now is a good time to make sure we are on the
developbranch and not themainbranch. Also take a moment to push your project to GitHub so that the project is available.
A quick explainer of the lines is as follows:
lines 1-10: We give the action a name of our choosing, and define the criteria needed for our action to run
lines 13-15: Our workflow is called
aws_cdk, if the event is a PRmerge, or apush, then spin up an ubuntu server to run the following steps.lines 17-22: The server is configured with
gitbut that's it. So we create a step to checkout our repo and set up node version 18 using official GitHub-managed actions. Because NodeJS comes with NPM, we runnpm installlines 23-31: We need to install the
CDKon our server. While this can be done manually, there is a popular and well-maintained 3rd-party action that does this. With it installed, we run thecdk diffcommand which is similar in spirit togit diffto view changes between what is local vs what is deployed. To do that, we provide AWS credentials as environment variables and our GitHub token environment variable for pull-request support.lines 32-41: We deploy our application using the same GitHub action as the previous step except for this time we call the
deploycommand. Because we can't accept yes/no CLI prompts in this server, we pass a flag to auto-approve.
🗒️ If following along through the course, it's a good idea to run
npx aws-cdk synthlocally before deploying. This will compile your code to CloudFormation which serves as a good sanity check that there are no configuration errors.
GitHub action permissions are on a per-repo basis. Ensure your repo is configured correctly:

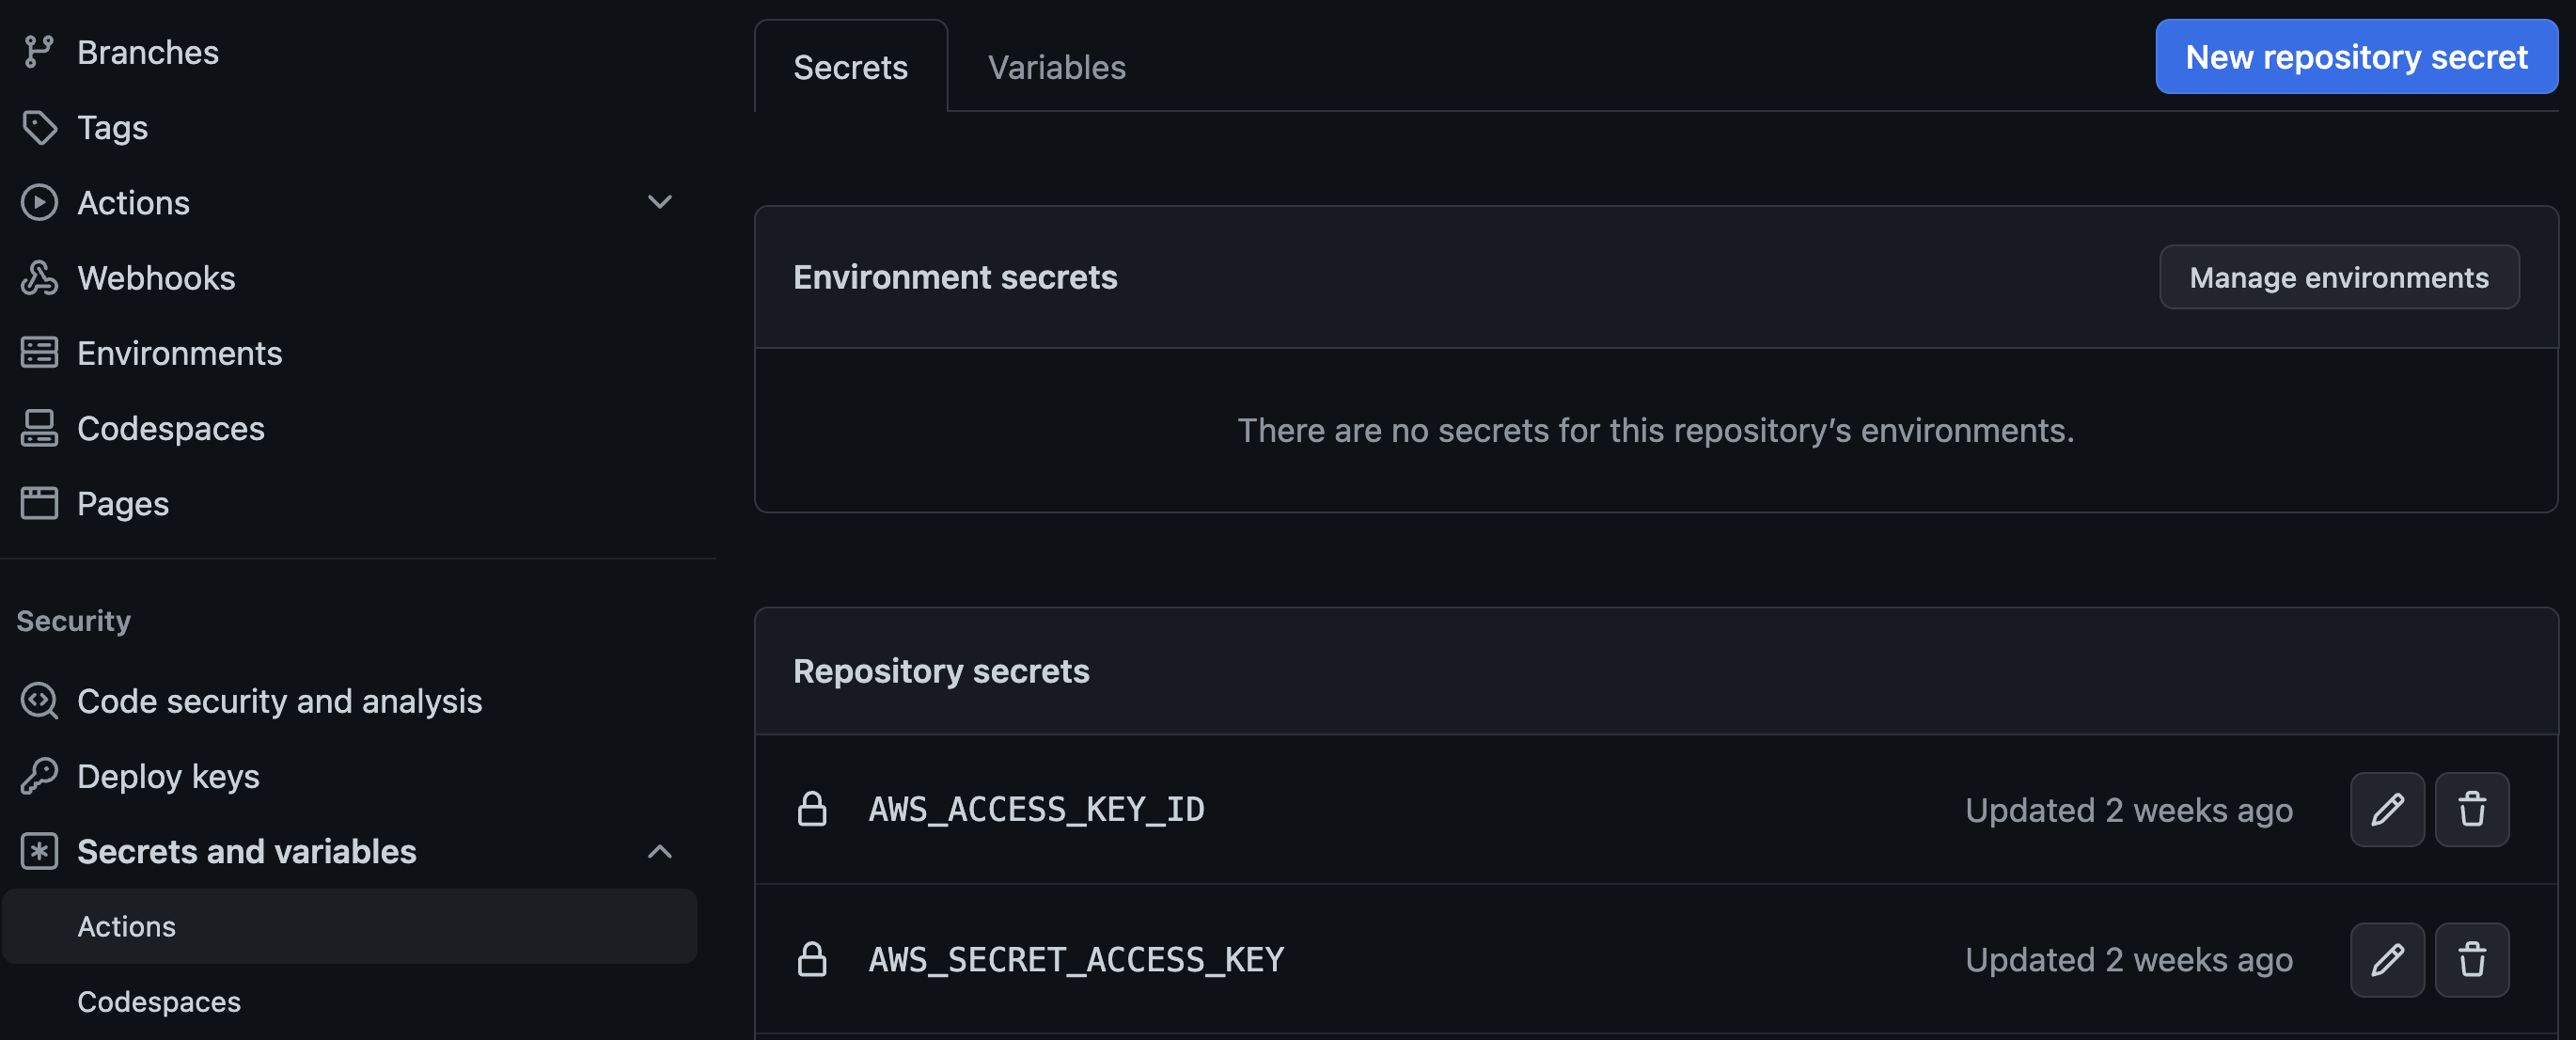
Lastly, recall our GitHub action uses environment variables to avoid us having to pass in our raw AWS credentials (which should never be done!).
The simplest way to get those is to grab them from your machine. When you set up your AWS account, those were stored in a ~/.aws directory. Grab those values and paste them into GitHub as shown in the following screenshot:
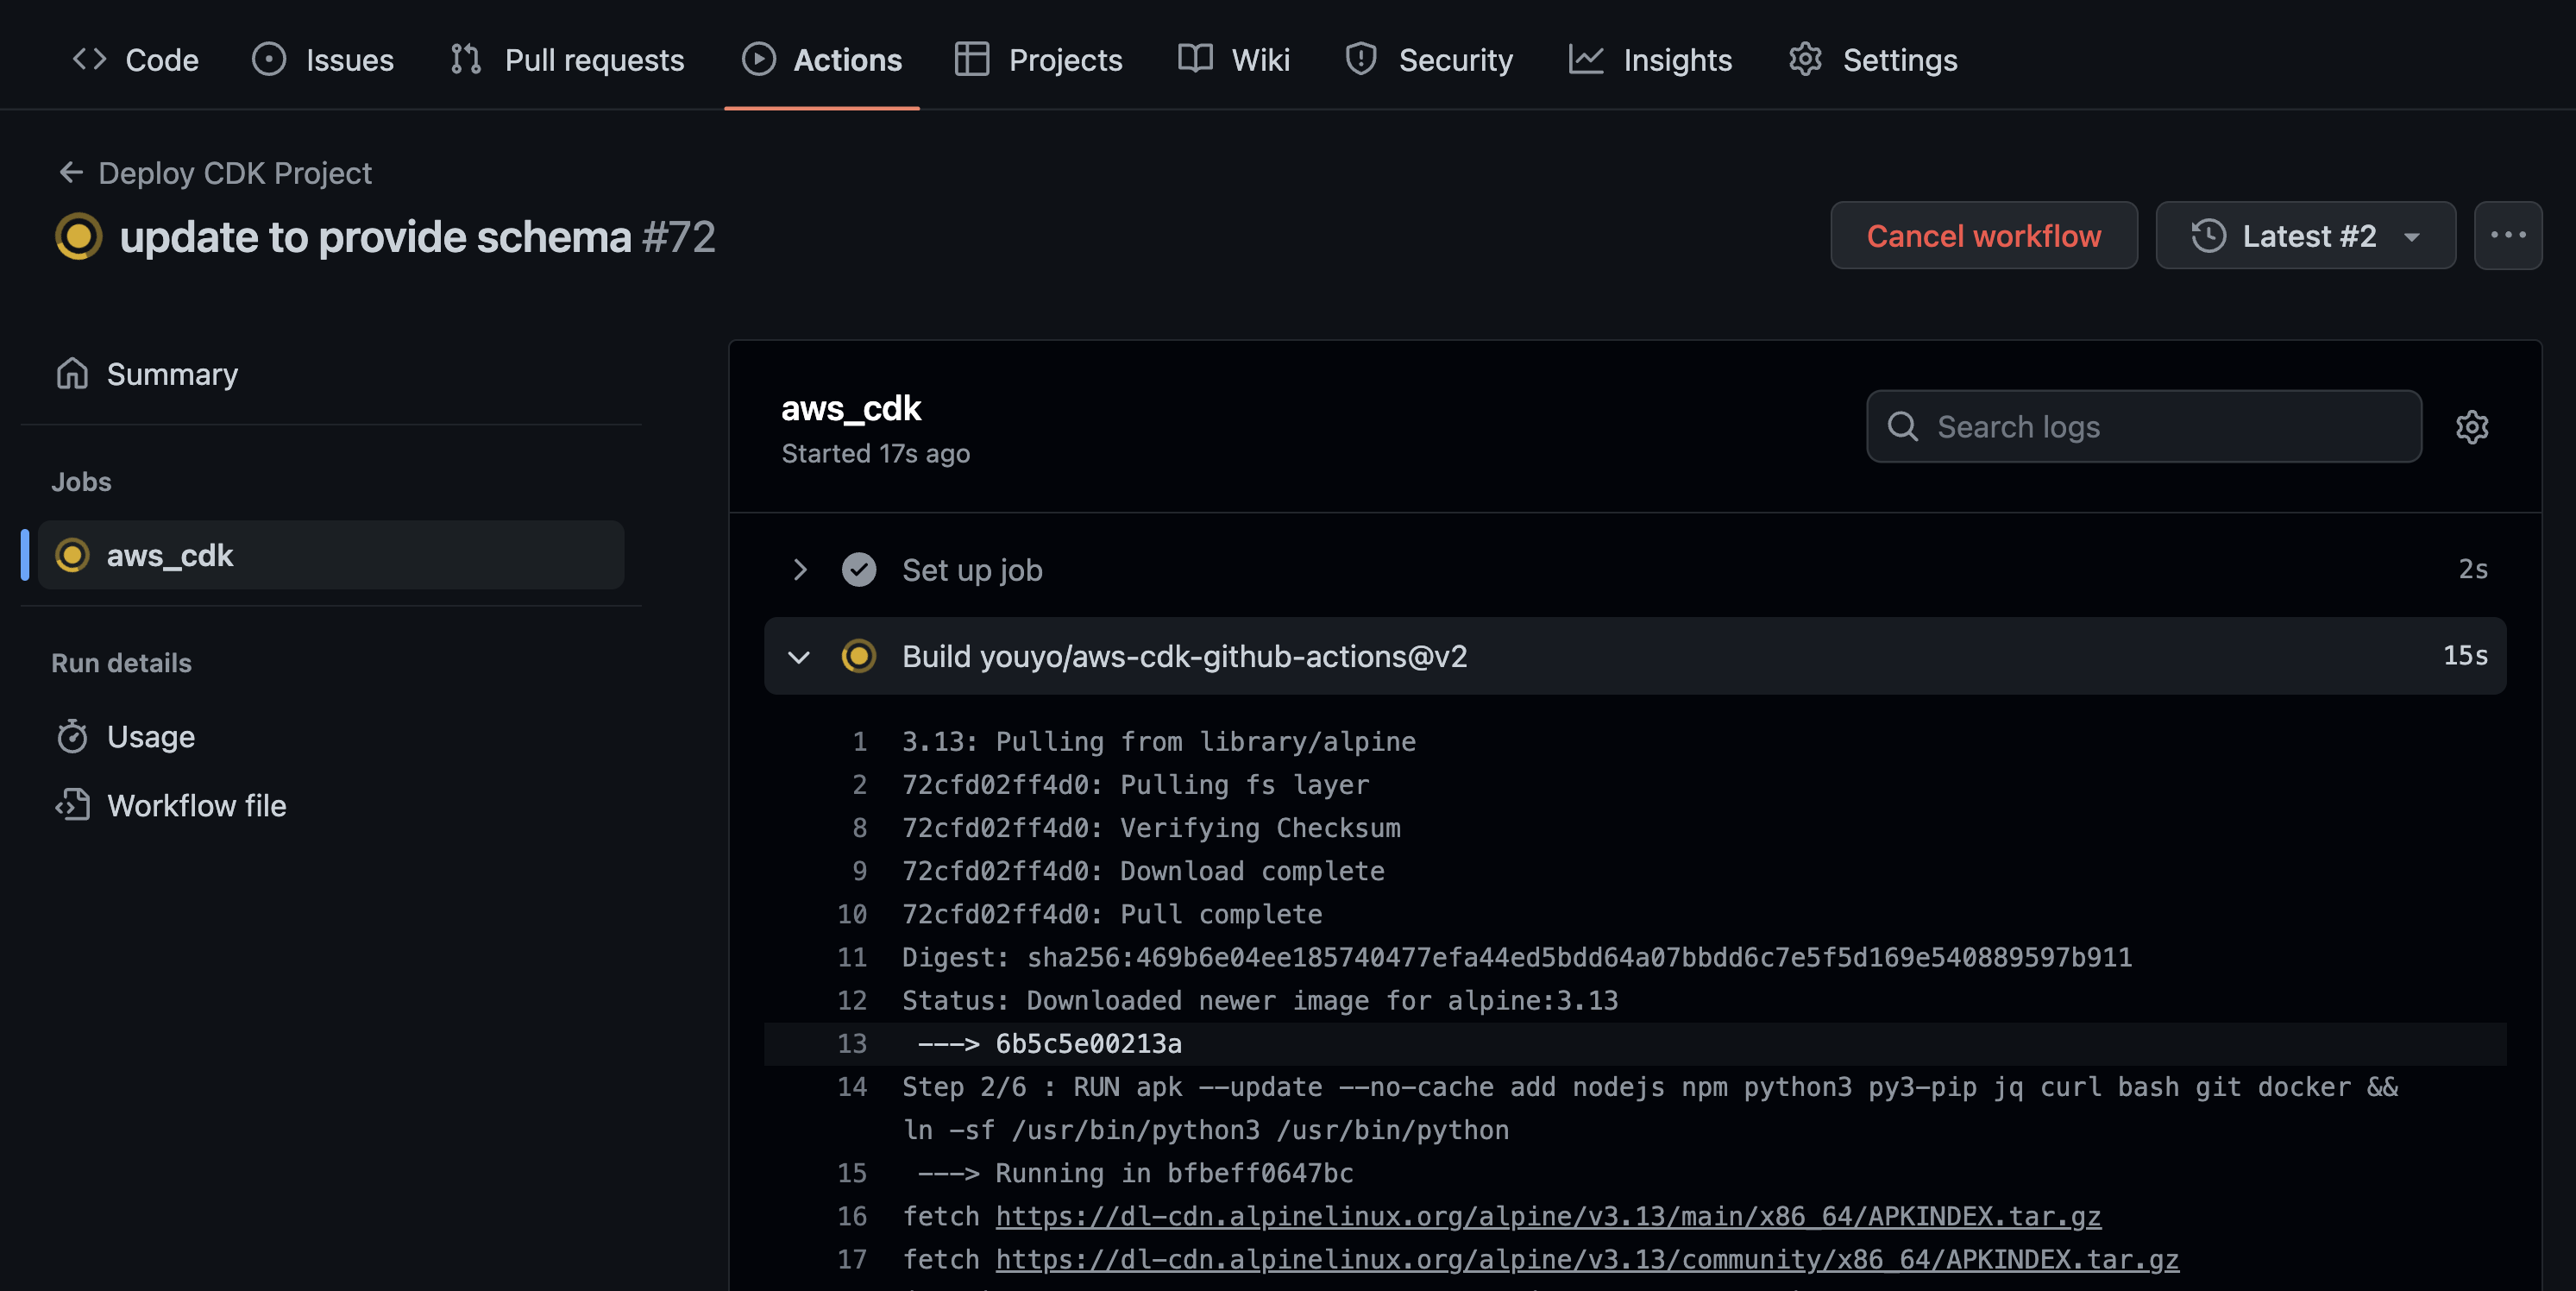
With our application configured, you can now deploy your code and view the action run from the Actions tab:
Deploy to Production
On every commit, we have our code deploying our develop environment, however, when a merge occurs on the main branch, we want to deploy our production environment.
To accomplish this, all we have to do is update our cdk.context.json file. Paste in the following:
{
    "globals": {
        "appName": "trip-logger",
        "region": "us-east-1",
        "appDescription": "A stack for a Travel pic viewer"
    },
    "environments": [
        {
            "environment": "develop",
            "branchName": "develop",
            "s3AllowedOrigins": ["*"]
        },
        {
            "environment": "production",
            "branchName": "main",
            "s3AllowedOrigins": ["*"]
        }
    ]
}
Commit your changes and wait for your develop branch to deploy. Once done, create a pull request to your main branch and merge it. You should see your production environment deploy 🎉
Conclusion
In this chapter, we saw how to deploy a CDK application to AWS using GitHub actions. While there are entire courses and varying opinions on how to manage your workflows and architecture, this method shows off the configuration options available while keeping the deployment straightforward.
While deploying our backend is useful on its own, in a fullstack application, you'll likely need the values from these services. In the next chapter, we'll see how this can be accomplished as we shift our focus to our frontend application.
Until then, happy coding!
🦦


