

AWS CDK for Frontend Developers: The Ultimate Guide to Get You Started
Intro
In tech, solutions are often ended with "...but it depends". Few things are absolute. However, there is something everyone can agree on: It's best to learn by doing.
So when I set out to create a guide for frontend developers working with the AWS CDK, I didn't want to tell concepts (and if you've been following my blog for a while, you know that's not my style). I wanted to deliver a guided path towards building a fullstack, fully-typed, fully serverless project so that frontend developers can automate their backend infrastructure.
I keep saying this is meant for "frontend" developers, but when it comes to modern frontend development, that definition is pretty loose. As mentioned in the initial chapter of this series, there is a specific demographic that I'm targeting.
Prereqs
While it's possible to read certain chapters in this series to pick up a particular solution, it's meant to be followed in sequence. At this point, you should have an idea of whether this guide is for you and also have a local environment bootstrapped and set up with the AWS CDK.
Series Overview
In this chapter, we'll see how the series will flow and tour what we're building. Then we'll set up our CDK project so that it's flexible to iterate on in later chapters.
In particular, here's the following outline for our backend:
Understanding if this series is for you
Setting up an AWS account and the AWS CDK
You are here👉🏽 Project overview and setupDynamoDB and Lambda: Creating your first CDK services
Amazon Cognito: Adding authentication and authorization
Simple Storage Service (S3) and Cloudfront: Adding image storage
AWS AppSync: Modern API Development
Deploying to AWS: CDK context and GitHub actions
Also, because this is a fullstack series, we'll bring our infrastructure to life on the frontend:
Frontend setup NextJS, TailwindCSS, and Cloudinary(!)
Frontend to backend with AWS Amplify libraries
AWS Amplify Hosting: Considerations and walkthrough
[Bonus]: Fullstack SaaS starter with Stripe
With an understanding of what services we'll be making use of, let's get started building our project!
AWS CDK Project Setup
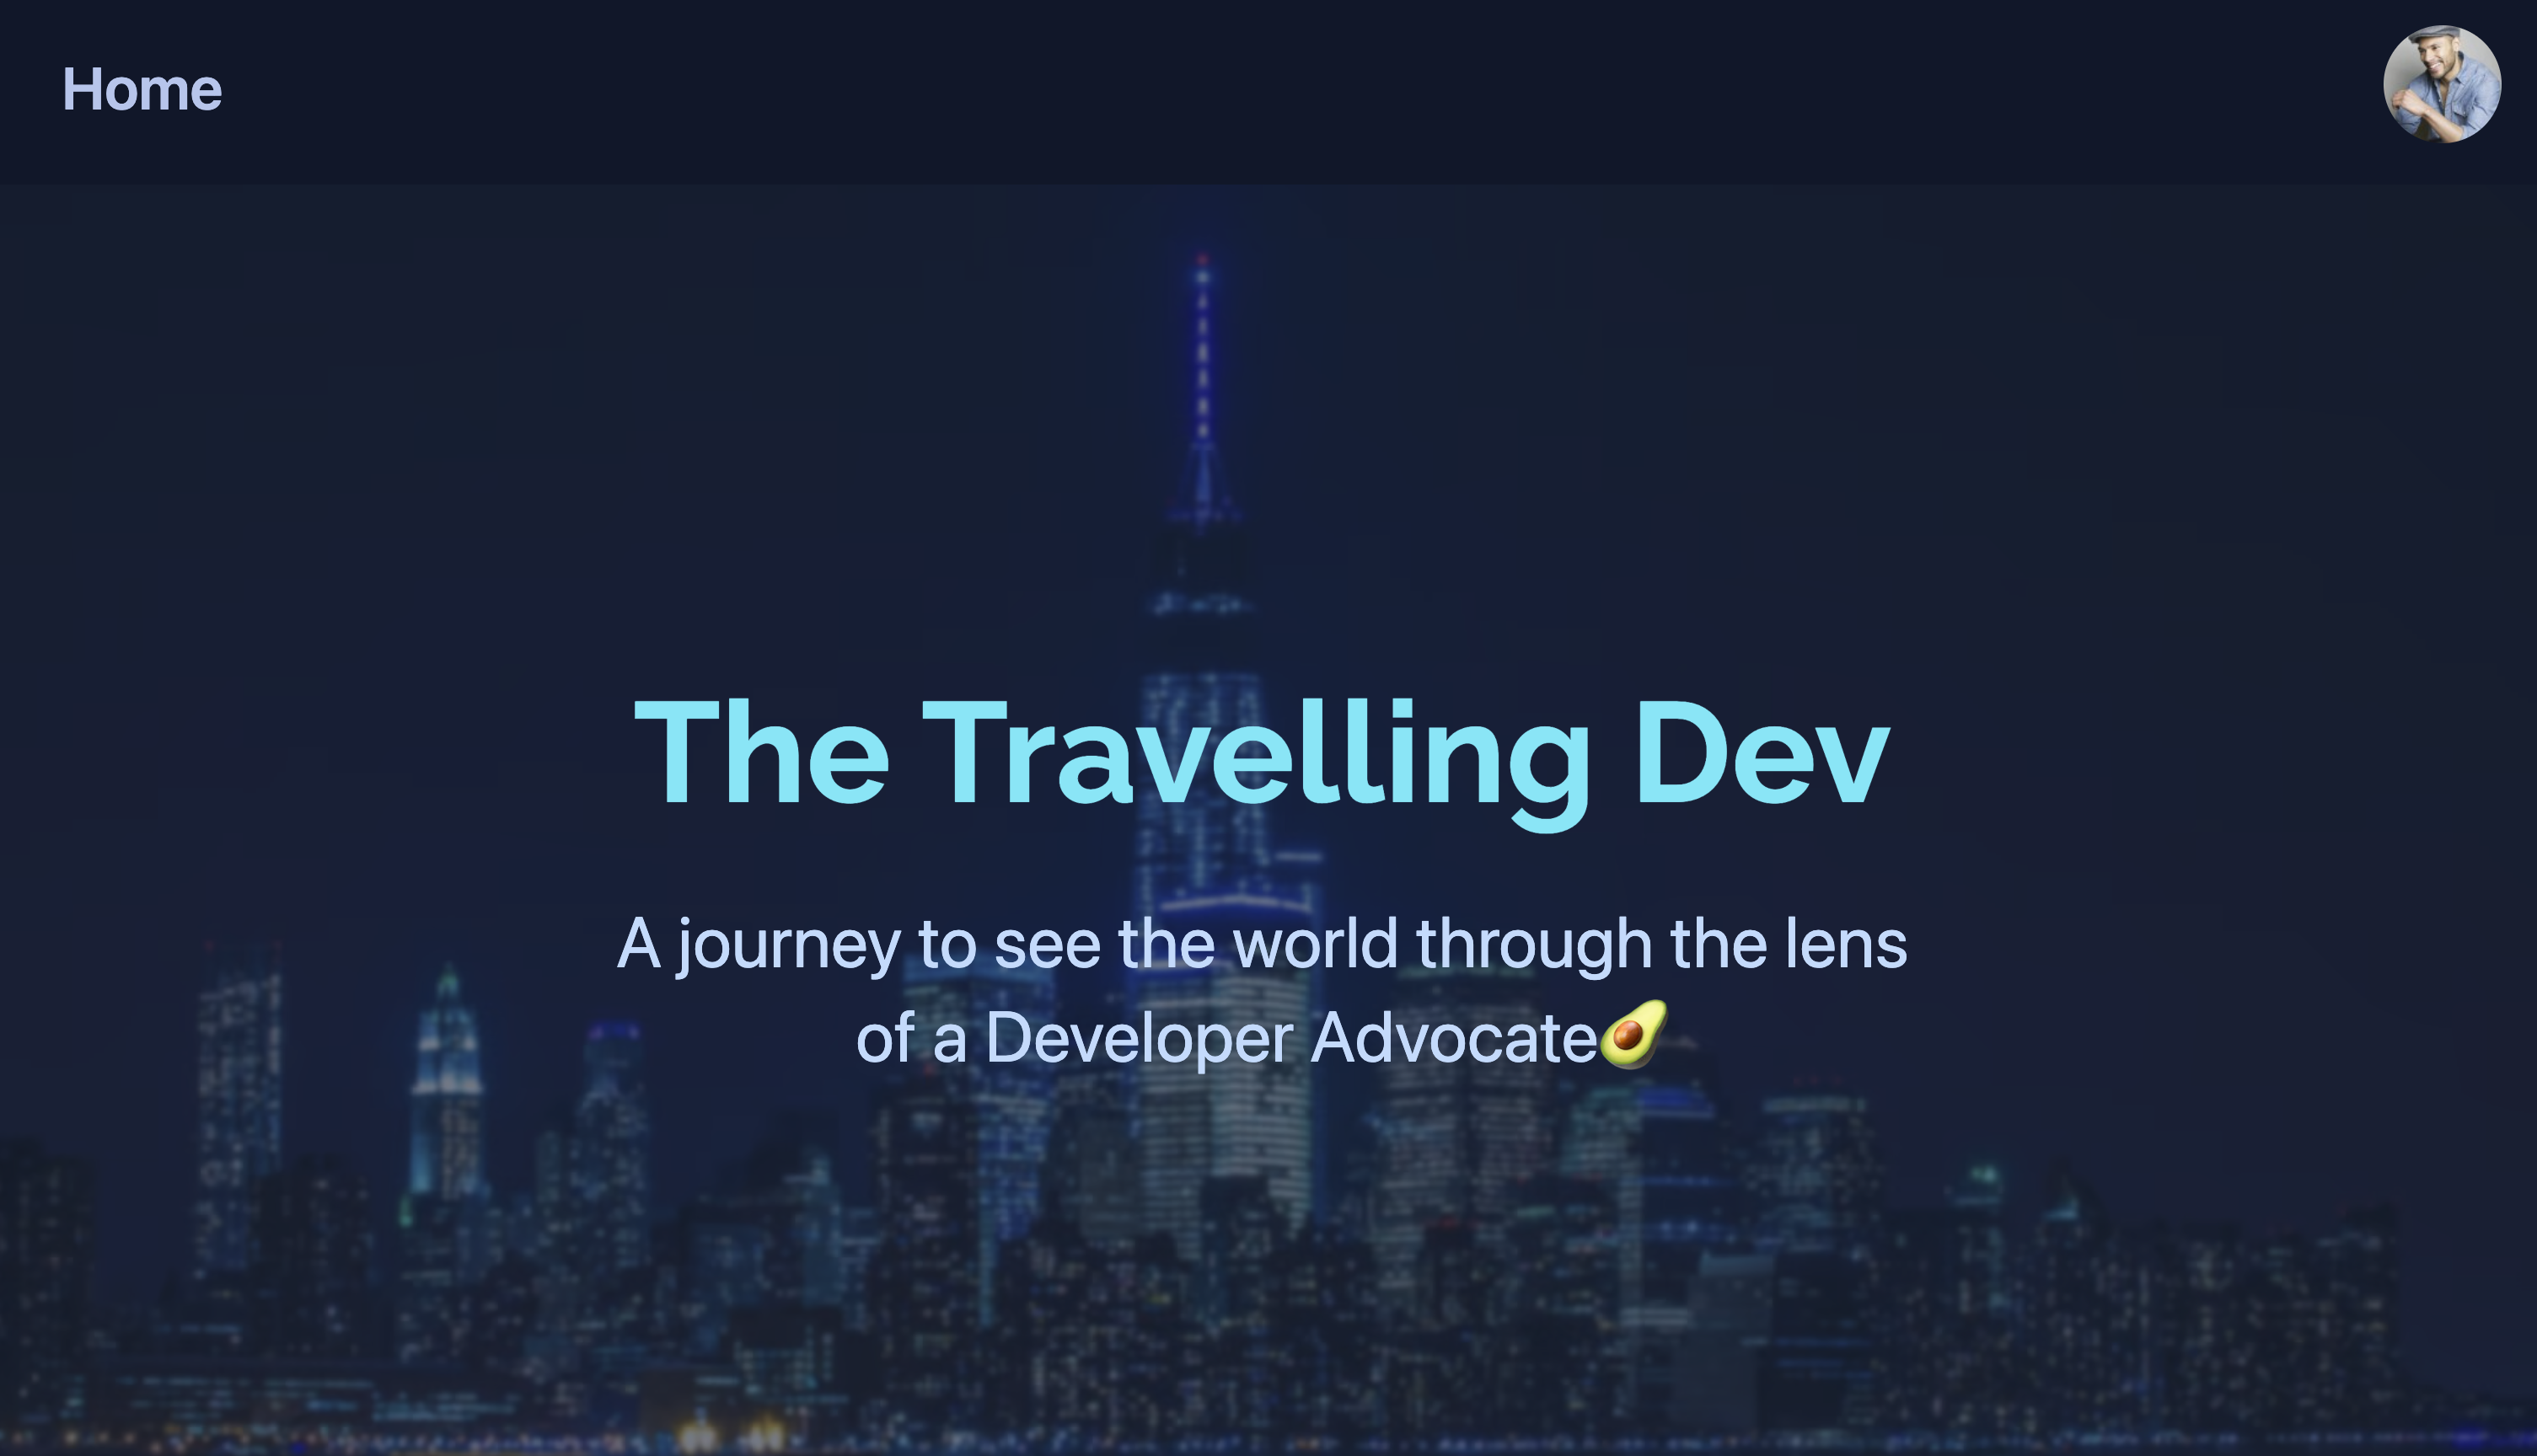
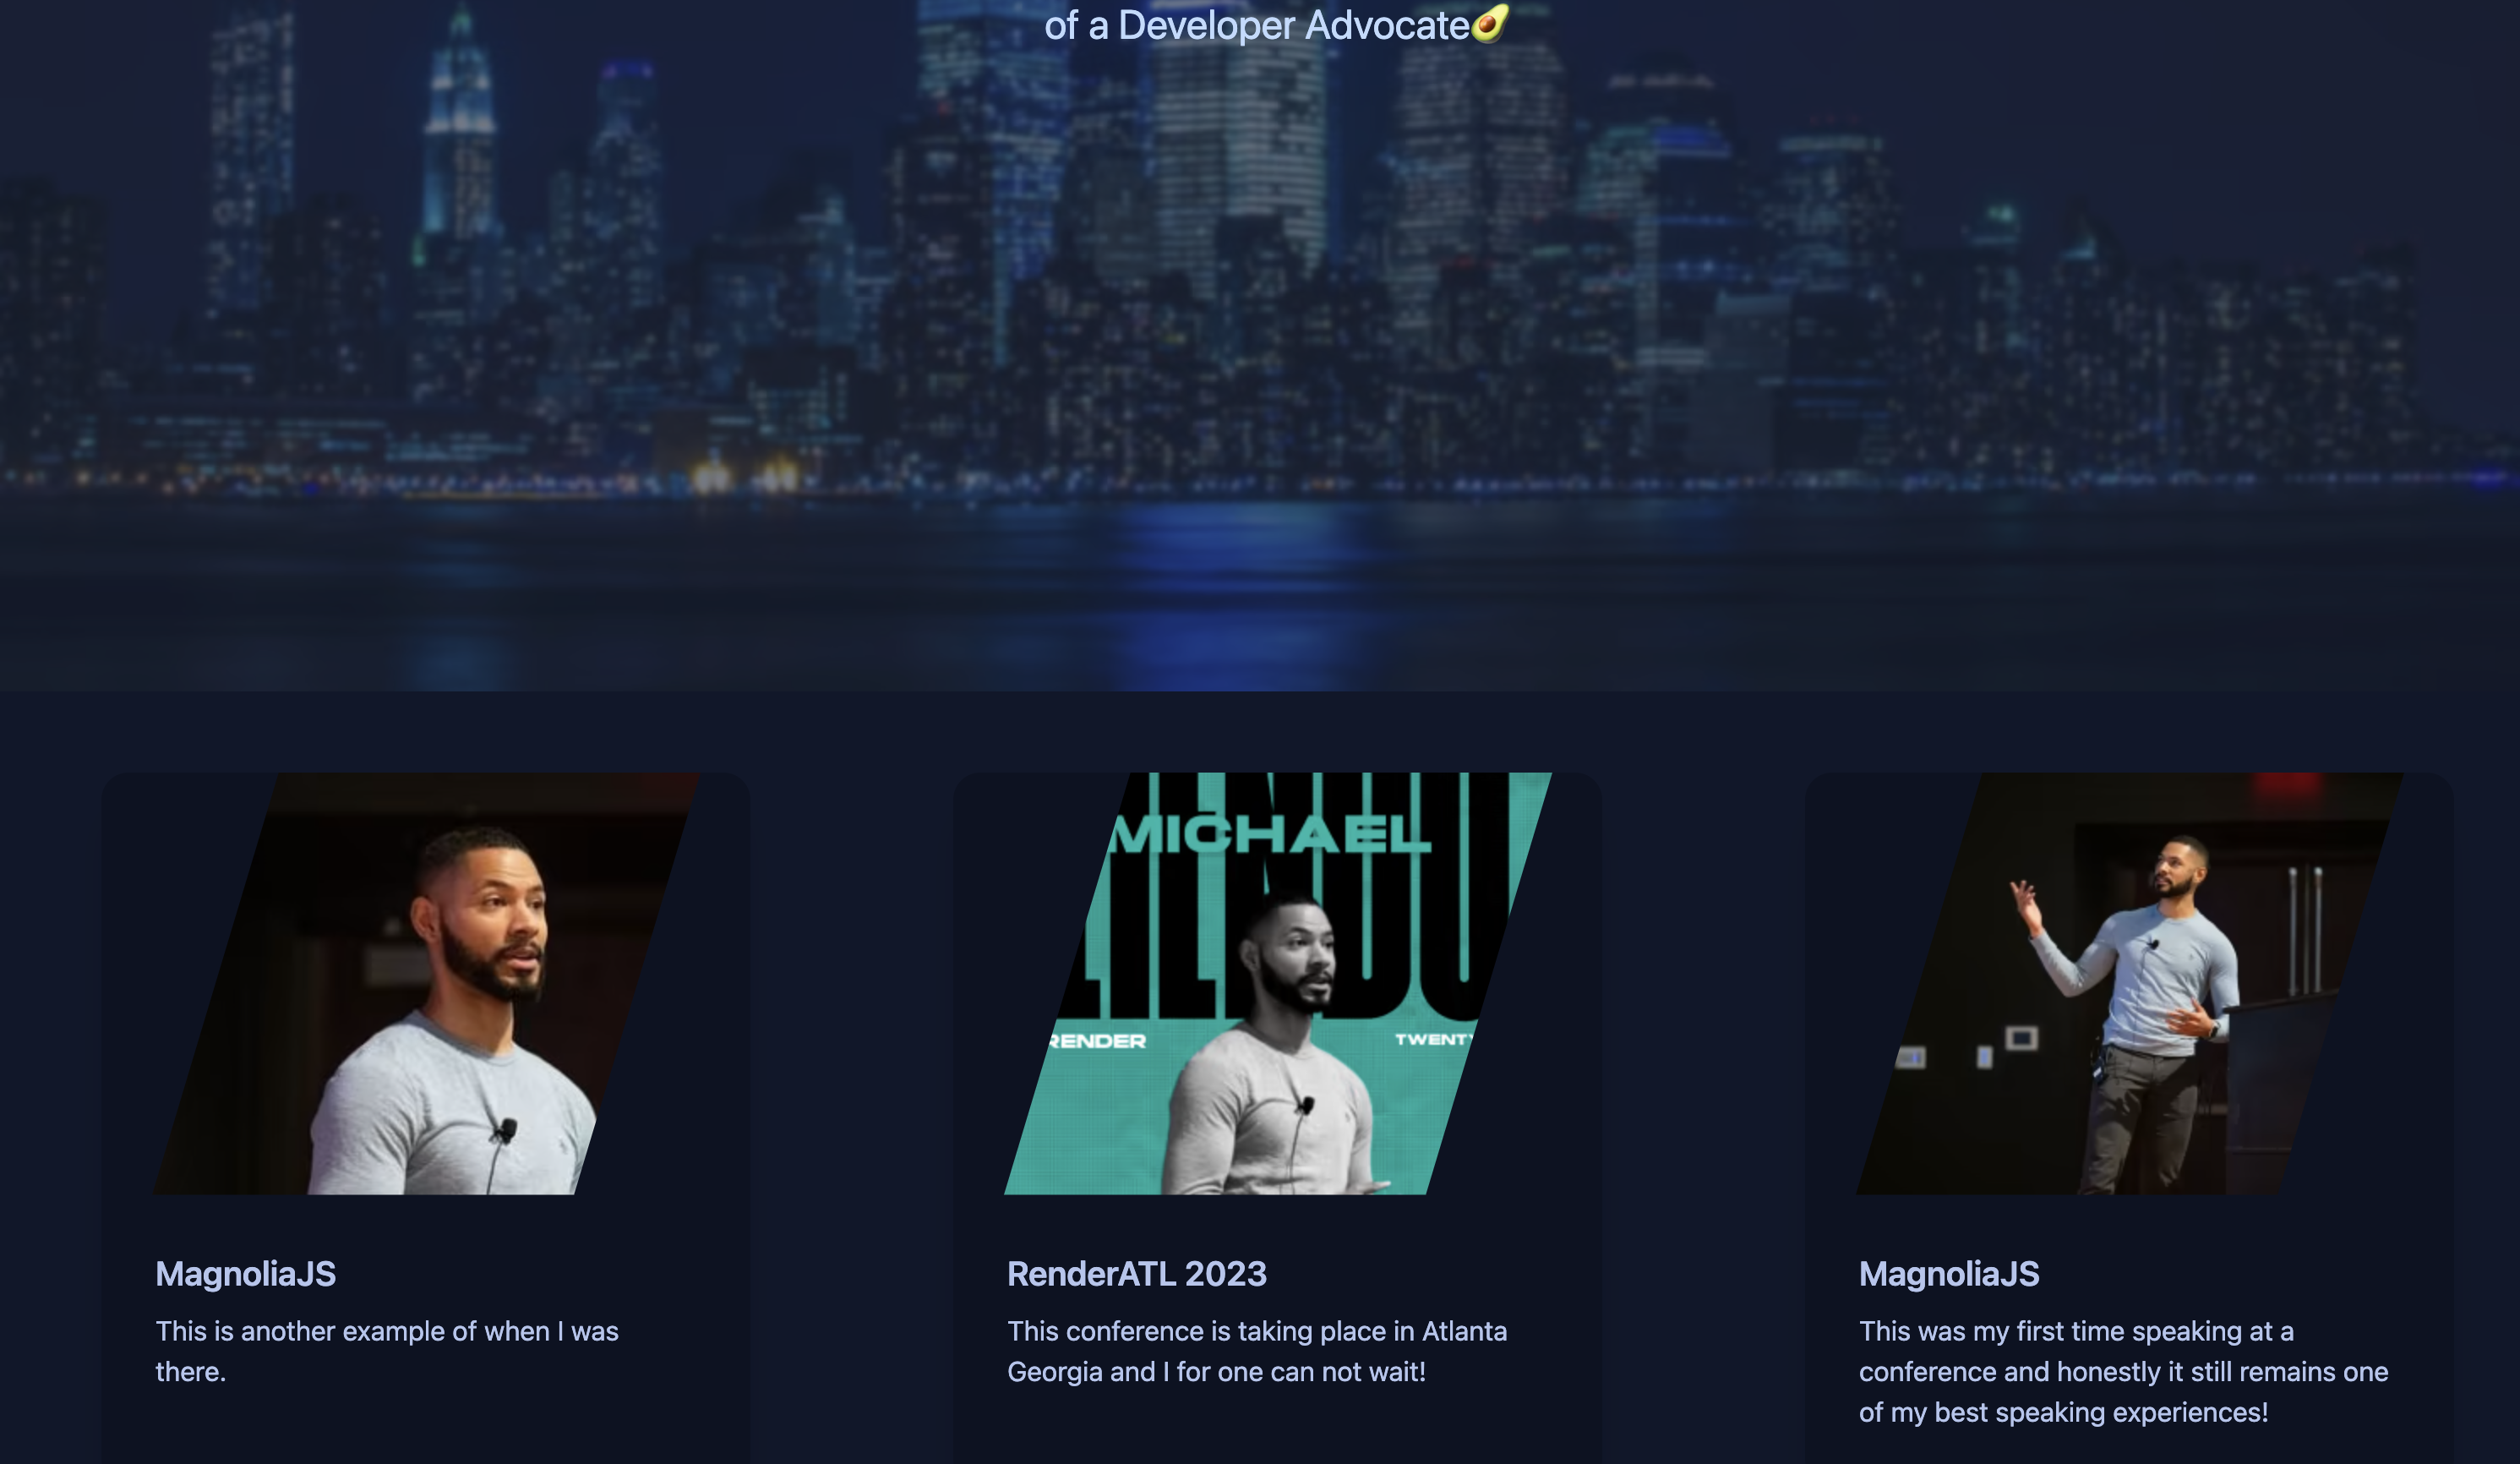
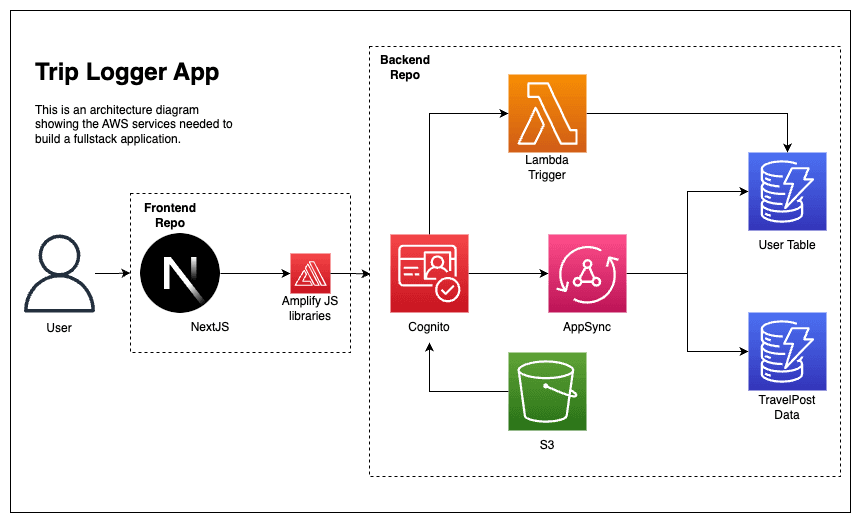
The project we'll build is a trip posting app where we can share with others the trips that we've been on. While sounding simple, take a moment to think about all of the features our app will require and how they match the upcoming chapters. You'll soon realize this is a core functionality found in most modern applications that hope to be more than a public to-do site.
In a new directory, run the following command:
# My direcotry: ~/Projects/fullstack-cdk-series/backend-trip-post
npx aws-cdk@latest init -l typescript
🗒️ For our backend, I'll be working from a
backend-trip-postdirectory.
This will initialize a new CDK project using the latest version. Specifically, we are setting the language to TypeScript (both --language, or -l work).
Once installed, you should receive output similar to the following:
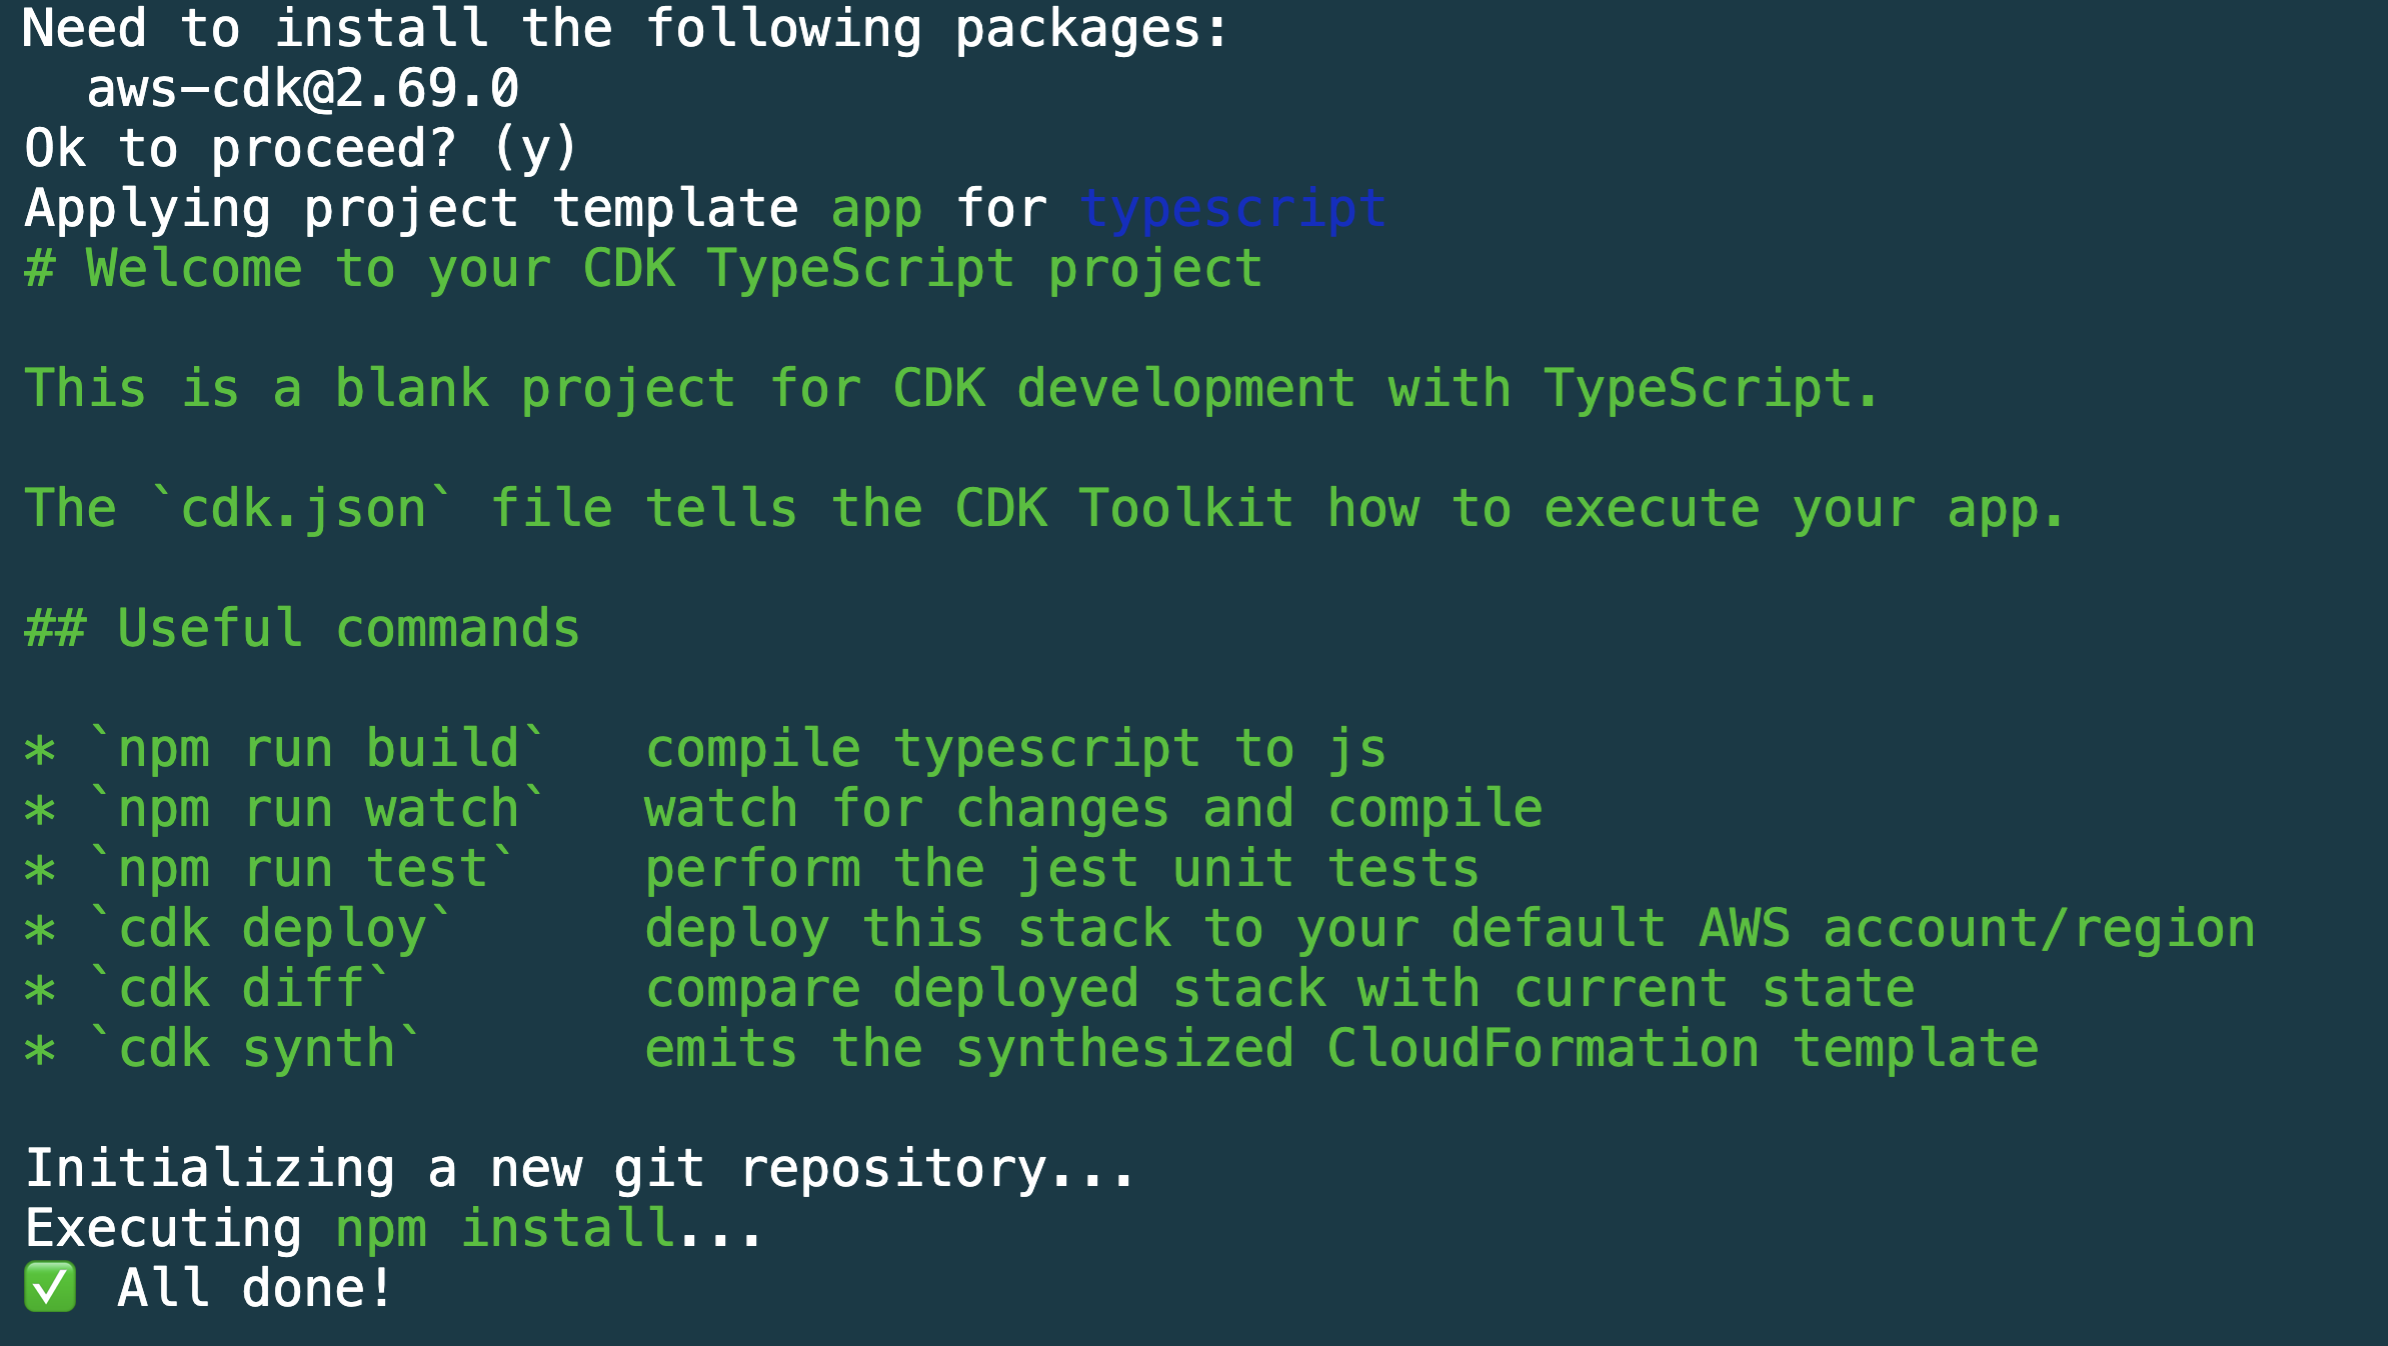
Right away, you can see the CDK is here to inform us of useful commands. To expand on this, open up the project in your editor (I'll be using VS Code) and let's go over a few of the generated files:
npm run build: We're writing TypeScript, and this command usestscto convert it to JavaScriptnpm run watch: Some services like Lambda can be watched and redeployed upon save instead of having a full redeploynpm run test:haha lolruns our test suitelib/backend-trip-post-stack.ts: In JavaScript, you can call multiple functions at the same time by wrapping them in a larger function. This is where we define that larger function--called a stack.bin/backend-trip-post.ts: Our projects can contain multiple stacks. This is where we tell our CDK app instance(new cdk.App())about them. Since AWS has multiple regions around the world and it's possible to deploy our application to various accounts, this is also where we pass that configuration to our stacks. If left blank, it will use the values from our local AWS profile.
In short, what we deploy to AWS is one or many stacks. These stacks can be configured with the account, region, and additional context we provide.
A stack is made up of constructs. But what's a construct?
Constructs
Recall that the AWS CDK is a wrapper around CloudFormation, and that CloudFormation is AWS's way of templating AWS services.
A construct is a wrapper around a CloudFormation-defined AWS service. That means instead of writing YAML, we get to use a TypeScript. These constructs can exist in one of three levels depending on how abstract you want to be.
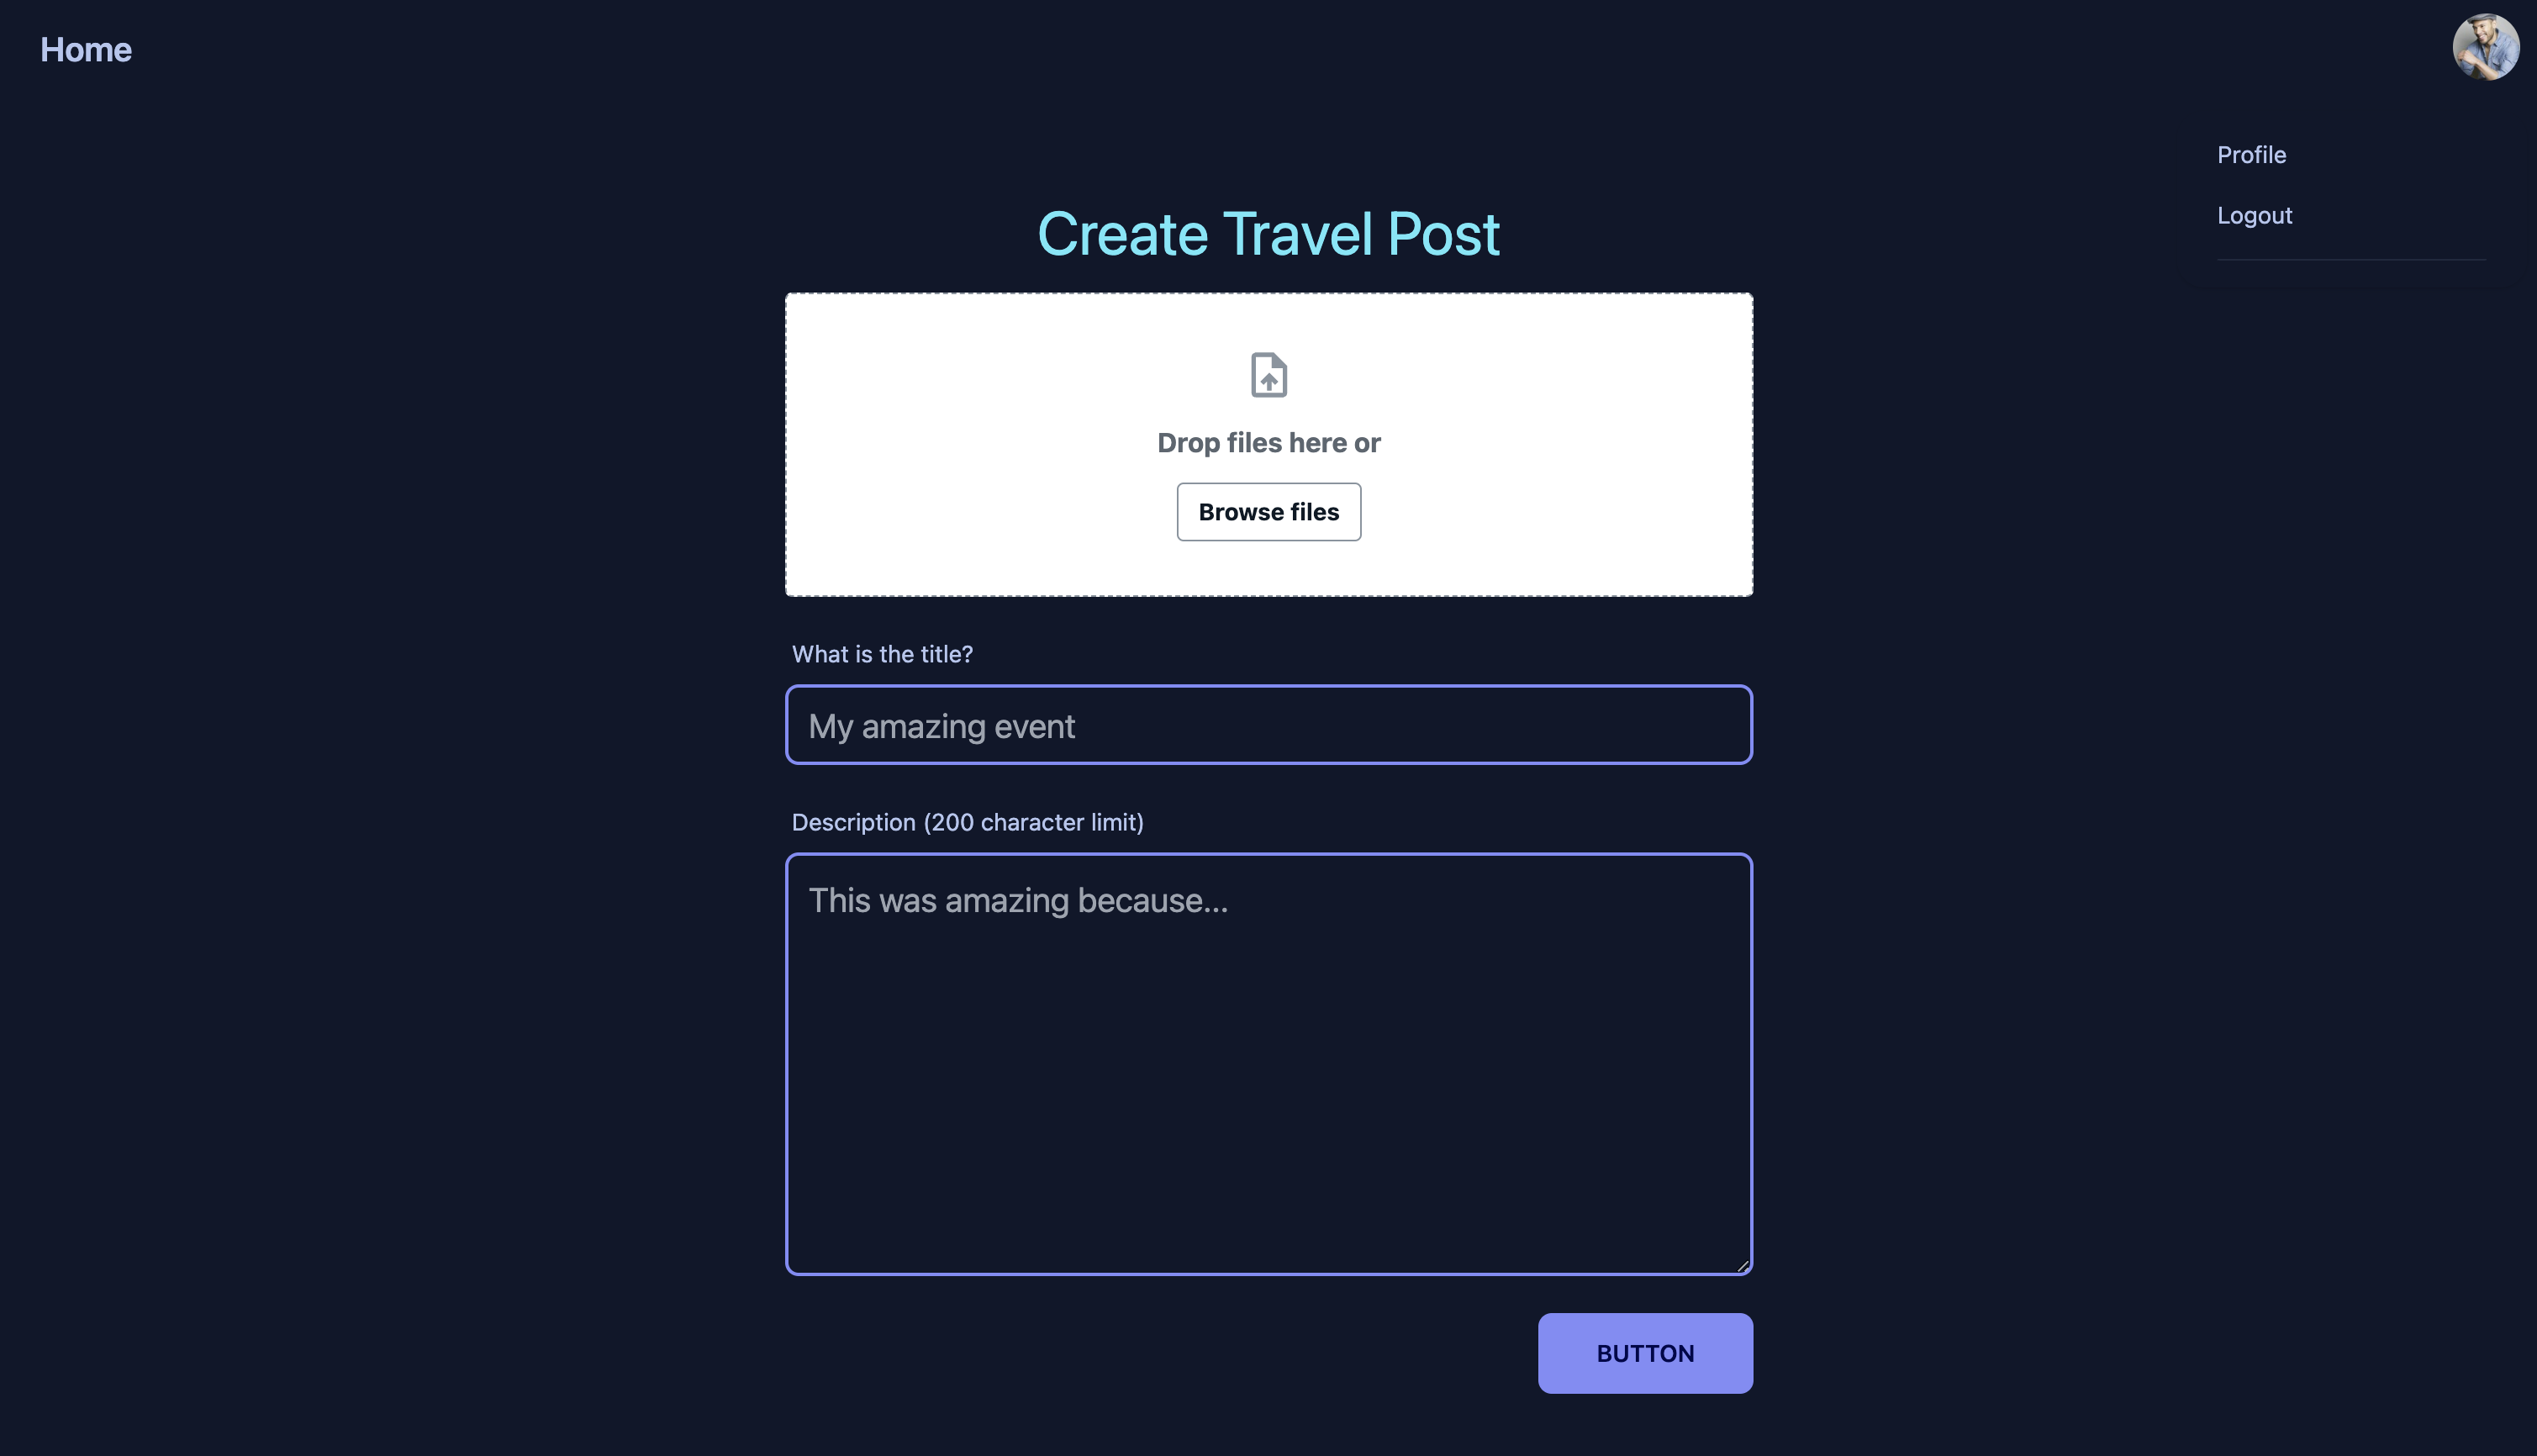
While sounding (super) confusing at first, as a frontend developer, you're actually already familiar with this concept due to React's components:
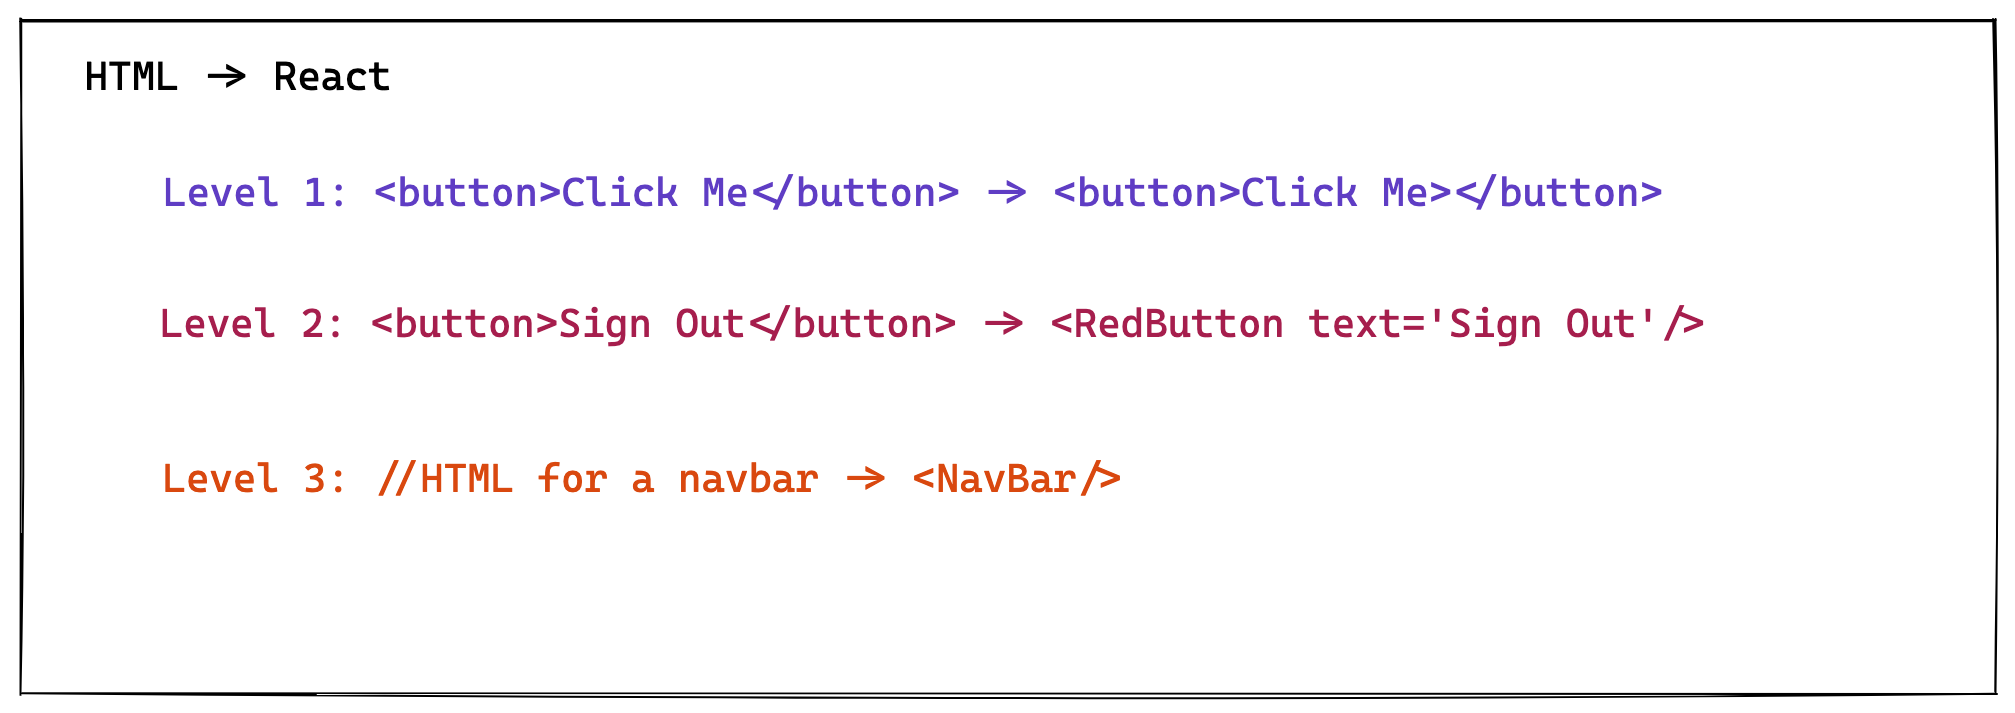
In the above screenshot, we see an example of a level 1 construct in purple. The base is HTML, and the abstraction is JSX. At level 1, even though we're in React, our code is mirroring what's available in HTML.
At level two, we use React as intended. When people think of React, this is what typically comes to mind. Instead of mirroring HTML, our JSX has sensible defaults and opinions based on how people are likely to use it.
When we get to level 3 we trade flexibility for speed. This often means we don't have as many knobs to configure but get a solution-oriented abstraction that is usually the combination of other services.
When a new service at AWS comes out, the CDK is typically updated with level 1 support. This is done by pulling the CloudFormation template.
After that, the CDK team and the community can contribute a level 2 construct. This is what most developers prefer to work with, and what we'll be using in this series.
In the CDK, an L3 construct represents a solution. These are community maintained and while they can save a lot of time like deploying a static site with a few commands, they are often org specific in both implementation and what options they allow.
CDK Context: How to avoid pigeonholing
We haven't written much code in this post and that makes me sad. So before wrapping up, let's make our time easier in the later stages by spending some time on our setup.
Similar to React, the CDK doesn't have an opinion on how you set up your project. As many devs know, this is great for getting started but can pigeonhole (put us in a situation difficult to get out of) if not careful.
While we'll be iterating on this process when in the deployment chapter, we can lay the foundation now.
Initial Context
When we initialized our project, the CDK generated a cdk.json file. For the most part, this contains configurations by the CDK and feature flags so that otherwise breaking changes by the CDK team can be safely introduced. However, we can also add additional context fields that are specific to how we would like our app to be deployed.
While it's possible to add those values in this file, I prefer putting them in a separate cdk.context.json file. Create this file in the root of your project:
touch cdk.context.json # or right-click in your editor to create the file.
🗒️ This file is special when placed at the root of our project. The CDK knows how to read the contents of this file as we'll see later on.
In that file, place the following:
{
    "globals": {
        "appName": "travel-viewer-app",
        "region": "us-east-1",
        "appDescription": "A stack for a Travel pic viewer"
    },
    "environments": [
        {
            "environment": "develop",
            "branchName": "develop"
        }
    ]
}
To summarize this code: Anything in globals will be about our project, regardless of what branch or stage we're on. Anything in environments will be specific to the git branch or CDK environment we are targeting.
The CDK initialized a git project for us and so you should be on the main branch currently. That's fine and we'll check out our develop branch later on.
Once we deploy, we'll want to combine our globals with the specific object in our environments array into one complete object.
To make sure we have TypeScript gives us inference on that, add a cdk.context.d.ts file and paste in the following:
export type CDKContext = {
    appName: string
    appDescription: string
    region: string
    environment: envNameContext
    branchName: branchNameContext
}

export type envNameContext = 'develop'

export type branchNameContext = 'develop'
Again, the above snippet refers to the 3 globals and the two environment-specific values.
🗒️ The CDK has type-definition files ignored by default in the
.gitignorefile. To keep that setting, but allow this file, add the following under the*.d.tsmention:
!cdk.context.d.ts
bin directory setup
This section is crucial to setting up our application for long-term success.
We need a way to get the current git branch we are on. Also, as mentioned, we'll need to combine our context file into a single object. This will be in addition to any additional props our stack needs to get set up.
Doing this in our bin/backend-trip-post.ts would make it a bit messy. So we'll do this in a new file.
Create the following file in our bin directory: init-stack.ts
Once created, import the CDK library and our context types:
import { CDKContext } from '../cdk.context'
import * as cdk from 'aws-cdk-lib'
getCurrentBranch function
// ... other imports
import * as gitBranch from 'git-branch'

// Get the current git branch
const getCurrentBranch = (): string => {
    const currentBranch = gitBranch.sync()
    return currentBranch
}
Getting the branch name is simple enough with the git-branch package. Be sure to install that package and its separately packaged TypeScript types:
npm i git-branch && npm i --save-dev @types/git-branch
getEnvironmentContext function
Next, we'll want to get our branch, and based on that create an object that matches our CDKContext types.
To accomplish that, paste in the following:
// Get the environment context based on the current git branch
const getEnvironmentContext = (app: cdk.App) => {
    const currentBranch = getCurrentBranch()
    const environments = app.node.tryGetContext('environments')
    const environment = environments.find(
        (env: any) => env.branchName === currentBranch
    )
    const globals = app.node.tryGetContext('globals')

    return { ...globals, ...environment }
}
Nothing too fancy here--which is how I like to keep things, but what you'll notice is the app.node.tryGetContext. By defining our context in a cdk.context.json file, we can call this method anywhere in our application to retrieve values. From there, we use a combination of the getCurrentBranch method and the find method on arrays to create our object.
initStack function
The last function in this file is what we'll end up calling in our backend-trip-post.ts file.
Recall that so far we've defined the custom properties that we'll provide to our stack. However, the CDK requires its own set. Specifically, it needs to know the AWS environment to publish our app to, and a name for the stack. Optionally, we can tell it things like what account, tags, and name of the stack.
To see this in action, paste in the following:
// Initialize the stack
export const initStack = () => {
    const app = new cdk.App()
    const context = getEnvironmentContext(app) as CDKContext
    const stackName = `${context.appName}-stack-${context.environment}`

    // tag resources in AWS to find the easier
    const tags = {
        Environment: context.environment,
        AppName: `${context.appName}`,
    }

    // Provide required properties to our Stack
    const stackProps: cdk.StackProps = {
        env: {
            region: context.region,
        },
        stackName: stackName,
        description: context.appDescription,
        tags,
    }

    return {
        app,
        stackNameWithEnv: stackName,
        stackProps,
        context,
    }
}
Passing values to our stack
When the above initStack function gets called it returns everything needed for our stack. Let's complete this post by initializing our stack and updating its values to accept them.
In bin/backend-trip-post.ts replace the existing code so that it resembles the following:
#!/usr/bin/env node
import { initStack } from './init-stack'
import 'source-map-support/register'
import { BackendTripPostStack } from '../lib/backend-trip-post-stack'

const { app, stackNameWithEnv, stackProps, context } = initStack()

const travelStack = new BackendTripPostStack(
    app,
    stackNameWithEnv,
    stackProps,
    context
)
If all went well, you should see TypeScript complaining that BackendTripPostStack doesn't know about context.
Update that file so that the default code is replaced with an updated version that not only takes in our context, but no longer assumes the props are optional:
import { CDKContext } from './../cdk.context.d'
import * as cdk from 'aws-cdk-lib'
import { Construct } from 'constructs'

export class BackendTripPostStack extends cdk.Stack {
    constructor(
        scope: Construct,
        id: string,
        props: cdk.StackProps,
        context: CDKContext
    ) {
        super(scope, id, props)
        // our code will go here
    }
}
Congratulations, you've just completed the hardest part of this entire series 🎉
🗒️ I want to take a moment to emphasize that we didn't have to construct our app like this no more than on the frontend we don't have to split out our code.
However, some things remain true across stacks. Learning how to set up a project based on what you're trying to accomplish is one of them
Conclusion
In this chapter, we talked about how to initialize a CDK project and the various files that come with it. We compared CDK wrapping CloudFormation to JSX wrapping HTML. This analogy extended to constructs being similar to React components before getting our stack set up to accept custom values.
In the next chapter of this series, we'll dive into how simple it can be to work with constructs by creating our databases and a Lambda function.
In the meantime, I'm looking forward to your comments, suggestions, and feedback!
Happy Coding,
🦦


