

How I leverage Apple Keynote and WebSockets to maximize engagement during presentations

If there's one thing I'm developing a bit of a reputation for, it's how I put focus on interactivity during my presentations. I don't like doing slides so whenever I do, I try to come up with ideas where the audience can also engage with me during my talk.
During peak COVID, I was doing a lot of virtual events. To help, I created a demo where I played a live game of Connect4 with one of the attendees while talking about AWS Amplify
That talk was a lot of fun! However, once things started to open up, I wondered how I can bring that kind of engagement to my onstage presentations.
In this post, I'll show how I used Apple Keynote and AWS AppSync subscriptions to create an engaging presentation that included over 400 attendees at the same time!
Keynote Setup
Once upon a time, I would spend weeks developing slides in code so that I could get the developer fix I craved. This was more self-fulfilling than creating value for attendees. So I went back to Apple Keynote.
I prefer Keynote because of its modern-looking templates and features. But one day, I spotted another feature that got my gears turning:
export to html
Once exported, you're given a folder that contains an index.html file and an assets folder. The assets folder contains all of your slides--it isn't meant to be modified or easy to understand so for my purposes I left it as is and whenever I modified my slides I just re-exported.
The index.html however is more interesting.
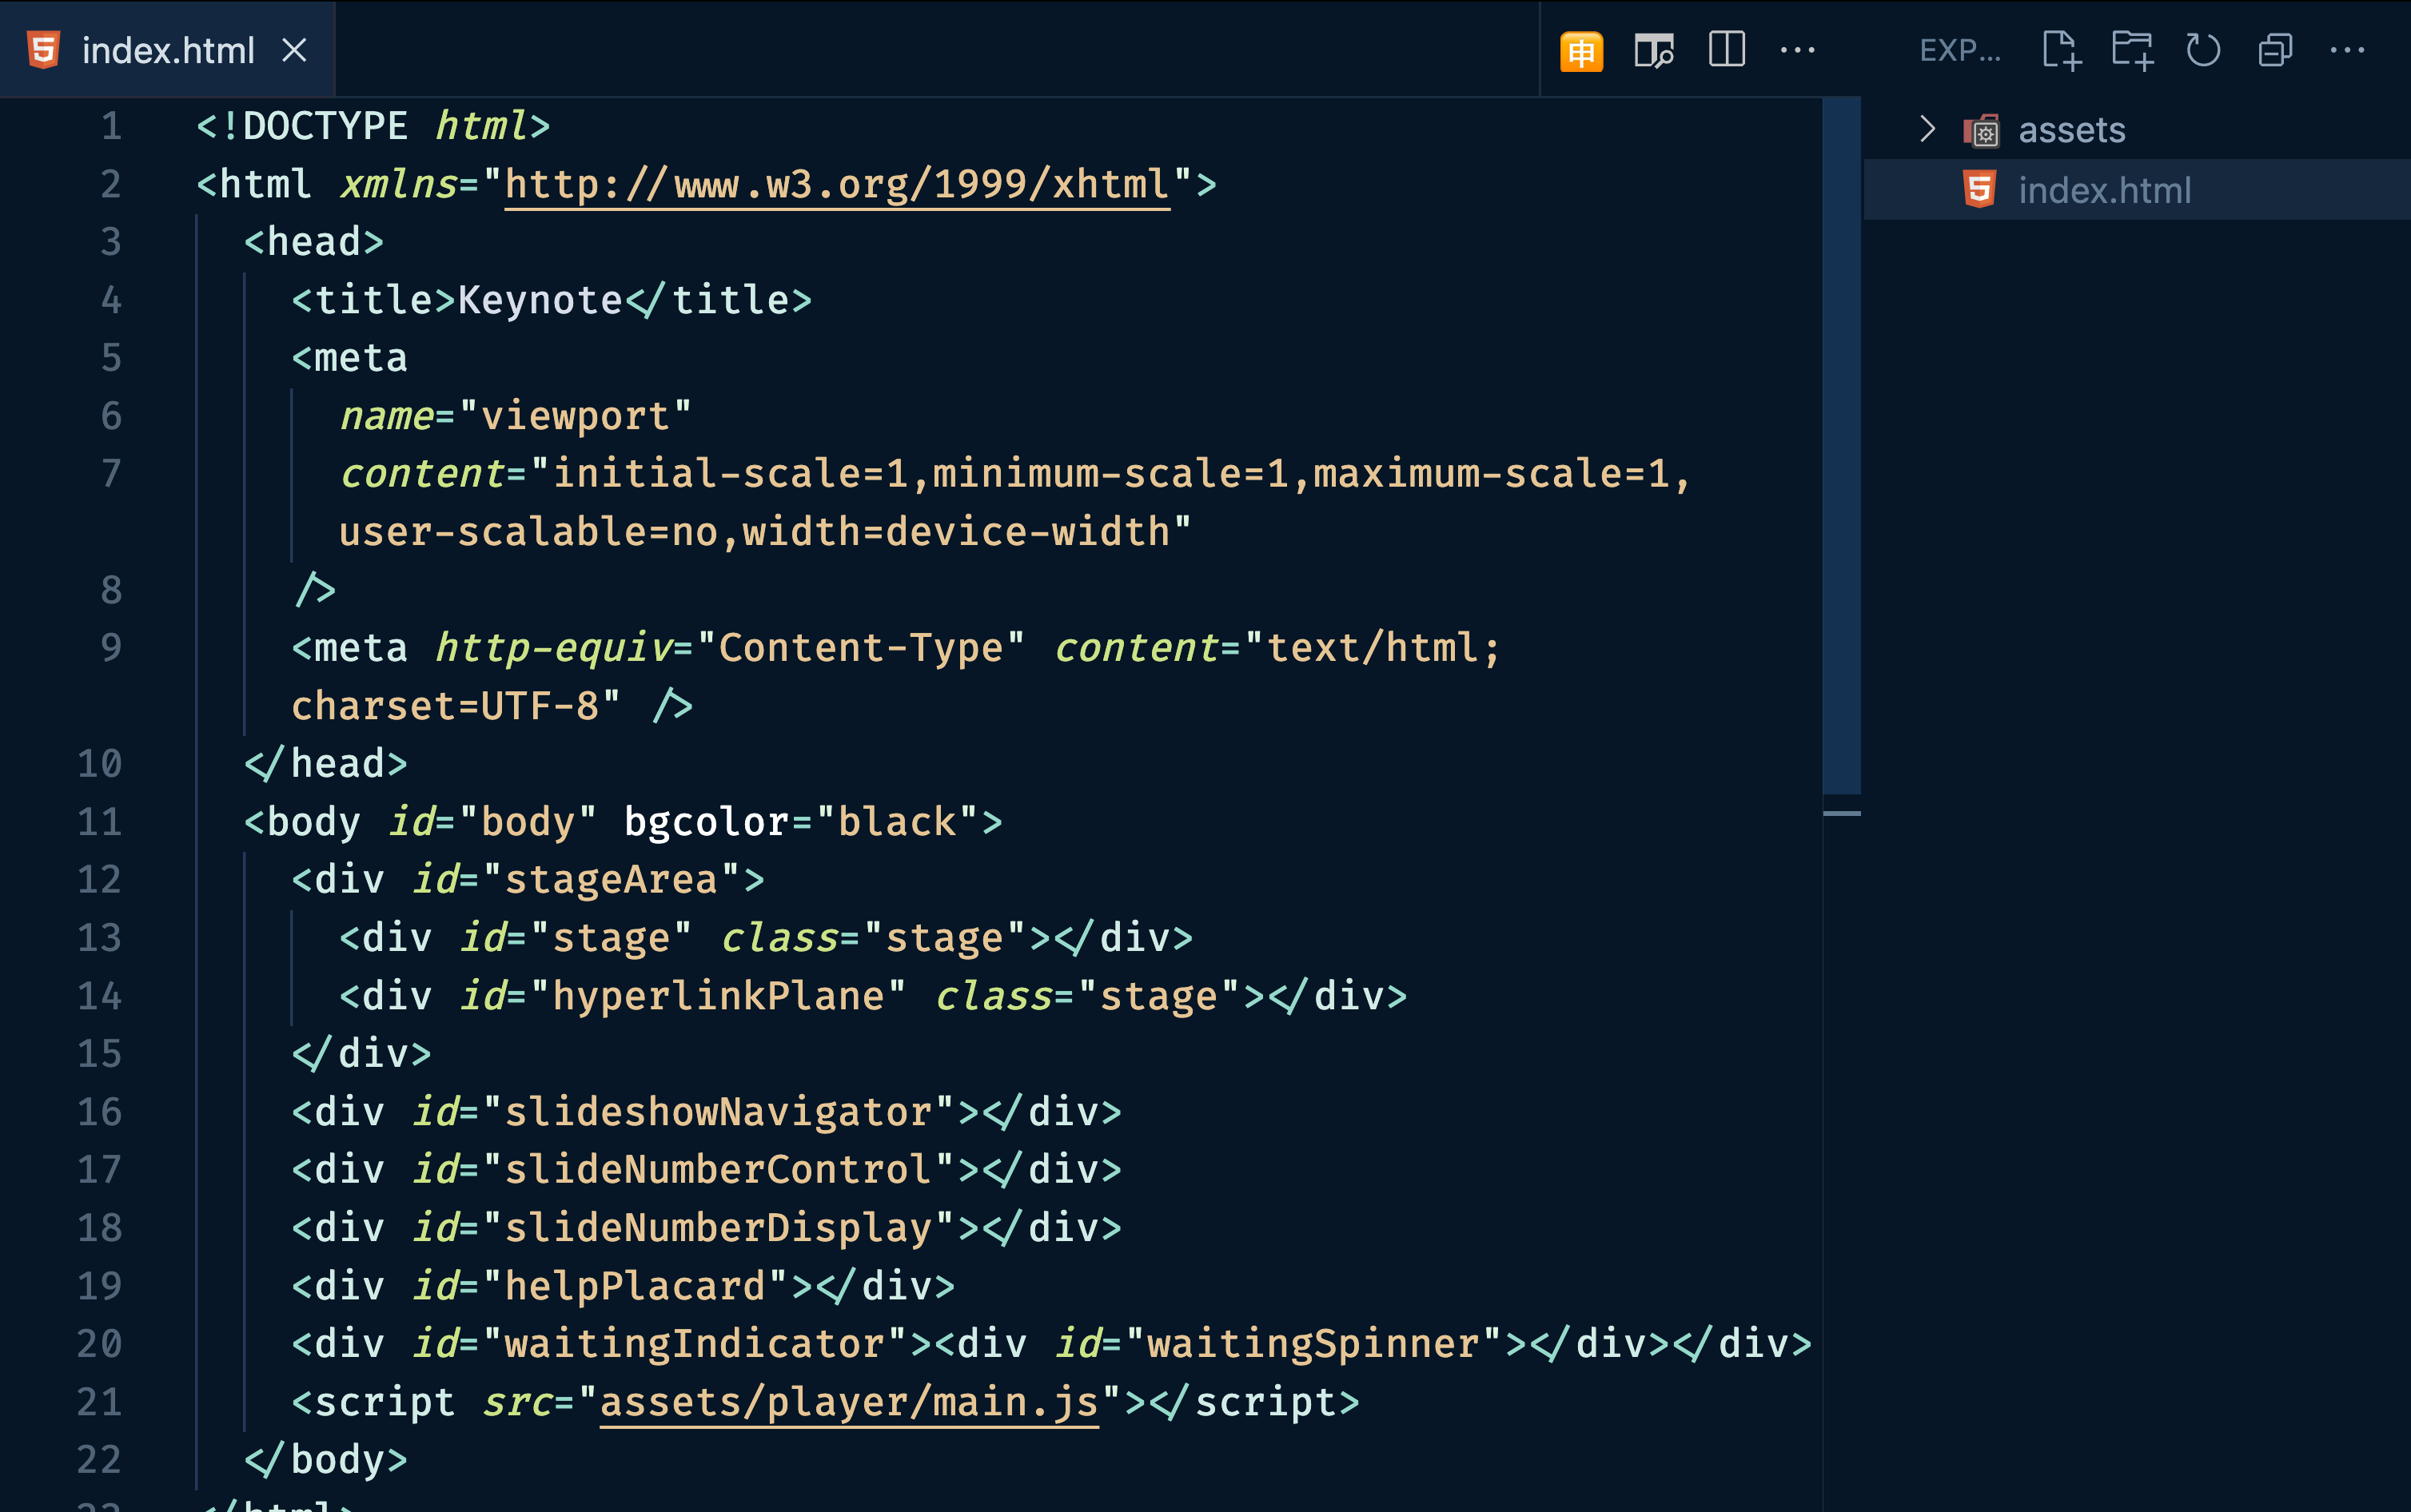
What I love about this file is how simple it is. As for what I've learned from testing different scenarios, here ya go:
The
idin thebodytag is needed so the slides know where to mount.Not everything nested in the
bodytag is needed, but it's best to just leave it alone.When viewed in the browser (via VS Code's liveServer feature or otherwise), the
clickevent listener is hijacked and used to advance the slides. This is important to know for development purposes.The
div.slideshowNavigatorelement is used to show a slide preview. To see them, move your cursor to the left side of the screen when viewing your slides in the browser.
Keynote to React
This part isn't novel but was definitely an "aha" moment.
I had the idea of overlaying emojis on my slides but wanted to take advantage of the React ecosystem to do so.
I'm sure there are ways to do this in [insert some modern framework], but since the easiest way to do this was to merge the Keynote HTML file with the HTML file of a React framework, I used Create React App.
npx create-react-app my-presentation && cd $_ && code .
From there, I merged the index.html file in create-react-app with the one generated from Keynote:
<!--public/index.html-->
<!DOCTYPE html>
<html lang="en">
    <head>
        <meta charset="utf-8" />
        <link rel="icon" href="%PUBLIC_URL%/favicon.ico" />
        <meta name="viewport" content="width=device-width, initial-scale=1" />
        <meta name="theme-color" content="#000000" />
        <meta
            name="description"
            content="Web site created using create-react-app"
        />
        <link rel="apple-touch-icon" href="%PUBLIC_URL%/logo192.png" />
        <link rel="manifest" href="%PUBLIC_URL%/manifest.json" />
        <title>React App</title>
    </head>
    <body id="body" bgcolor="black">
        <noscript>You need to enable JavaScript to run this app.</noscript>
        <div id="root"></div>
        <div id="stageArea" style="z-index: -100">
            <div id="stage" class="stage"></div>
            <div id="hyperlinkPlane" class="stage"></div>
        </div>
        <div id="slideshowNavigator"></div>
        <div id="slideNumberControl"></div>
        <div id="slideNumberDisplay"></div>
        <div id="helpPlacard"></div>
        <div id="waitingIndicator"><div id="waitingSpinner"></div></div>
        <script src="assets/player/main.js"></script>
    </body>
</html>
In addition, I dragged the assets folder given from the Keynote output to the public directory in the React project so the script tag in the HTML file correctly points to it.
Congrats! You now have your slides as a React app! 🎉
Testing Interactivity with Framer Motion
The audience attendees will have a web app to add emojis, however for testing, it'll be nice to add a button. Whenever the button is hovered (because the click event is hijacked), we want an emoji to float up on the screen.
Let's first add Framer Motion by running the following command in your terminal:
npm i framer-motion
From there, add the following component to the App.js file alongside the one that is already there:
const EmojiThrower = ({ emoji = '💯' }) => {
    const randomX = Math.random() * (window.innerWidth - 100)
    return (
        <motion.div
            z-index={100}
            initial={{ y: '100vh', x: randomX, opacity: 1, position: 'absolute' }}
            animate={{ opacity: 0, y: 0 }}
            exit={{ opacity: 0 }}
            transition={{ duration: 2 }}
        >
            <p style={{ fontSize: '40px' }}>{emoji}</p>
        </motion.div>
    )
}
This is a component that displays an emoji (by default a 💯) at the bottom of the page (100vh) and a random place along the x-axis. Initially, the emoji is fully visible, but over two seconds it both decreases its opacity to zero and brings itself to the top of the screen (0px).
Next, update the App component so that it renders an EmojiThrower every time the button is moused over.
import { motion } from 'framer-motion'
import { useState } from 'react'
// ...EmojiThrower code
function App() {
const [emote, setEmote] = useState([])
const handleClick = () => { setEmote([...emote, 1])}
return (
<div className="App">
<div style={
{ display: 'flex', justifyContent: 'flex-end' }
}>
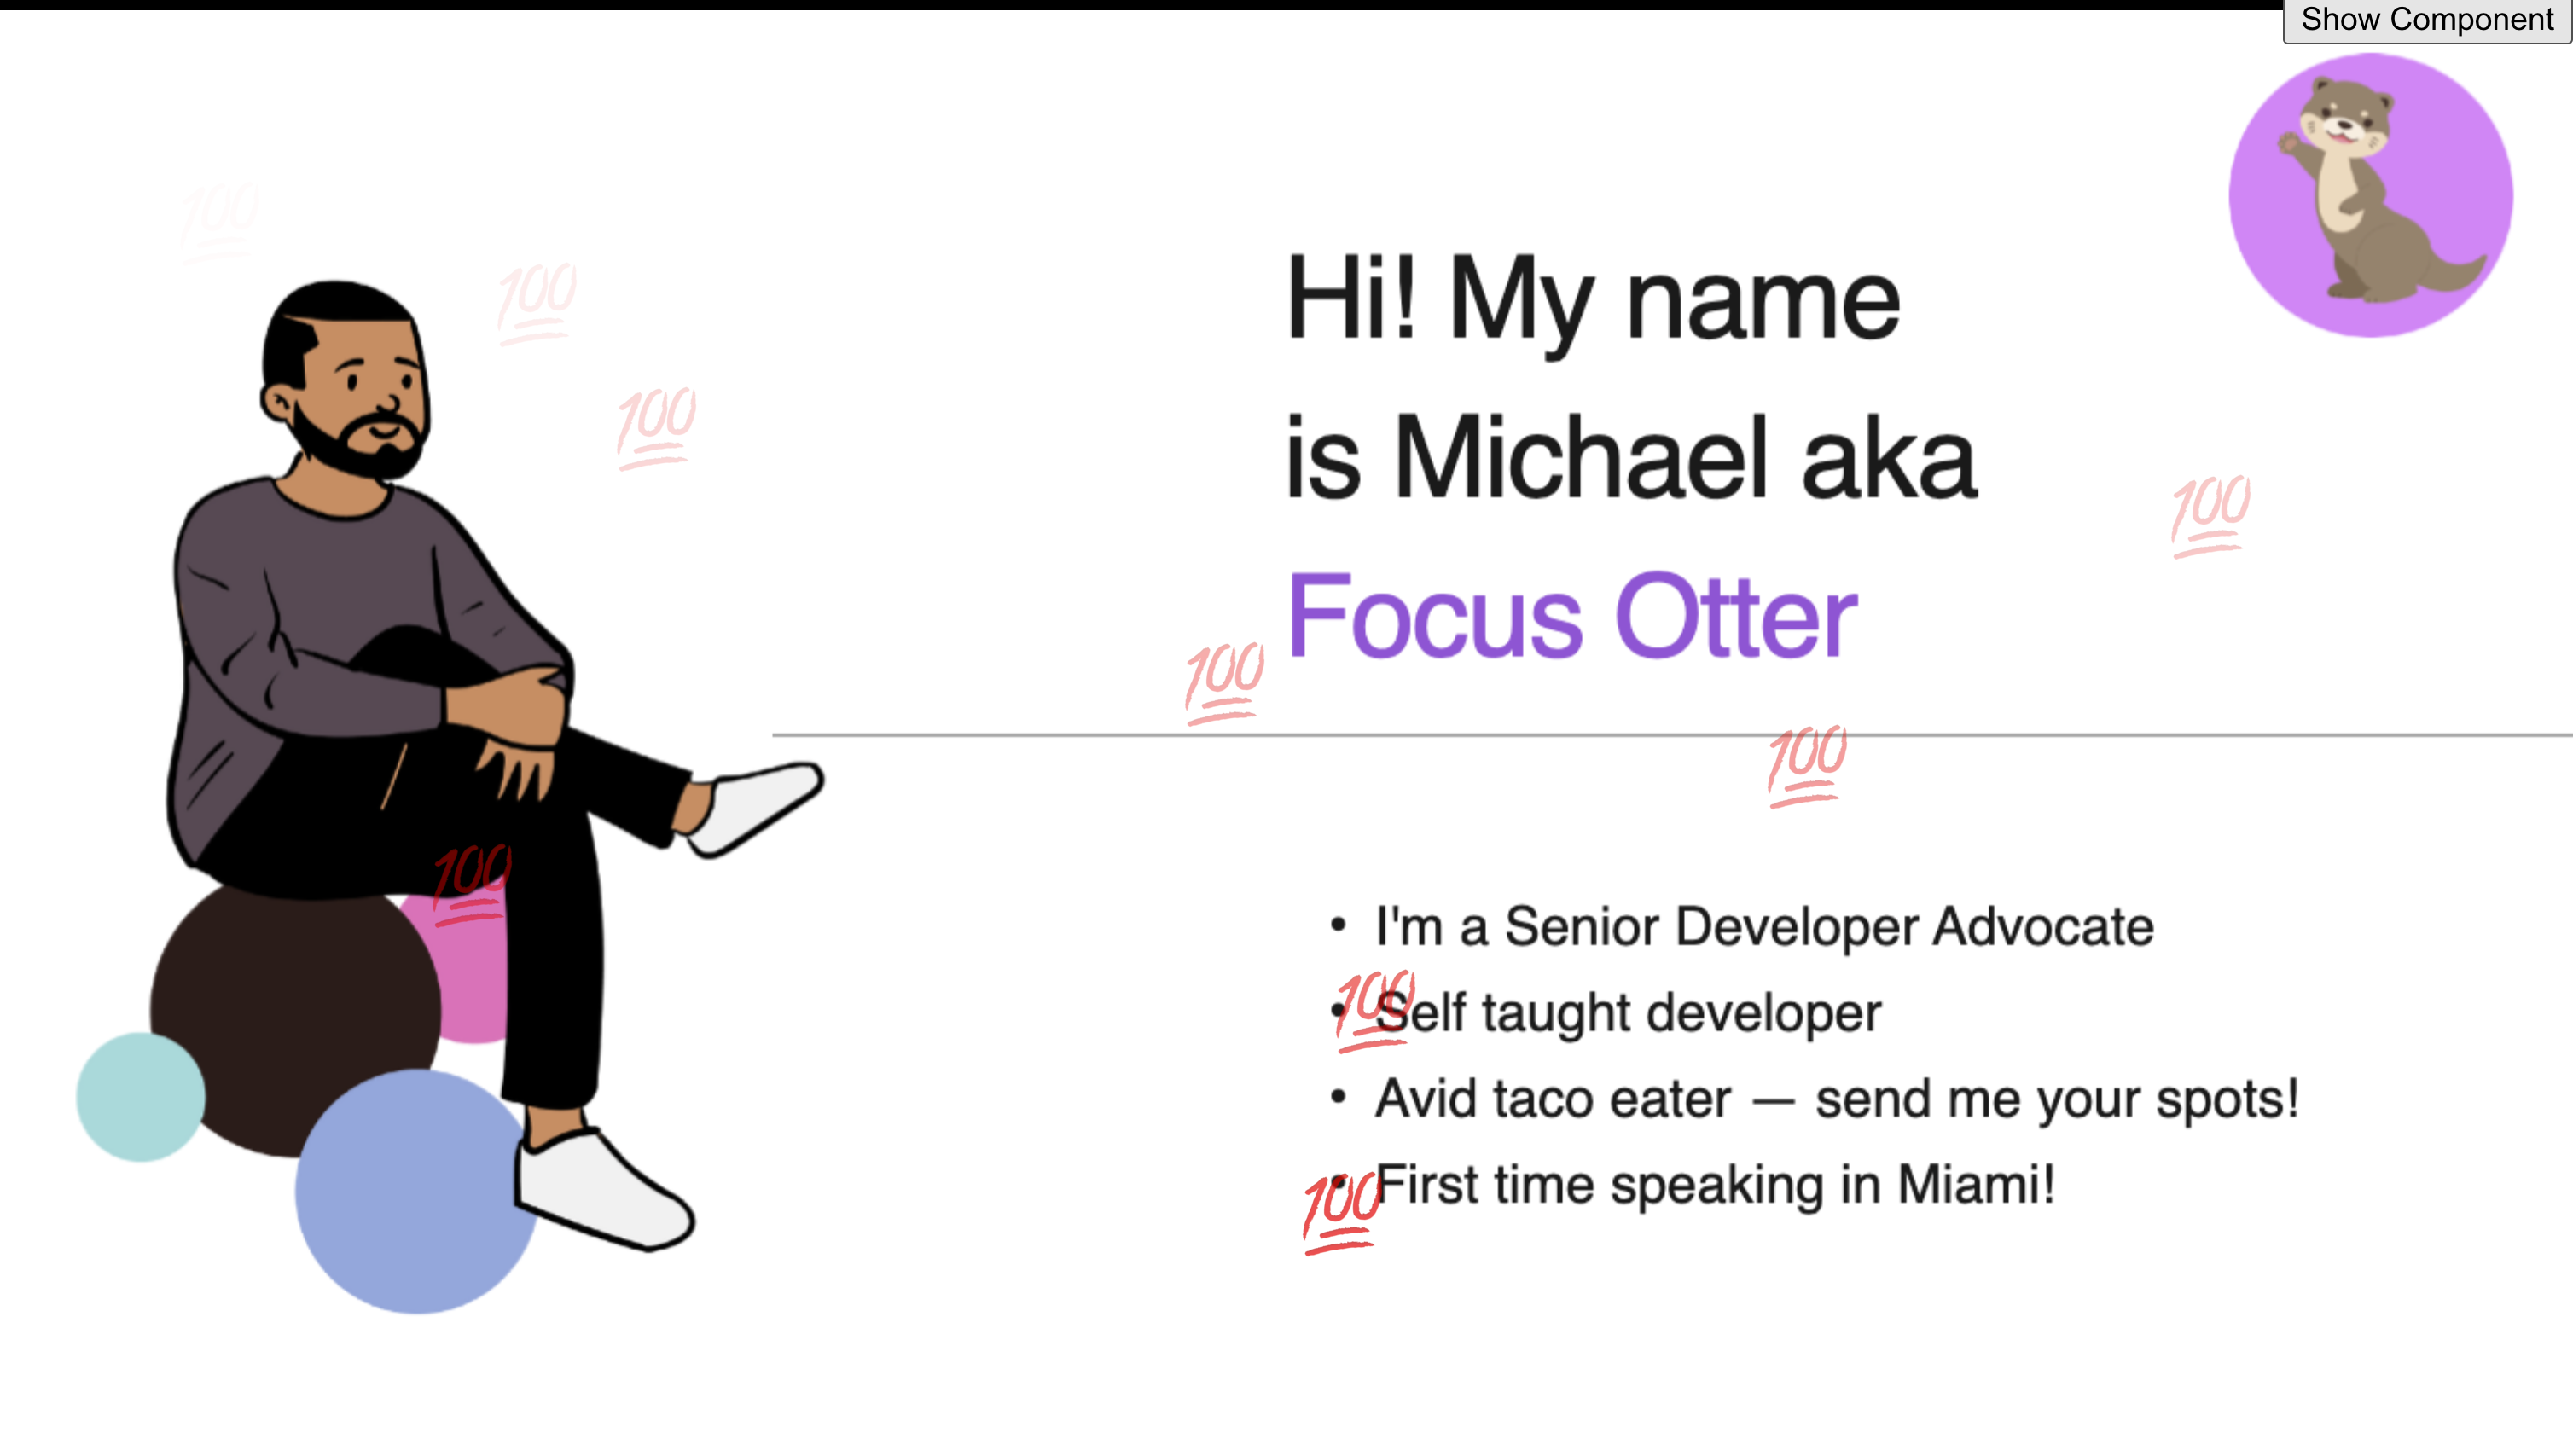
<button onMouseOver={handleClick}>
Show Component
</button>
</div>
{emote.map((item, i) => {
return <EmojiThrower key={i} />
})}
</div>
)
}
export default App
Because the slideshowNavigator has a top z-index, the button we'll use for testing has to be moved to flex-end so that the onMouseOver event can fire.
Creating and hosting an app for your audience
Being able to click a button and show the emojis locally is nice for testing purposes, for live engagement, we'll need our attendees to click buttons on a deployed app instead.
No need to recreate the wheel here since I already have a repo that does just this 🙂
Fork (and star😉) the following repo and install its dependencies:
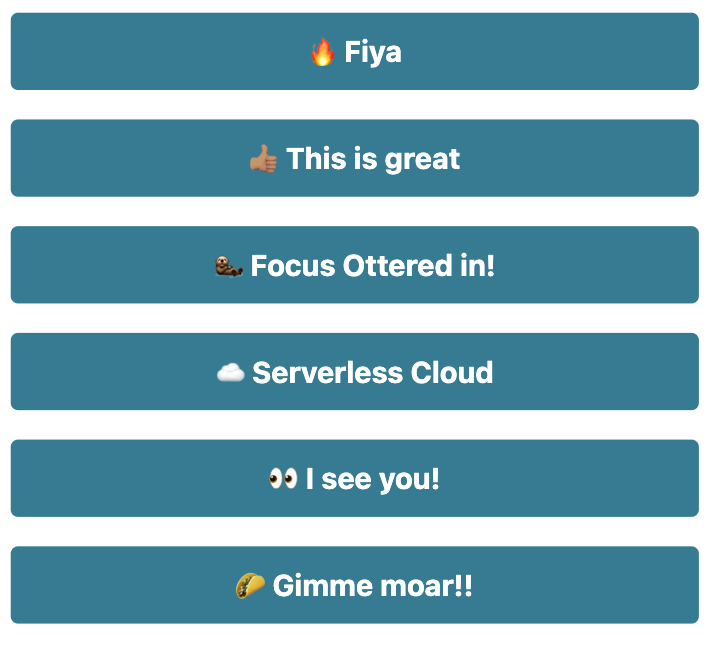
When running the project with npm run start, you should see a simple app:
In the code, the section to display emojis is handled by refs:
const emojiRef = useRef([
        { emoji: '🔥', displayText: '🔥 Fiya' },
        { emoji: '👍🏽', displayText: '👍🏽 This is great' },
        { emoji: '🦦', displayText: '🦦 Focus Ottered in!' },
        { emoji: '☁️', displayText: '☁️ Serverless Cloud' },
        { emoji: '👀', displayText: '👀 I see you!' },
        { emoji: '🌮', displayText: '🌮 Gimme moar!!' },
    ])
Feel free to change those to emojis that best suit your needs.
The next part of the code is the handleClick handler that fires whenever a user clicks a button:
const handleClick = async (emote) => {
        const reaction = {
            icon: emote,
        }
        const channel = 'miami'
        await gen.publish(channel, JSON.stringify(reaction))
    }
We'll publish data to a WebSocket channel. In my case, I was attending the amazing React Miami conference, so I named my channel miami. This doesn't actually matter much to us, but I like to update it in case I'm showing off the code.
The last part to discuss is the await gen.publish(channel, JSON.stringify(reaction)) line.
When we create our WebSocket API in AWS, it will provide a file called generated file for us. The forked repo came with this file. Essentially, it exports a function called publish that takes it a channel name, and a string of data. When invoked, it will publish the data to any clients subscribed to that channel.
With the main files in understood, feel free to host this simple web app wherever you like. I prefer to use AWS Amplify 🙂
Bringing the idea to life with AWS AppSync
This is usually the part where I provide a blurb about how AWS AppSync is a managed GraphQL service by AWS and talk about its benefits. But for this project, we're only interested in leveraging its WebSocket feature so we won't be diving it that.
If you are wanting to learn about that, however, I have a full tutorial for you to checkout:
Adding WebSockets to your application is really easy and one of the few times I recommend using the AWS Console instead of infrastructure as code.
On the AWS AppSync service page, select Get started with AWS AppSync.
This will prompt you to log into your AWS Account. Go ahead and sign in.
🗒️ If you logged in with your root account, or are new to AWS, be sure to check out my video to make sure your AWS account has basic security measures in place!
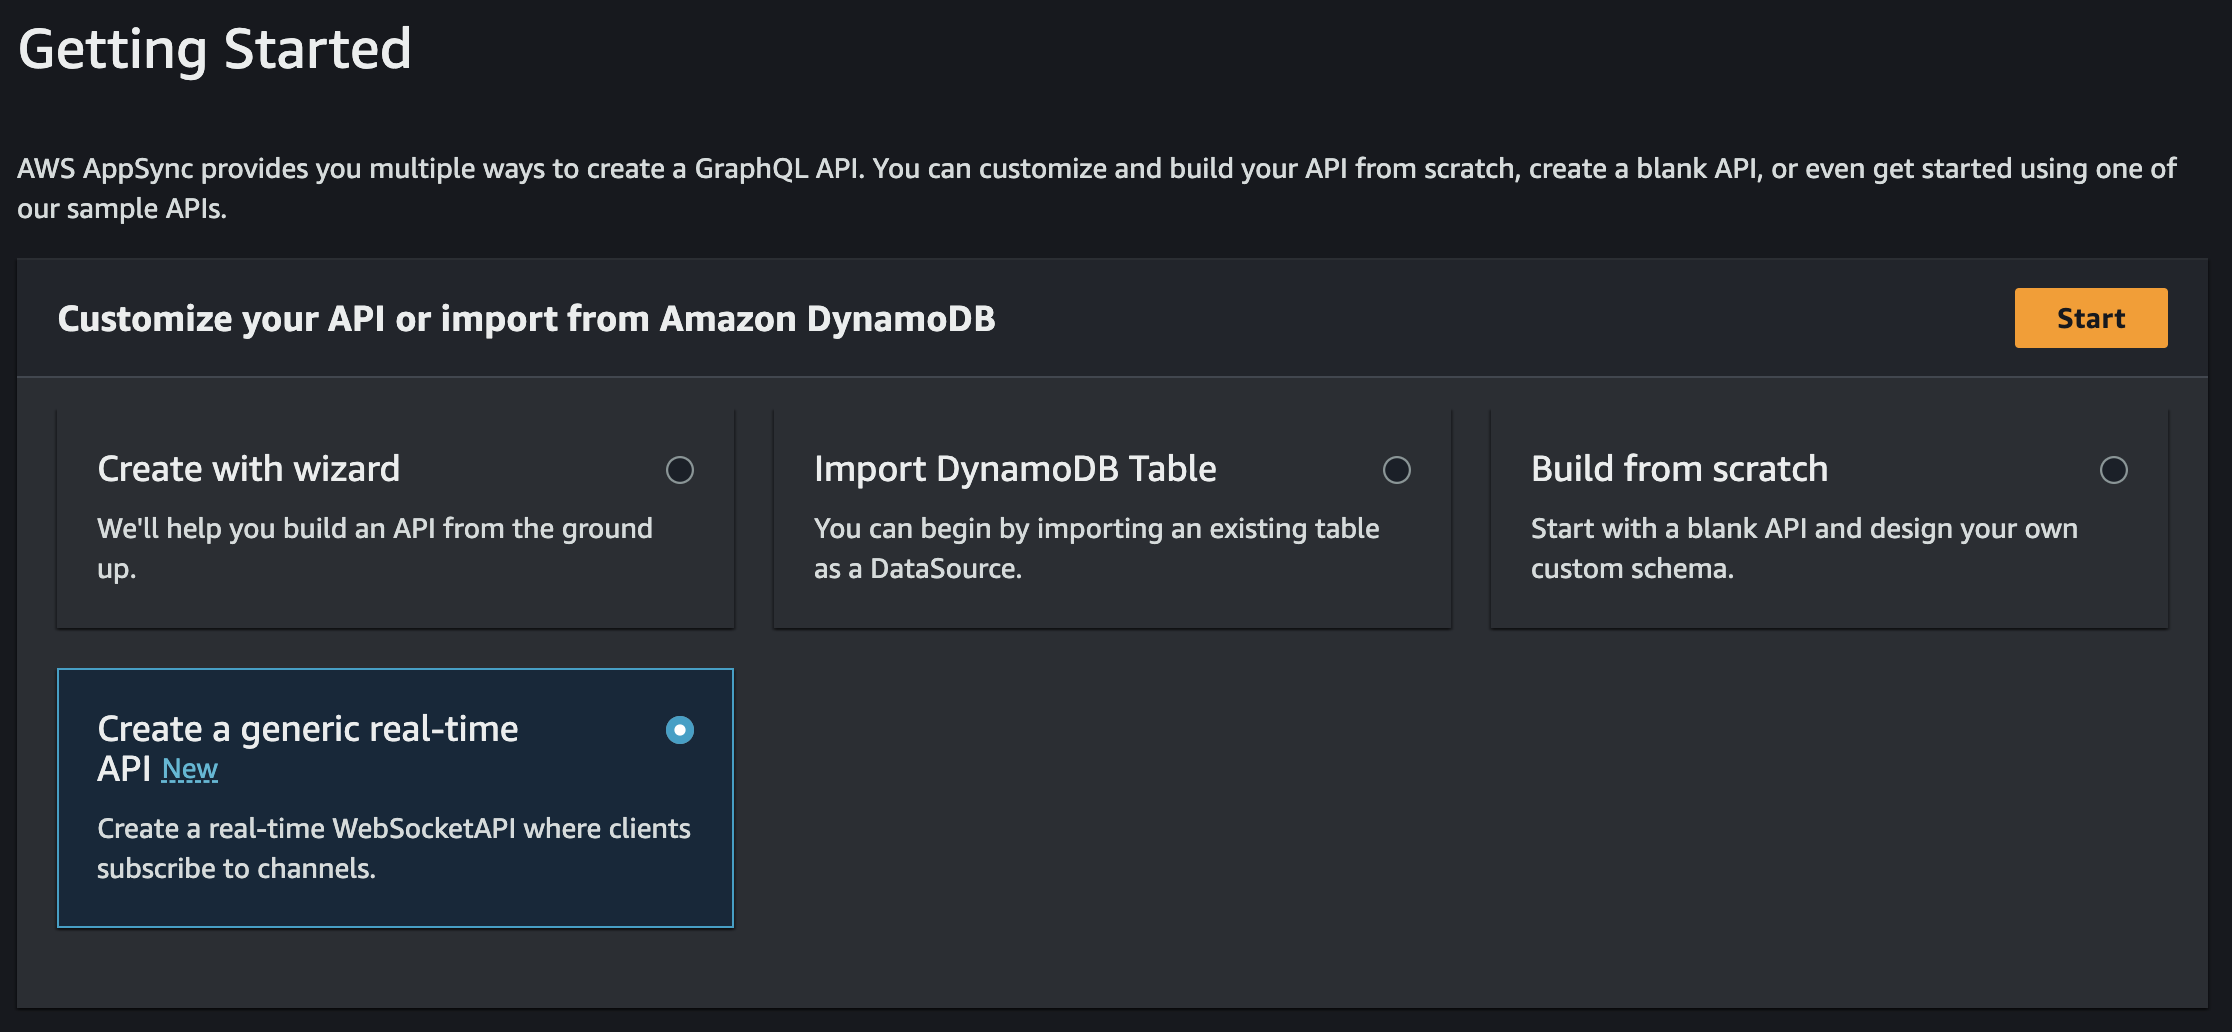
Once signed in, select the orange Create an API button. At this point, you should see a few options on how to create an API. Select Create a generic real-time API and click start as shown in the following screenshot.
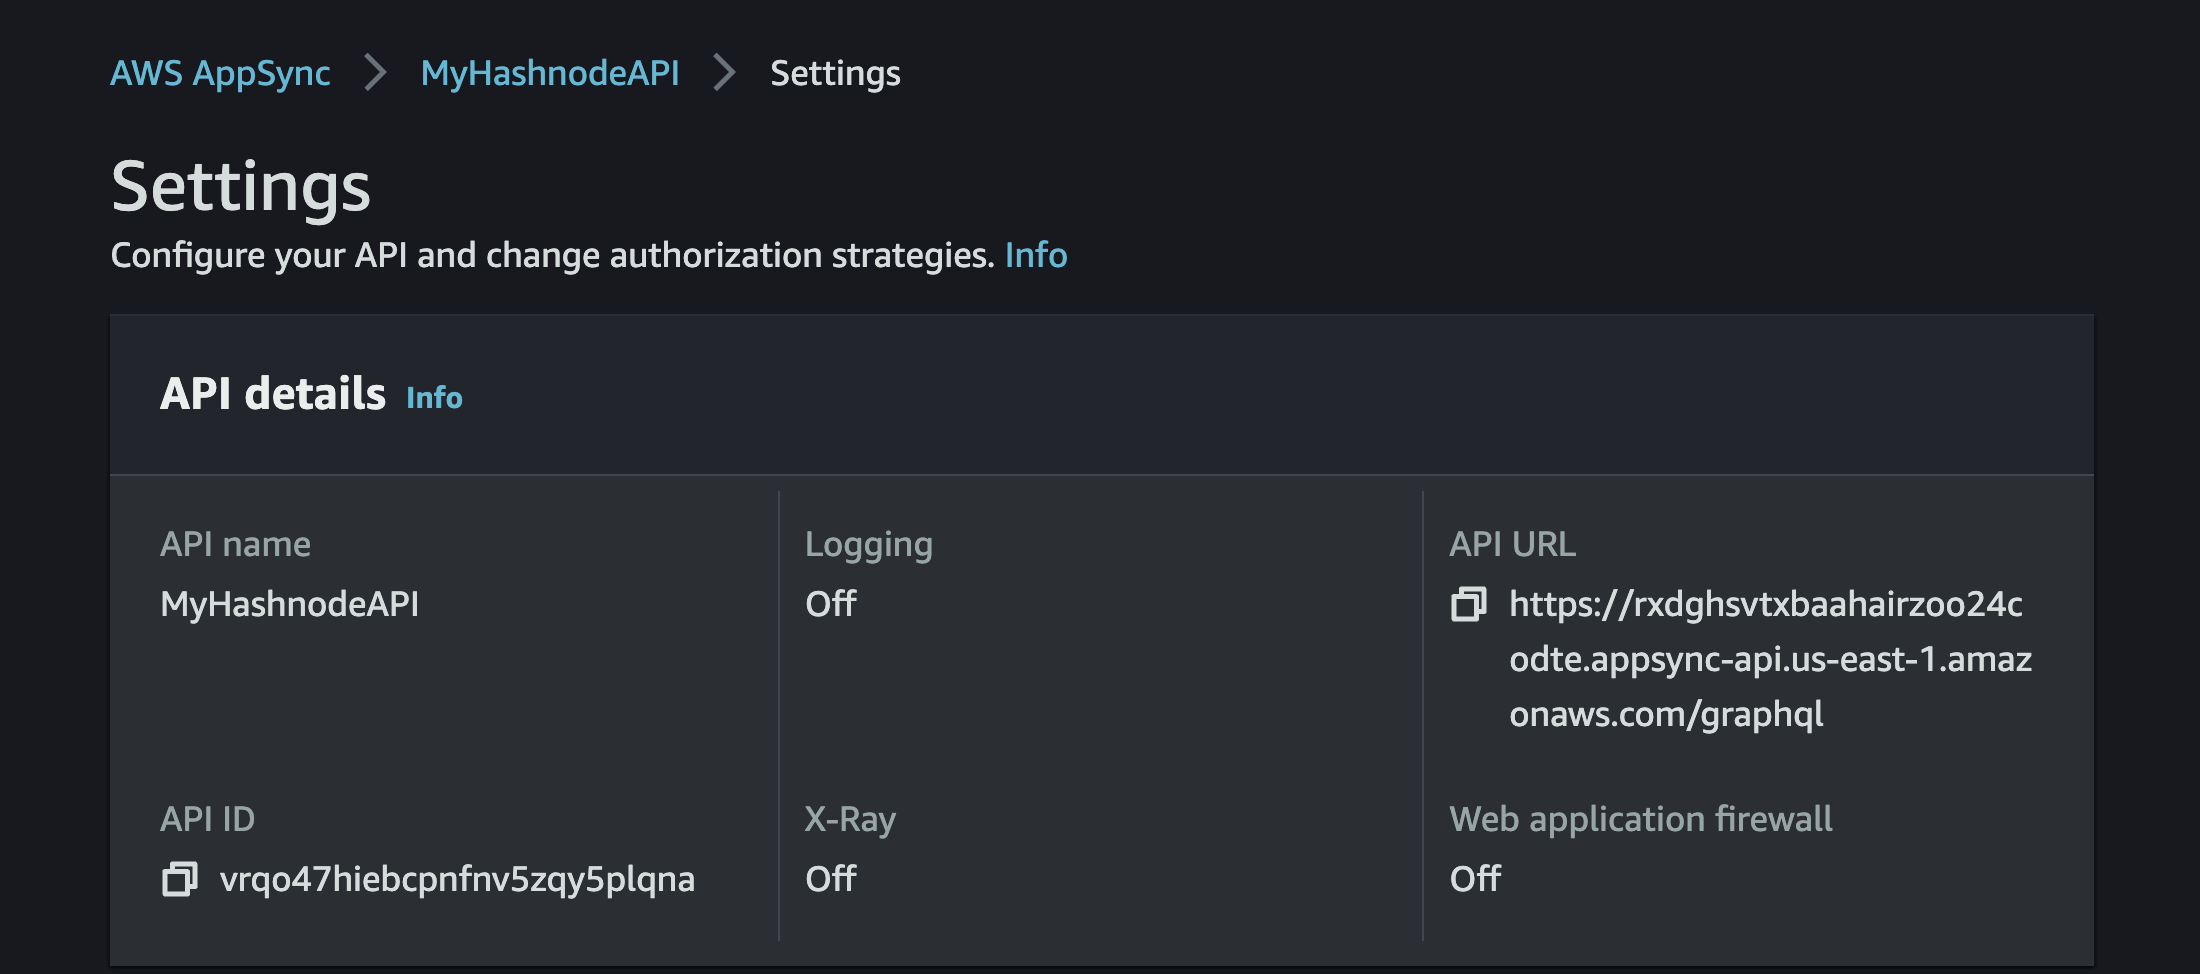
Give your API a name (any name is fine). After selecting next, your new WebSocket API will be provisioned 🎉
Once done, the src/generated.js file in your presentation project should make more sense: AppSync generates the majority of the code. All we have to do is update the URL and API Key so that it matches our own API credentials.
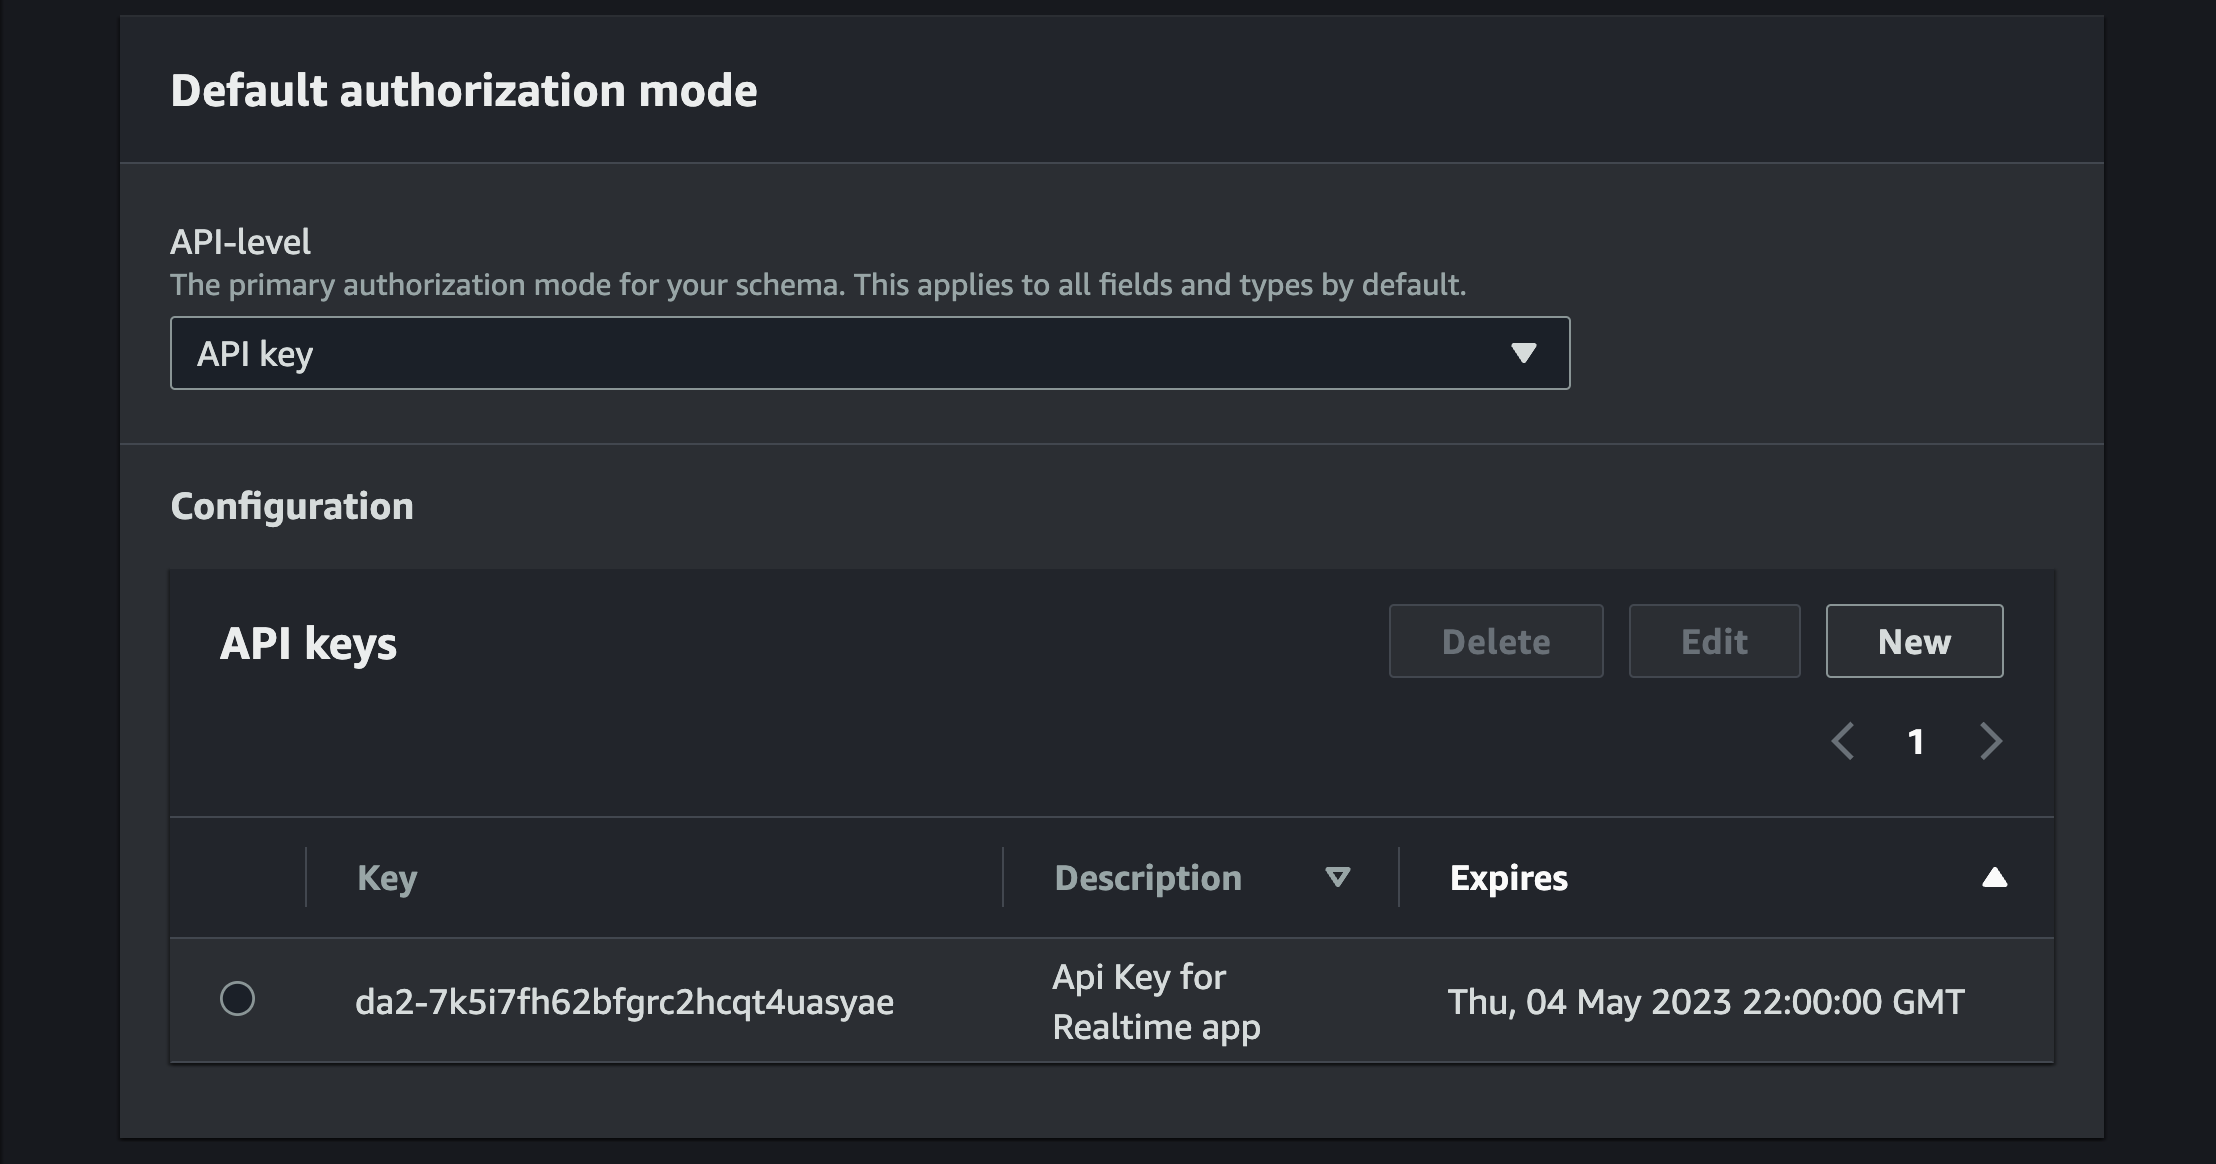
In the settings tab on the left, copy your API URL and the API key and paste them in the generated.js file in both the emoji-thrower application, and the react-keynote application.
import { API, graphqlOperation } from 'aws-amplify'

export const config = {
    aws_appsync_graphqlEndpoint:
        'https://long-string.appsync-api.us-east-1.amazonaws.com/graphql',
    aws_appsync_region: 'us-east-1',
    aws_appsync_authenticationType: 'API_KEY',
    aws_appsync_apiKey: 'da2-bunch-of-alphanumerics',
}
With both projects having the correct AWS configuration, all that's left is to update our react-keynote project so that instead of manually firing the emoji on button hover, it listens for events from the EmojiThrower application.
Update the App component in the react-keynote app with the following:
import { subscribe } from './generated'
import { motion } from 'framer-motion'
import { useEffect, useState } from 'react'

// ...EmojiThrower component

function App() {
    const [emote, setEmote] = useState([])

// this is new
    useEffect(() => {
        const sub = subscribe('miami', ({ data }) => {
            console.log(data)
            const icon = JSON.parse(data).icon
            setEmote((prevState) => [...prevState, icon])
        })

        return () => {
            sub.unsubscribe()
        }
    }, [])

// no more <button/>
    return (
        <div className="App">
            {emote.map((item, i) => {
                return <EmojiThrower key={i} emoji={item} />
            })}
        </div>
    )
}

export default App
I did this live for AWS Developer Innovation Day and in the span of 3ish minutes, I handled over 5500 subscription requests!
It helps if you create a QR Code for your audience and add that to one of your slides (don't forget to re-export to HTML and add the assets folder to your project again). Currently, I run the slides in fullscreen on localhost and that seems to work fine for me.
Conclusion
In this post we learned how to export an Apple Keynote presentation to HTML. By doing so, we could add interactivity to our presentation so that our audience isn't just looking over our slides. We used emojis in this case, but the possibilities are really dependent on how creative you want to be.
Additionally, we saw how easy it is to add in AWS AppSync's subscriptions. Doing so allows us to only make use of the live interaction parts while not getting fully mixed in with the GraphQL side of things (though many apps will benefit from that 😉)
I hope you enjoyed this as much as I did putting it together!
Until next time, happy coding!


