

Create a public API by web scraping in NextJS

Cover photo by Kelly Sikkema
Typically, when wanting to pull in external data into an application, one would use an API. But what if the data we want isn't in an API, or the API isn't easily accessible?
That question is what we'll be answering in this tutorial.
Project Overview
The end result of this tutorial is an open API and docs page deployed on Vercel.
As for the project itself, we'll let our users pass in a Twitter handle and we'll return that users follower count. Note that we won't be using the Twitter API, instead, we'll be web scraping the data.
If you'd rather check out the code used to scrape followers from Twitter, feel free to check out this gist I put together and adapt it to your projects 🙂
But if you'd rather understand the process, problems, and reasoning as we create it together, keep on reading 😄
Understanding Web Scraping
Web scraping--or data-mining, may sound scary or dangerous, but it's really just using basic tools to access data we already have access to.
To kick things off, we'll start this project with an image of the data we'd like to collect:
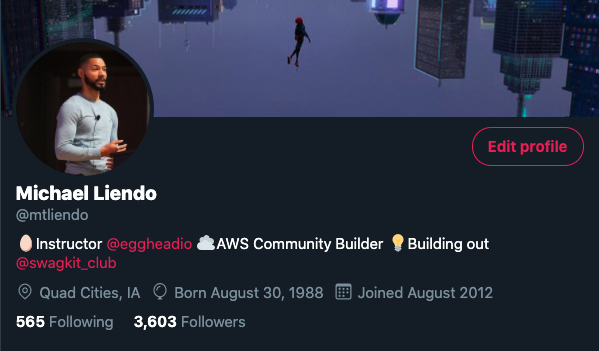
Using my twitter profile as an example, we'd want to grab my follower count as a number.
But how?
If you've ever worked with the Twitter API before, you know that it requires an approval process to use their API and has gotten more restrictive over the years.
Usually, in that case, I like to inspect the network tab in the Developer Tools to try and find an XHR request that serves as a JSON endpoint I can try to use.
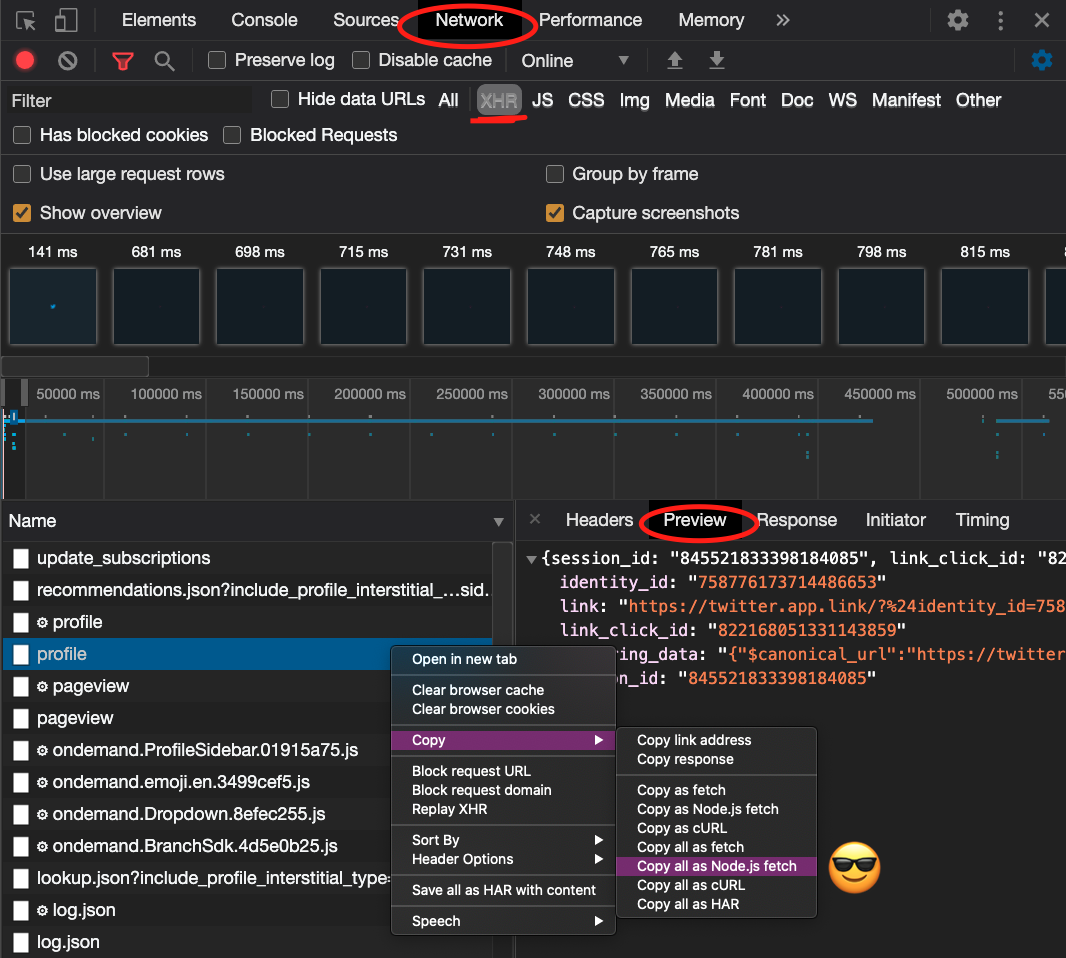
In this case, no luck, and the incoming requests are polluted. So now is the time to use the element selector to see if there is a way to grab what we want with basic JavaScript:
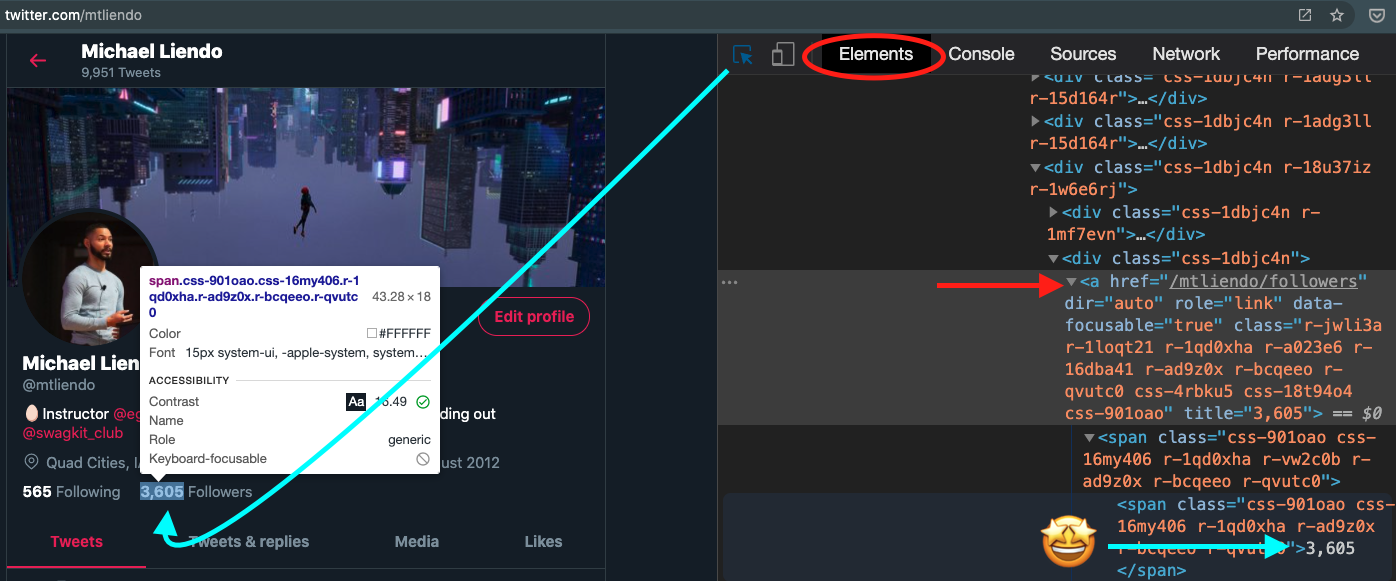
"I want to grab the text 3,605 that lives in the anchor tag with an
hrefof/mtliendo/followers"
It's important to be as specific as possible, but not anymore. Meaning, I wouldn't want to select one of those obscure looking class names because they're likely coming from a CSS module or computed class name that changes every time we visit the page.
🗒️ If you're wondering how we've gotten this far and haven't written any code, welcome to web scraping! Deciding how you're going to grab the data you want is actually the hard part.
Scaffolding Our Application
Now that we understand why we're resorting to web scraping and have identified a way to grab the data we want, let's get to coding.
First, we'll initialize a NextJS project by running the following command:
npx create-next-app twitter-followers && cd $_
💡 The
&& $_at the end will change into the directory we just created after the NextJS scaffolding takes place.
Next, let's add in the package we'll be using to perform the web scraping.
npm i cheerio
cheerio is a fantastic library that uses methods similar to jQuery to traverse HTML-like strings on the backend.
With our project scaffolded, and our main dependency installed, let's start writing out our function.
The last step before opening up our project in an editor is to create a file for our API route.
touch pages/api/followers.js
Writing the Scraper
In the followers.js file we just created, add the following code:
const cheerio = require('cheerio') // 1

export default async (req, res) => { // 2
  if (req.method === 'POST') { // 3
    const username = req.body.TWuser

    try { // 4
      const response = await fetch(`https://mobile.twitter.com/${username}`)
      const htmlString = await response.text()
      const $ = cheerio.load(htmlString)
      const searchContext = `a[href='/${username}/followers']`
      const followerCountString = $(searchContext)
        .text()
        .match(/[0-9]/gi)
        .join('')

      res.statusCode = 200
      return res.json({
        user: username,
        followerCount: Number(followerCountString),
      })
    } catch (e) { // 5
      res.statusCode = 404
      return res.json({
        user: username,
        error: `${username} not found. Tip: Double check the spelling.`,
        followerCount: -1,
      })
    }
  }
}
Breaking down the code
First we import the
cheeriomodule using commonJS (require instead of import)We export a function. NextJS will create a serverless endpoint for us. In doing so, it gives us a way to see what data came in via
req(the request), and a way to send data back viares(the response). Because we're doing some asynchronous stuff in this function, I'm marking it asasync.As mentioned above, the
reqgives us info about what's coming in. Here we're saying, "If this incoming request is aPOSTrequest, look at thebodyand grab theTWuserpiece of data. You'll see shortly how we send theTWuseralong.This is the heart of our application. Line by line, we're fetching data from Twitter. Parsing the response as
.text()instead of.json().
This lets gives us back the HTML of the page as a string--which is exactly what cheerio expects. From there, you'll notice the a[href='/${username}/followers'] piece of code. This is grabbing that anchor tag that contains the follower count. The problem is that it's a long string that looks like this:
 "         3,606\n
           Followers "
To solve for that, we use the match method. This uses a bit of regex that grabs the numbers from the string, from there we join numbers back together and send the data back to the user as a JSON object.
5.. A final bit of error handling that sends back some data if the user isn't able to be found.
🚨 Perceptive devs may have noticed that I changed the URL from
twitter.comtomobile.twitter.com. This is because the site desktop site uses client-side rendering, but the mobile site (legacy desktop site) renders the data on the server.
Testing Out the Endpoint
Now that the worst is over, let's test out the endpoint in a browser. To do so, replace pages/index.js with the following code:
import Head from 'next/head'
import styles from '../styles/Home.module.css'
import React from 'react'

export default function Home() {
  const [inputValue, setInputValue] = React.useState('')
  const [userFollowers, setUserFollowers] = React.useState({})

  const handleSubmit = (e) => {
    e.preventDefault()
    fetch('/api/followers', {
      method: 'post',
      headers: {
        'content-type': 'application/json',
      },
      body: JSON.stringify({ TWuser: inputValue }),
    })
      .then((res) => res.json())
      .then((userData) => {
        setUserFollowers(userData)
      })
  }
  return (
    <div className={styles.container}>
      <Head>
        <title>Fetch Twitter Follower</title>
        <link rel="icon" href="/favicon.ico" />
      </Head>

      <main className={styles.main}>
        <h1>Fetch A Twitter Follower</h1>
        <form onSubmit={handleSubmit}>
          <label>
            Enter a Twitter username
            <input
              value={inputValue}
              onChange={(e) => setInputValue(e.target.value)}
            />
          </label>
          <button>Submit</button>
        </form>
        {userFollowers.followerCount >= 0 ? (
          <p>Followers: {userFollowers.followerCount}</p>
        ) : (
          <p>{userFollowers.error}</p>
        )}
      </main>
    </div>
  )
}
Not a whole lot going on here, but the main part I'll call out is the fetch call in the handleSubmit function.
The nice thing about NextJS is that we can just reference the file in the api directory by using the api/<filename> syntax. After that we set the method to post, add a json header, and pass in our data as a stringified object.
Special attention goes to the TWuser object in the body. This has to match what we grab from req.body in our api.
If you haven't already, test out your application by running the following command in your terminal
npm run dev
🚀 Deploy!
After making sure you can get a follower count and a proper error message, it's time to deploy!
Vercel is an awesome service to build and deploy apps built with NextJS. After logging in, they ask for a git URL for the project, so you'll want to make sure you put your project up on Github first.
Once done, your project will be live, and your example page should work. However, if you fetched your live API endpoint from a different browser it won't work. This is because CORS is blocked by default.

As a final step, let's fix that and redeploy it.
First, let's add the cors package
npm i cors
Then, we'll update the api/followers.js file to include the following at the top of the file:
const cheerio = require('cheerio')
const Cors = require('cors')

// Initializing the cors middleware
const cors = Cors({
  methods: ['POST'],
})

// Helper method to wait for a middleware to execute before continuing
// And to throw an error when an error happens in a middleware
function runMiddleware(req, res, fn) {
  return new Promise((resolve, reject) => {
    fn(req, res, (result) => {
      if (result instanceof Error) {
        return reject(result)
      }

      return resolve(result)
    })
  })
}

export default async (req, res) => {
 await runMiddleware(req, res, cors)
  if (req.method === 'POST') {
    const username = req.body.TWuser

// ...rest of code
Now, once you push your code up to GitHub, Vercel will automatically detect your changes and will start a new build.
Test out your function by editing the sandbox below and notice that now you can use your API endpoint outside of your application!
{% codesandbox dry-frost-lbvxr %}
Conclusion
🎉 Congrats on making it this far🎉
I hope you learned a lot and now have a solid foundation to not only know how to web scrape but when it's appropriate and how to do so with NextJS!
The one thing this is missing is a database to store info🤔 So if you liked this tutorial, you'll definitely like the next one where we'll take a slightly different approach by adding AWS Amplify to the mix!


