

Intro to API Gateway

We’re halfway through and we have already discussed so much! Today, we’re going to start tying our knowledge together so that we can create practical applications.
Kicking things off, we’re going to talk about API Gateway.
API Gateway + Need to Know Terms
This service allows us to quickly create endpoints for us to retrieve data.
Much like the post on S3, API Gateway is a service that can help quite a bit once you get up and running. However, in practical terms, we’ll be focusing on how we can quickly use it in our frontend applications.
API Gateway comes in 3 flavors: REST, WebSocket, and the more newly announced HTTP. As usual, now is a pretty good time to knock out some definitions.
Method: The action that should be applied when interacting with your data endpoint ie) PUT, POST, GET, DELETE
Resource: A user-named item regarding your data. Ie, if you are creating an API about pets, then /pets is a likely resource. Each resource has one or more methods attached to it.
REST Endpoint: A URL that will perform This allows full customization over how we would like to create our APIs.
WebSocket Endpoint: Creates an open connection to allow for near-real-time communication.
🔥Protip: AWS has better options if you’re considering WebSockets with API Gateway.
HTTP Endpoint: Slightly less flexible than REST Endpoints, while offering 40% of the cost savings and much of main functionality.
Stage: An environment where your API lives. Typically used to keep separate production and development environments.
🏗️ Creating our API
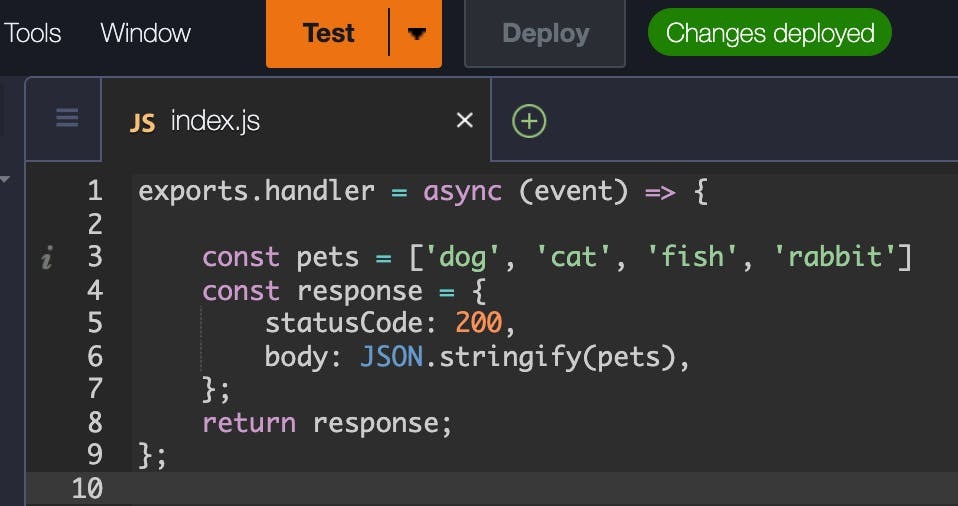
🗒️ This section assumes that you have completed the previous day’s task of creating a pet Lambda. If not, refer back to that email before continuing. However, if you just need a quick refresher, we created and deployed the following lambda function:
Log into your account and search for API Gateway from the top search bar.
Next, follow the steps below:
- Under HTTP API, select “Build”
- Select “Add Integration”, then select Lambda
- Select the region you used to create your Lambda function
- Click in the “Lambda Function” box and select your lambda
- In the “API name” field, name your API pets-api
- When you're done, select “Next”
Almost done!
On the next page, we’ll be configuring our API endpoint. Go ahead and follow these steps:
- For the Method field, change it to GET
- For the Resource Path, change that to /pets
- Click Next
We’re not going to configure another stage, so go ahead and click next.
If all went well, your screen should look just like mine in the screenshot below
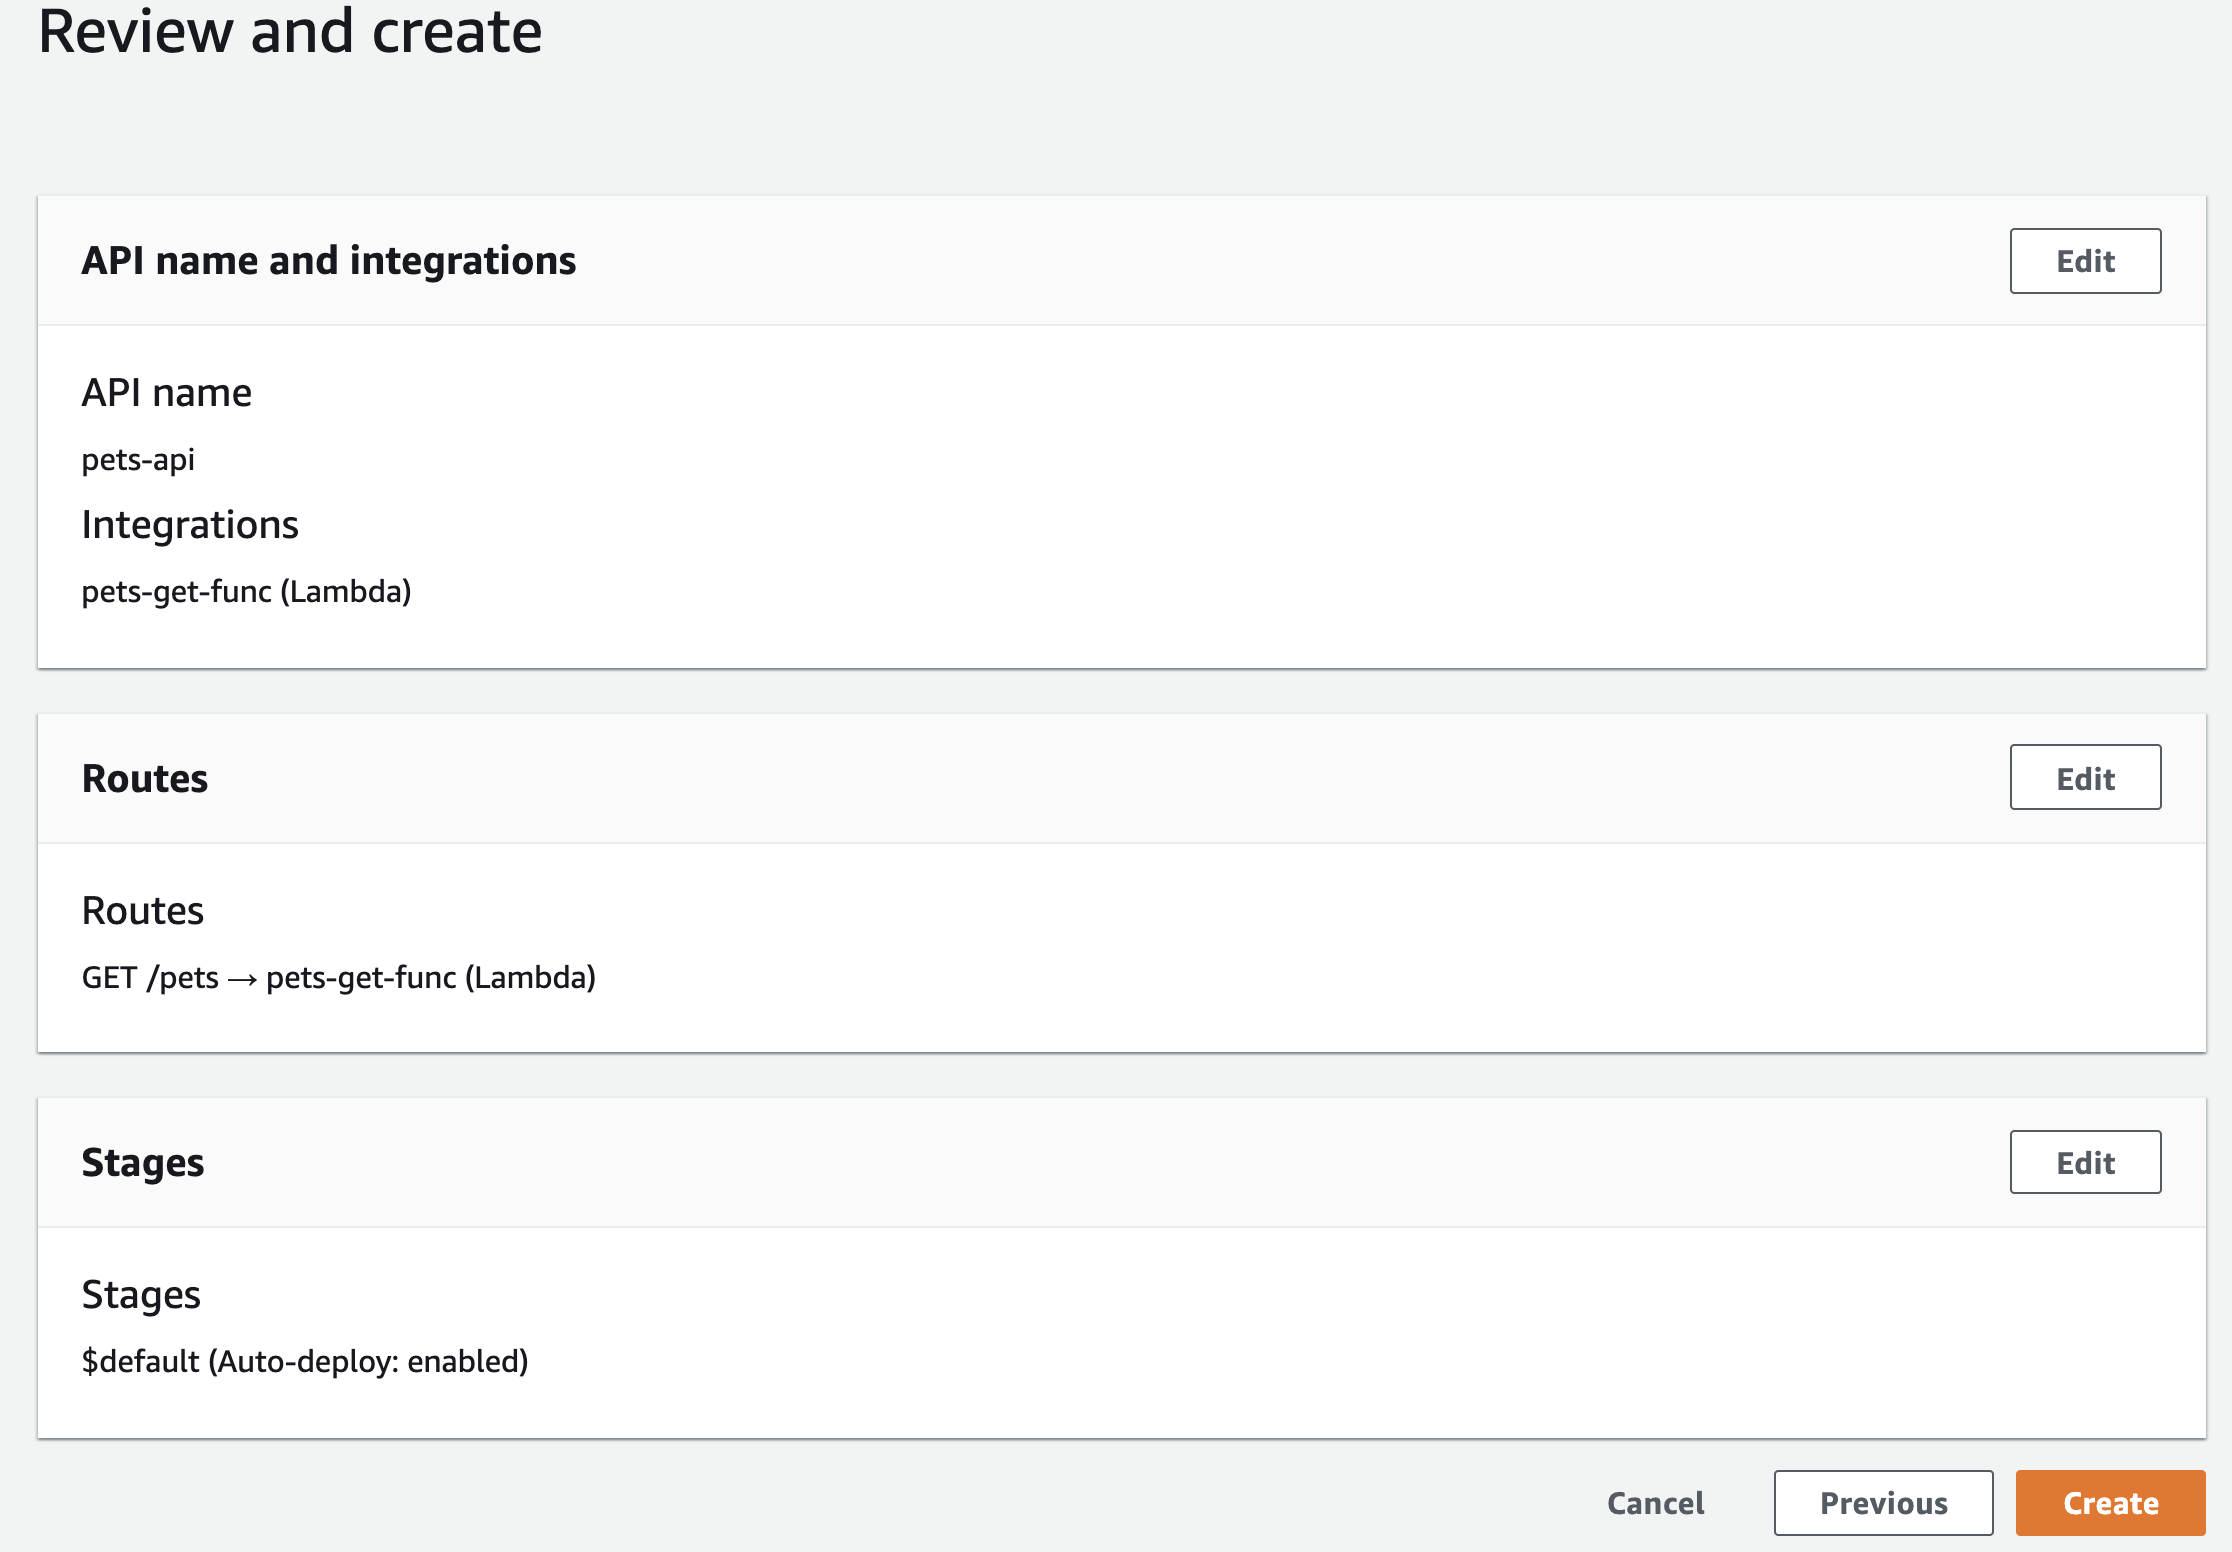
🎉 Congratulations! You just created an API endpoint on AWS without writing any code!
Testing your endpoint
With your API selected, you should see an “Invoke URL”. If you were hasty and clicked it, you already know it doesn’t work 😅
That’s because we didn’t assign anything to the root or / resource. Our resource is /pets.
Copy the Invoke URL paste it in your browser’s search bar, ensuring that you appends /pets to it. You should now see your list of pets!
If you’re just wanting to use this endpoint on your server, then you’re all done! However, chances are you want to use this in your frontend applications too. Unfortunately, if you try that now, you’ll be greeted by a friend that we’ve all met:
CORS

It’s saying “hey, server to server is fine, but server to the browser isn’t configured”.
Let’s fix that.
Back in the AWS Console:
- Select the CORS tab on the left-hand side (under Develop)
- Select the Configure button Under Access-Control-Allow-Origin enter an asterisk
- Click Add, then Save
🗒️ Access-Control-Allow-Origin with an asterisk as the value allows anyone to call our endpoint. In many scenarios, you’ll want to lock that down to just your website’s domain.
🎉 Congratulations! You just enabled CORS for your publicly available API endpoint. Feel free to test it out in a Codesandbox!
Pricing
API Gateway doesn’t charge for the first one million API calls. In my region (and most others) pricing after the free amount is $1.00 for every million requests.
Not bad at all!
https://aws.amazon.com/api-gateway/pricing/
Over the course of a few posts, we have already covered a lot! Next time, we’ll learn how to persist data to a NoSQL database by taking a look at DynamoDB.
See ya then!


