

Batching Requests with AWS Amplify and AppSync
A gentle intro to VTL Resolvers

Often times we hear the story of building CRUD apps. While this is great, the reality is that many use cases require the ability to go beyond creating, reading, updating, and deleting a single item.
Think about the storefront for example: A store owner may need the ability to upload several products at once. Asking them to input 100 products one by one creates a poor customer experience.
This post will showcase how to extend our GraphQL schema created with Amplify, to create a custom resolver that accepts an array of items, instead of one.
Along the way, we'll discuss how AWS AppSync makes use of VTL to generate our request and response resolvers, as well as how Amplify integrates with the CDK to tie everything together!
Essential Knowledge
This project assumes some knowledge of AppSync, Amplify, and VTL. If you're wanting to get up to speed on what AWS AppSync is all about, no worries! I created a primer video just for you:
Also, if you're familiar with how AppSync works with Amplify, but want a quick understanding of what VTL is definitely check out my last post where I uncover just that:
Project Initialization
The project we're using as a starter file is based on a previous post. It's nothing special, but we're definitely going to be adding some features to it so it stands out a bit more.
Clone the starter project from the link below--make sure you're on the amplify-batch-upload-starter branch
Once the project is cloned, installed the package files by running the following command in your terminal
npm install
With our packages installed, start the repo by running the following command
npm start
When viewing the application in the browser, ensure that you can see the home page and admin page
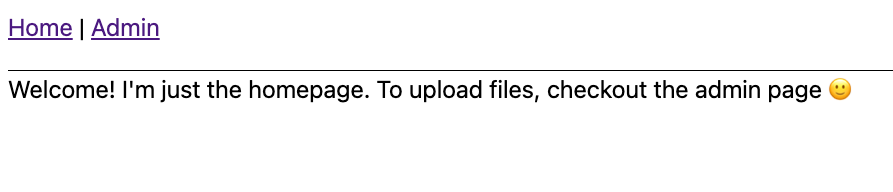
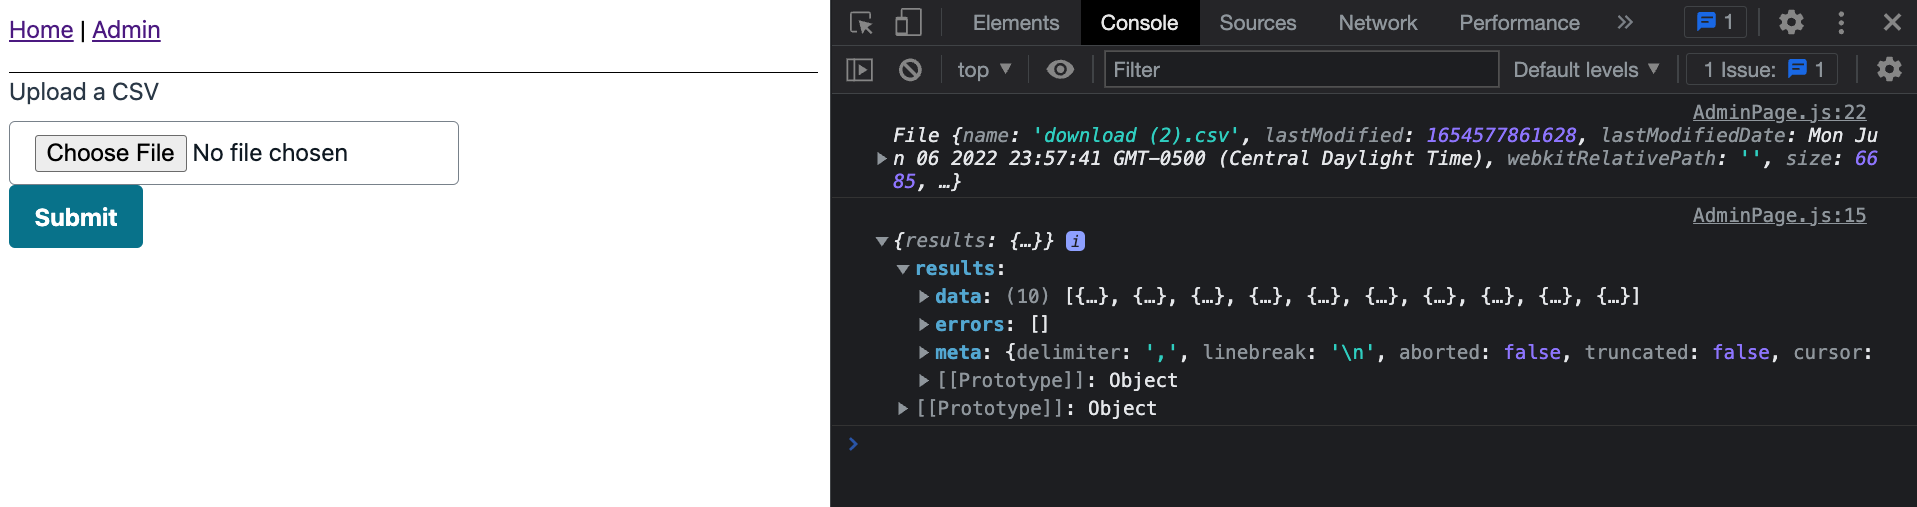
🗒️ The admin page showcases a CSV that has been uploaded and has its contents sent to the devTools console.
Project Overview
In this application, we'll simulate uploading a CSV full of profile data. The CSV will be generated from the randomUser API. You can generate your own CSV by clicking the following link:
https://randomuser.me/api/?format=csv&results=10
To make the project a bit more real world, we'll add the following features/constraints:
- Anyone visiting our app will have the ability to read Profile data
- Only users in the
admingroup will be able to create,update, delete and batch upload Profile data
This means we'll need at a minimum authentication and an API for this project.
Project Setup
We'll leverage the Amplify CLI to scaffold our backend services and the Amplify libraries to bind our frontend to our backend.
To get started, ensure you have the latest version of the Amplify CLI installed (currently 8.4.0:
npm i -g @aws-amplify/cli && npm i aws-amplify
Next, initialize our project by running the following command:
amplify init -y
🗒️ Feel free to leave off the
-yflag. Having it there just tells Amplify to accept all of the defaults.
Once this is done, we're now ready to use the CLI to create services!
Adding Authentication
Setting up authentication is one of the easiest services to add in Amplify. Amplify supports a "basic flow" that asks a few prompts and otherwise accepts reasonable defaults, or a "manual flow" that allows us to walk through a slew of configuration options.
In our use case, we want unauthenticated users to read Profile data. We could use an API Key, instead, we'll use IAM permissions so that we don't have to worry about rotating keys.
Run the following command:
amplify add auth
| prompt | response | notes |
| Use the default auth and security configuration? | Manual configuration | This has quite a few steps but offers the most flexibility |
| Select the authN/authZ services you want to use: | Signup/signin, connected with AWS IAM | In almost all applications, this will be your default |
| Provide a friendly name | [enter] | This is the name that will show up in our code editor |
| Enter a name for your identity pool | [enter] | Amazon Cognito has 2 parts: User Pools (users) and Identity Pools (permissions). |
| 🚨Allow unauthenticated logins?🚨 | Yes | Selecting 'Yes' means users that don't login at all will have some level of access. |
| Enable 3rd party auth providers | No | Useful for allowing social-signups like Facebook and Google |
| Enter a Userpool name | [enter] | Users that signup for our app will get grouped here |
| How do you want users to sign in? | Username | |
| Add User Pool Groups? | Yes | Down the road, we may want customers to sign in also. So we'll create an admin group to distinguish the two |
| Provide a name for your group | admin | |
| Add another group? | N | After pressing [enter], press it again for the sort option |
| Add admin queries API | N | Selecting [yes] would allow us to have a signed in user that can control other user's access |
| Enable Multifactor auth (MFA) | Off | First-time sign in's will need to enter a code, but after that, their username and password are fine. |
| Email based registration | Enabled | The options here are to either have the access code sent to the user's email or phone |
| 🚨 For the rest of the options: | if y/n select n otherwise, press enter |
In short, users will signup/in with a username, users that don't sign up have the ability to use our API (so long as we set up our API to do so), and we created an admin group.
And with that, our authentication category is done. Before pushing up to AWS, let's add our API.
Adding an API
As mentioned, we'll use AppSync as our GraphQL API. When combined with Amplify, we can make use of Amplify's directives to create our CRUD operations for our Profile data model.
To get started, run the following command in the terminal:
amplify add api
| prompt | response | notes |
| Select from one of the services | GraphQL | |
| Select a setting to edit: | Authorization modes | We'll allow varying access for signed in users, and guest users |
| Choose a default auth type | Amazon Cognito | This will be for admin users. |
| Configure additional auth types | y | |
| Choose additional auth types | IAM | Recall, for Cognito we allowed "unauthenticated access". This is how we allow public access for our API with Cognito |
| Here is the GraphQL API that we will create | continue | |
| Choose a schema template | Blank Schema | It actually doesn't matter what we select since we'll be providing our own schema |
| Edit the schema now | yes |
By selecting "yes" at the end, our schema should've opened in our editor. Furthermore, by setting Cognito and IAM auth, we've now made use of the Auth category we just defined earlier.
Let's define our API and tell Amplify what parts of our Profile model will be public and which will be private.
In the now-generated schema.graphql file, paste in the following:
type Profile
    @model
    @auth(
        rules: [
            { allow: public, provider: iam, operations: [read] }
            { allow: groups, groups: ["admin"] }
        ]
    ) {
    id: ID!
    firstName: String!
    lastName: String!
    email: AWSEmail!
    images: Images
}

type Images {
    thumbnail: AWSURL
    medium: AWSURL
    large: AWSURL
}

type Mutation {
    batchCreateProfile(profiles: [BatchCreateProfile]): [Profile]
}

input BatchCreateProfile {
    id: ID
    firstName: String!
    lastName: String!
    email: AWSEmail!
    images: ImagesInput
}

input ImagesInput {
    thumbnail: AWSURL
    medium: AWSURL
    large: AWSURL
}
Our Profile model is going to have a database associated with it thanks to the @model graphql directive and the CRUD operations have auth rules applied such that unauth users ("public") can read, and admin users can do all operations.
However, being an opinionated framework, Amplify doesn't support batching operations as part of its code generation. The good news is that Amplify will let us fall back to using plain AppSync which is why there is an additional Mutation called batchCreateProfile.
For input, it will take in an array of profiles that match the BatchCreateProfile input type and returns an array of Profile data.
If we pushed our Amplify application up to AWS right now, Amplify would see the new Mutation, but wouldn't know how to attach any resolvers to it.
🗒️ By not attaching resolvers to a model, Amplify would create a
NONEdatasource for thebatchCreateProfilefield. This has some advantages that we'll explore in a later post.
Instead of pushing up to AWS, we'll create our resolvers ourselves using the CDK!
Extend our Amplify Project with the AWS CDK
We'll make use of Amplify's extensibility features to add a custom resource to our project. The resource, in this case, will be our two resolvers: One request mapping resolver and another response mapping resolver.
🗒️ To learn more about extensibility in Amplify, checkout the following resource:
To get started, run the following command:
amplify add custom
Follow the prompts to add a CDK resource called MyCustomResolvers.
Once done, this will create a cdk-stack.ts file. Note that this file is what we can develop in, and will be injected into the sibling build directory when we push our application up.
The last thing to do for setup is to add the appSync node module package:
cd ./amplify/backend/custom/MyCustomResolvers
npm i @aws-cdk/aws-appsync@~1.124.0
Once done, be sure to navigate back to the root directory:
cd ../../../..
Attaching AppSync resolvers with the AWS CDK
In the cdk-stack.ts file, I'll provide the code snippet. I've also left comments so that we can talk about the relevant sections.
Paste in the following code:
import * as cdk from '@aws-cdk/core'
import * as AmplifyHelpers from '@aws-amplify/cli-extensibility-helper'
import * as appsync from '@aws-cdk/aws-appsync'
import { AmplifyDependentResourcesAttributes } from '../../types/amplify-dependent-resources-ref'
const fs = require('fs')

export class cdkStack extends cdk.Stack {
    constructor(
        scope: cdk.Construct,
        id: string,
        props?: cdk.StackProps,
        amplifyResourceProps?: AmplifyHelpers.AmplifyResourceProps
    ) {
        super(scope, id, props)
        /* Do not remove - Amplify CLI automatically injects the current deployment environment in this input parameter */
        new cdk.CfnParameter(this, 'env', {
            type: 'String',
            description: 'Current Amplify CLI env name',
        })

        // 1. Access other Amplify Resources
        const retVal: AmplifyDependentResourcesAttributes =
            AmplifyHelpers.addResourceDependency(
                this,
                amplifyResourceProps.category,
                amplifyResourceProps.resourceName,
                [
                    {
                        category: 'api',
                        resourceName: 'batchupload',
                    },
                ]
            )
        // 2. Access variables from our API when the application synths
        const apiIdRef = cdk.Fn.ref(retVal.api.batchupload.GraphQLAPIIdOutput)
        const envRef = cdk.Fn.ref('env')

        // 3. Create a function that will replace strings in a given string
        function injectVariables(
            replacements: { [s: string]: string },
            template: string
        ) {
            const injectedTemplate = Object.entries(replacements).reduce(
                (prev, _, i, arr) => prev.replace(arr[i][0], arr[i][1]),
                template
            )
            return injectedTemplate
        }

        // 4. Create a config that contains all of the values that need to be injected
        const config = {
            INSERT_GROUP_NAME: 'admin',
            INSERT_APIID: apiIdRef,
            INSERT_PROJECT_ENV: envRef,
        }

        // 5. Grab the request template, relative to the build directory
        const requestTemplate = fs.readFileSync(
            `${__dirname}/../Mutation.createBatchProfile.req.vtl`,
            {
                encoding: 'utf-8',
            }
        )

        // 6. Grab the request template, relative to the build directory
        const responseTemplate = fs.readFileSync(
            `${__dirname}/../Mutation.createBatchProfile.res.vtl`,
            {
                encoding: 'utf-8',
            }
        )

    // 7. Call the function to inject the variables
        const injectedRequestTemplate = injectVariables(config, requestTemplate)
        const injectedResponseTemplate = injectVariables(config, responseTemplate)

    // 8. Attach the resolvers to our AppSync API
        new appsync.CfnResolver(this, 'custom-resolver', {
            apiId: cdk.Fn.ref(retVal.api.batchupload.GraphQLAPIIdOutput),
            fieldName: 'batchCreateProfile',
            typeName: 'Mutation', // Query | Mutation | Subscription
            requestMappingTemplate: injectedRequestTemplate,
            responseMappingTemplate: injectedResponseTemplate,
            dataSourceName: 'ProfileTable', // DataSource name
        })
    }
}
Running the
amplify add customcommand creates a CDK backend that is Amplify-aware. As such, Using this format, we can access our existing Amplify-generated resources. Feel free to inspect theAmplifyDependentResourcesAttributesvalue to see what options are available to you.The return value (
retVal) only contains placeholder values likestring,number, etc. To grab the actual value, we use thecdk.Fn.reffunction to say, "When the application builds, grab the actual values and inject them here".
3-7. Our schema defines our data, but it's up to us to tell AppSync how to get it. These steps do just that. The injectVariables function takes in an object of values (4), and a string. The string comes from our VTL templates (5 and 6). Using this method, we can take advantage of intellisense in our editor and create generic reusable templates.
The templates have placeholder values, so we call the
injectVariablesfunction for the appropriate request and response template.We put it all together by using the
appsyncmodule we imported earlier to create a new resolver that is attached to our graphql API.
🗒️ Note that the naming of the VTL templates (
Mutation.createBatchProfile.req.vtl) is just a convention but a common one you'll see.
The next step is to actually create our VTL templates.
Creating the Request Template
Alongside the cdk-stack.ts file we were just working in, create a new file: Mutation.createBatchProfile.req.vtl.
In that file, paste in the following:
$util.log.info($util.toJson($context))
#set($isAuthorized = false)
#set( $createdAt = $util.time.nowISO8601() )
#set($profilesArray = [])
#foreach($group in $ctx.identity.claims.get("cognito:groups"))
  $util.log.info($group)
  #if($group == "INSERT_GROUP_NAME")
    #set($isAuthorized = true)
  #end
#end

#if(!$isAuthorized)
  $util.unauthorized()
#end

#foreach($item in \${ctx.args.profiles})
  $util.qr($item.put("id", $util.defaultIfNullOrBlank($item.id, $util.autoId())))
  $util.qr($item.put("createdAt", $util.defaultIfNull($item.createdAt, $createdAt)))
  $util.qr($item.put("updatedAt", $util.defaultIfNull($item.updatedAt, $createdAt)))
  $util.qr($item.put("__typename", "Profile"))
  $util.qr($profilesArray.add($util.dynamodb.toMapValues($item)))
#end
## [End] Initialization default values. **
$util.toJson( {
  "version": "2018-05-29",
  "operation": "BatchPutItem",
  "tables": {
    "Profile-INSERT_APIID-INSERT_PROJECT_ENV": $profilesArray
  }
} )
Stemming from my last intro post on VTL, this is a great place to learn a few extra VTL directives!
Let's start with a gist of what the template does:
👨🏽🏫 When a user calls the
createBatchProfilemutation, we check if they're an admin. If they are, we grab the arguments, add on a few extra values, and insert them into the related DynamoDB table.
With the high-level overview out of the way, let's chat about how we're doing this.
First, we use the newly announced $util.log.info directive to log out the $context object to CloudWatch. This is a great addition since it now makes it easier to see what is going on in our VTL.
Note that the $context object can best be thought of as something like the event object that gets passed into Lambda functions.
From there, we just use more directives!
$isAuthorizedis a variable we create to keep track of the authState,- We use the
$util.time.nowISO8601()helper to create a timestamp and pass the value to the$createdAtvariable - We also create an array called
profilesArray
Next, we'll use the #foreach directive to iterate over the array of cognito groups. For that, the $ctx.identity.claims.get("cognito:groups") does all of the heavy-lifting. It's worth noting that $context and $ctx are the same thing. One is just shorthand.
The #if directive checks if it's a proper group (remember that our config is going to insert admin in place of INSERT_GROUP_NAME.
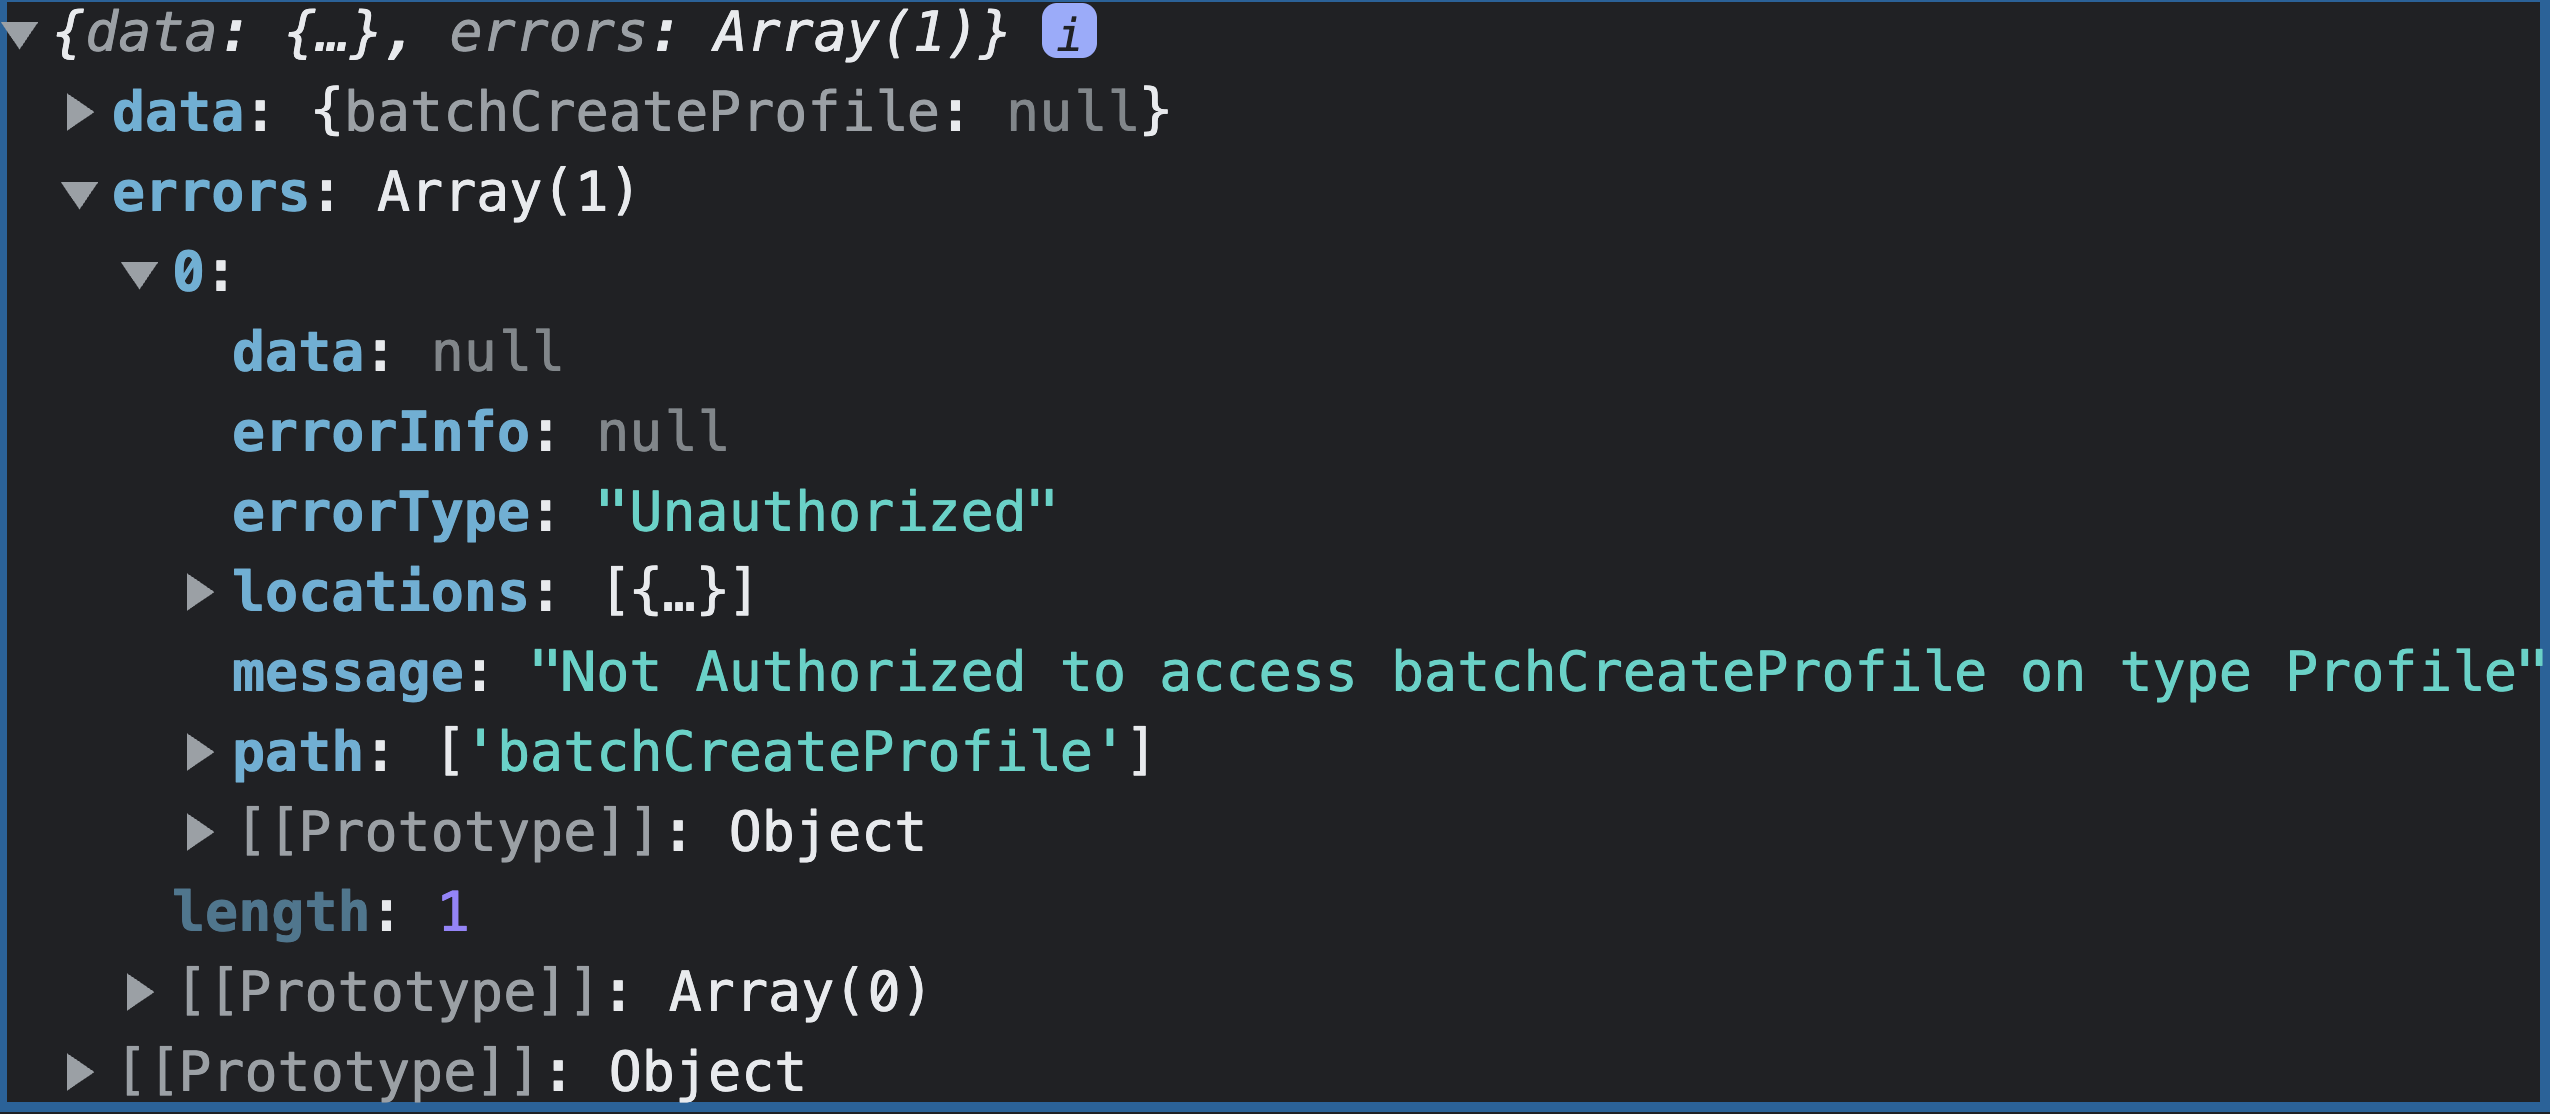
The cool thing is that the $util helpers even come with error handling. For example, if a user isn't an admin, then we throw an unauthorized error with $util.unauthorized.
Now, assuming a user is an admin, we iterate over the arguments they passed in, and add on a few extra fields like id and createdAt before using the dynamodb.toMapValues helper to turn the data from JSON to DynamoDB JSON.
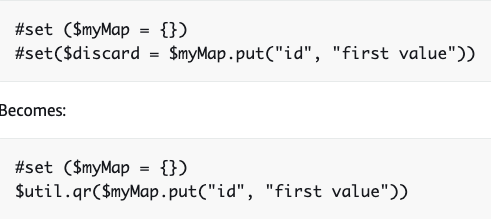
$util.qris a nice helper that says, "If you run a function that returns a value, use me to not have to create that value and just run the function"
$util.defaultIfNullOrBlankis great to say, "use this value if it's there, otherwise, use this one.". This works great with the$util.autoIdhelper that generates a random string`.
Finally the $util.toJson does what it says, but what's important is that this object is called an AppSync document.
In particular, this will call the BatchPutItem document which in turn calls the BatchWriteItem DynamoDB expression.
Creating the Response Template
Where the request template is often longer because it has to transform the data, the response template simply has to return it.
Create a file called Mutation.createBatchProfile.res.vtl.
When our request template gets done putting the data in DynamoDB, it'll issue back a response to the client. This is how we format that response.
Add in the following:
## [Start] ResponseTemplate. **
$util.log.info($util.toJson($context))
#if( $ctx.error )
  $util.error($ctx.error.message, $ctx.error.type)
#else
  $util.toJson($ctx.result.data.Profile-INSERT_APIID-INSERT_PROJECT_ENV)
#end
## [End] ResponseTemplate. **
🗒️ Recall that
##in VTL is how you specify comments.
After logging the context as before, we check if there were any errors stemming from trying to add the data to the database. If there is, we use the $util.error($ctx.error.message, $ctx.error.type) helper to throw it.
From there, we simply return the data--still using our config to inject our values instead of the placeholders INSERT_APIID and INSERT_PROJECT_ENV.
Testing our resolvers
With our custom resolvers in place, let's push up our resources to AWS.
Make sure you're at the root of your project and run the following:
amplify push -y
This will push up our Auth and API resources as well as accept any prompts when it comes to automatically generating graphql files for us.
In our index.js file, let's bind our frontend to our backend by configuring Amplify. Add in the following code snippet to the top of the page:
import {Amplify} from 'aws-amplify'
import config from './aws-exports'

Amplify.configure(config)
Next, we'll add authentication to our AdminPage using the withAuthenticator() module. In the AdminPage.js file, add the following import:
import {withAuthenticator} from '@aws-amplify/ui-react'
In addition, wrap our AdminPage with the following export:
export default withAuthenticator(AdminPage)
Now that our authentication is in place, add the following imports to add in our API:
import {API} from 'aws-amplify'
import {batchCreateProfile} from '../graphql/mutations'
Lastly, in the handleCSVSubmit function, replace the Papa.parse function with the following:
Papa.parse(uploadedCSV, {
    header: true,
    complete: async (results) => {
        const data = results.data.map((item) => ({
            firstName: item['name.first'],
            lastName: item['name.first'],
            email: item.email,
            images: {
                thumbnail: item['picture.thumbnail'],
                medium: item['picture.medium'],
                large: item['picture.large'],
            },
        }))
        console.log(data)
        await API.graphql({
            query: batchCreateProfile,
            variables: { profiles: data },
        }).catch((e) => console.log(e))
    },
})
🗒️ This is following the format of the CSV file we imported from the randomUser API in the beginning of the project.
Save the application, and run the project:
npm start
On the admin page, create a user--keep in mind that this user has to be an admin.
Once the user is created--for brevity sake, head into the Cognito console and move the user to the admin group.
Once in the group, logout of the application by adding a signOut prop to our AdminPage (this is provided when using the AmplifyProvider with withAuthenticator) along with a signOut button
<Button onClick={signOut}>Signout</Button>
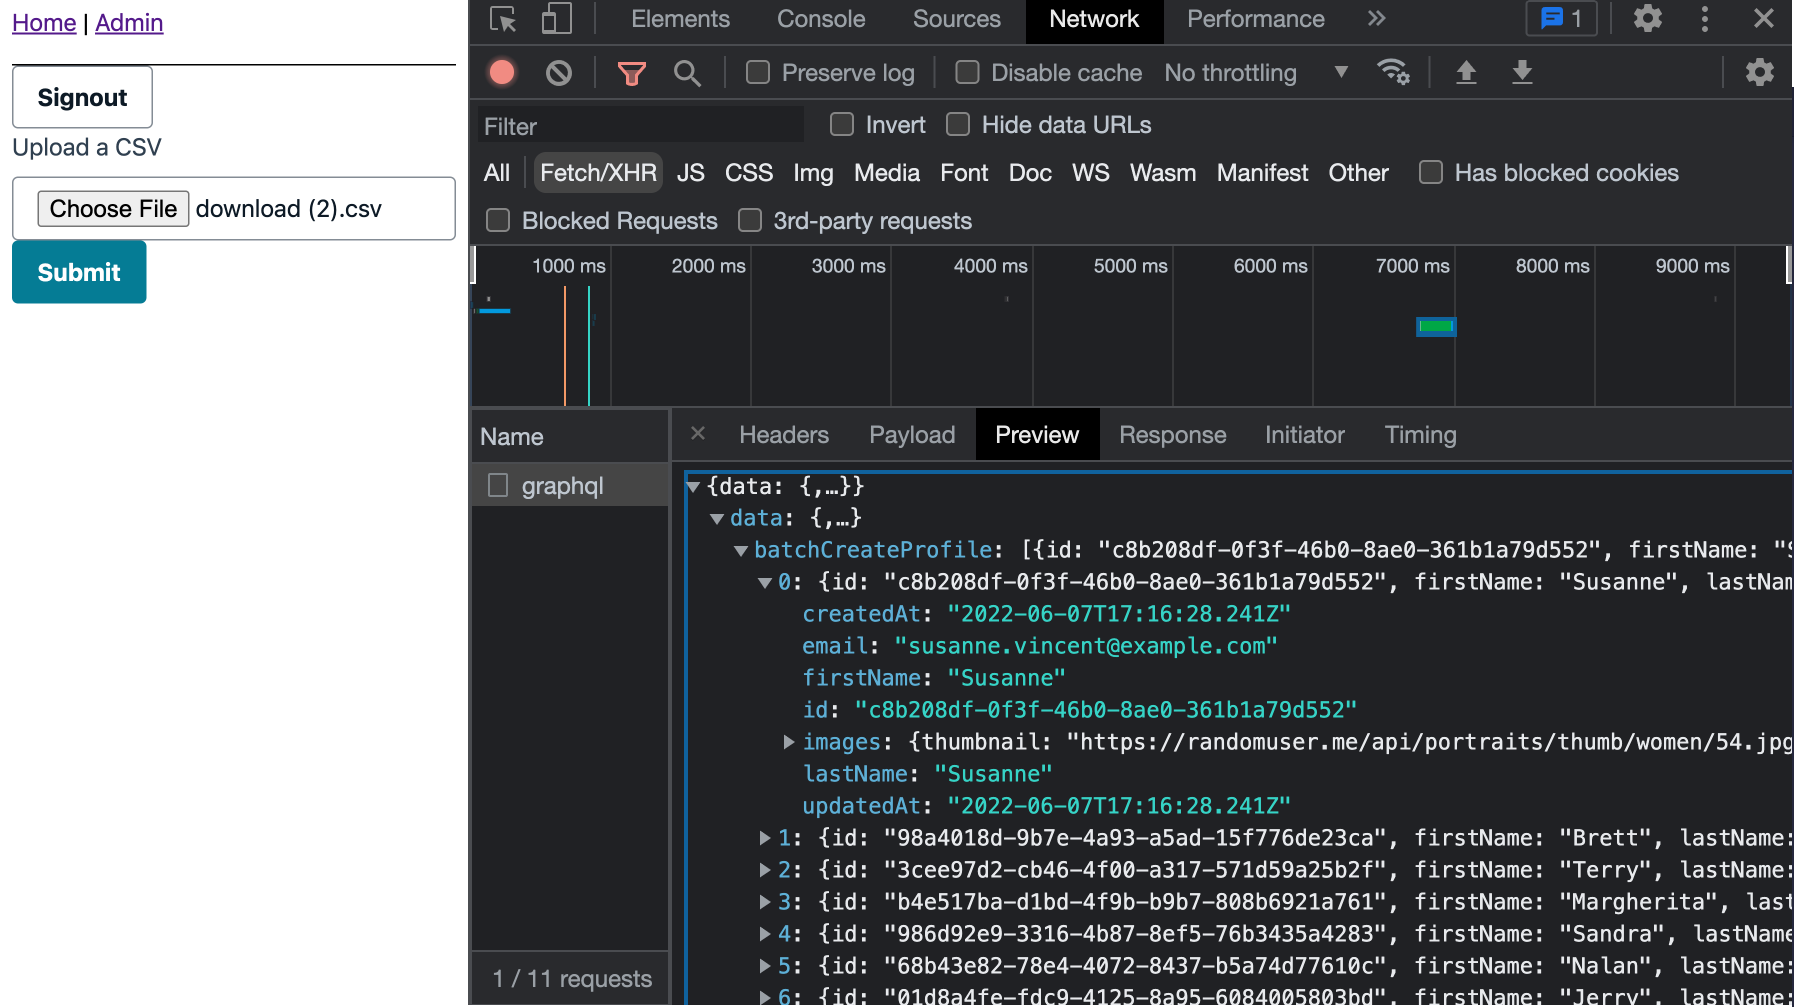
Once logged out, upload the CSV and view the output in the network tab.
Optional: view the results in DynamoDB!
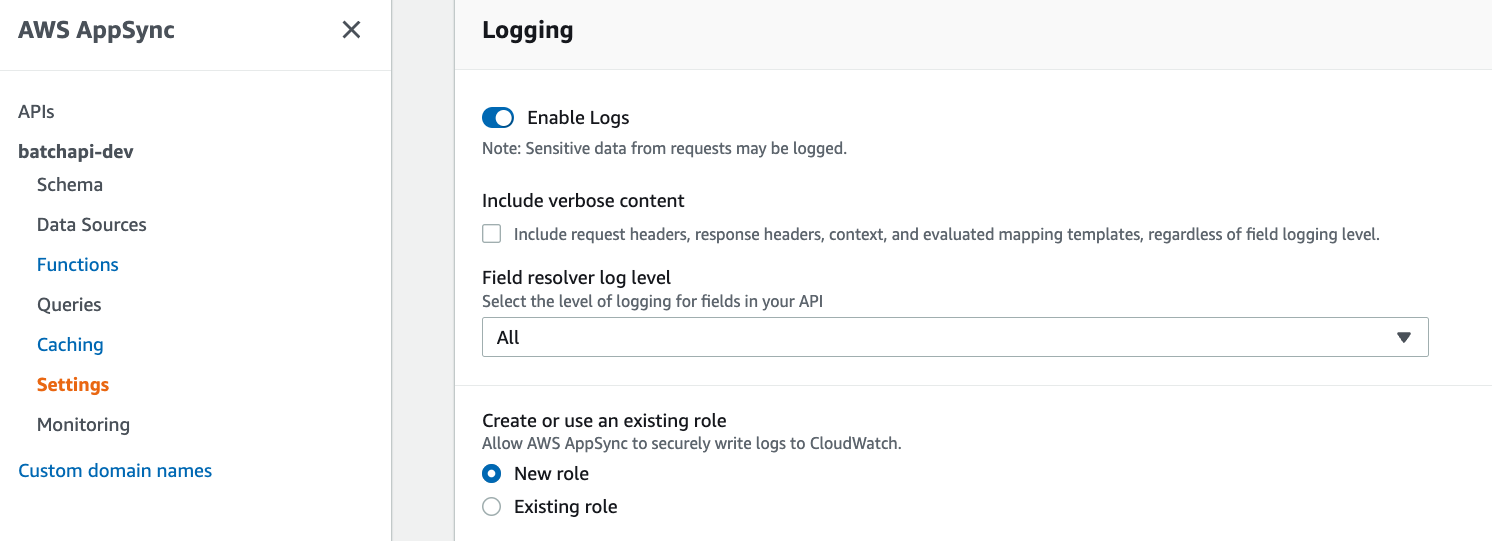
To view the logs in CloudWatch, ensure your API has logging turned on in its settings:
Conclusion
This project was fun as it lets us get deeper into understanding VTL and the role it plays. An often talked about criticism of Amplify is that it locks users in or it's a black box. However, going through projects like this show that neither are the case 🙂
Through the use of extensibility and understanding a bit of VTL, it becomes easy to build out various apps that adapt to your use case!
As always, thanks Focus Otters for checking out the post and I'll catch you all next time ✌️


