Overview
When adding a backend resource with AWS Amplify, like a Cognito User Pool, a Lambda function, or an S3 bucket, we provide reasonable defaults and best practices so that you can spend more time focusing on your business logic.
At Amazon, we like to say we take care of the Undifferentiated Heavy-Lifting ™️.
However, we realize that our users may have specific needs that differ from what we have in place. For example, when adding authentication with amplify add auth, we automatically set the password length to be at least 8 characters long without requiring special characters.
This may not work out for every organization, so we allow users to run amplify update auth to change some of those attributes from right within the Amplify CLI.
This works great, but AWS Services have many knobs that users can tweak and it isn't practical to add every one in our CLI.
To address that, we recently added a new command to the CLI:
amplify override <category>
This command integrates with the AWS CDK to allow your Amplify generated resources to be configured at a much more granular level that is easily reproducible.
In this post, we'll look at examples on how this may be used in your Amplify projects.
Overriding Authentication
During the process of adding authentication with the amplify add auth command, you can enable varying use cases such as adding federated identities from social providers, setting password defaults and more.
But let's say you wanted to do something really specific like changing the length of time a signup-confirmation email is valid for. Amplify defaults to 30 days. But maybe your organization only allows for 2. That's now possible with only a few commands:
amplify override auth
This command integrates with the CDK to create an overrides.ts file that looks like so:
import { AmplifyAuthCognitoStackTemplate } from '@aws-amplify/cli-extensibility-helper';

export function override(resources: AmplifyAuthCognitoStackTemplate) {

}
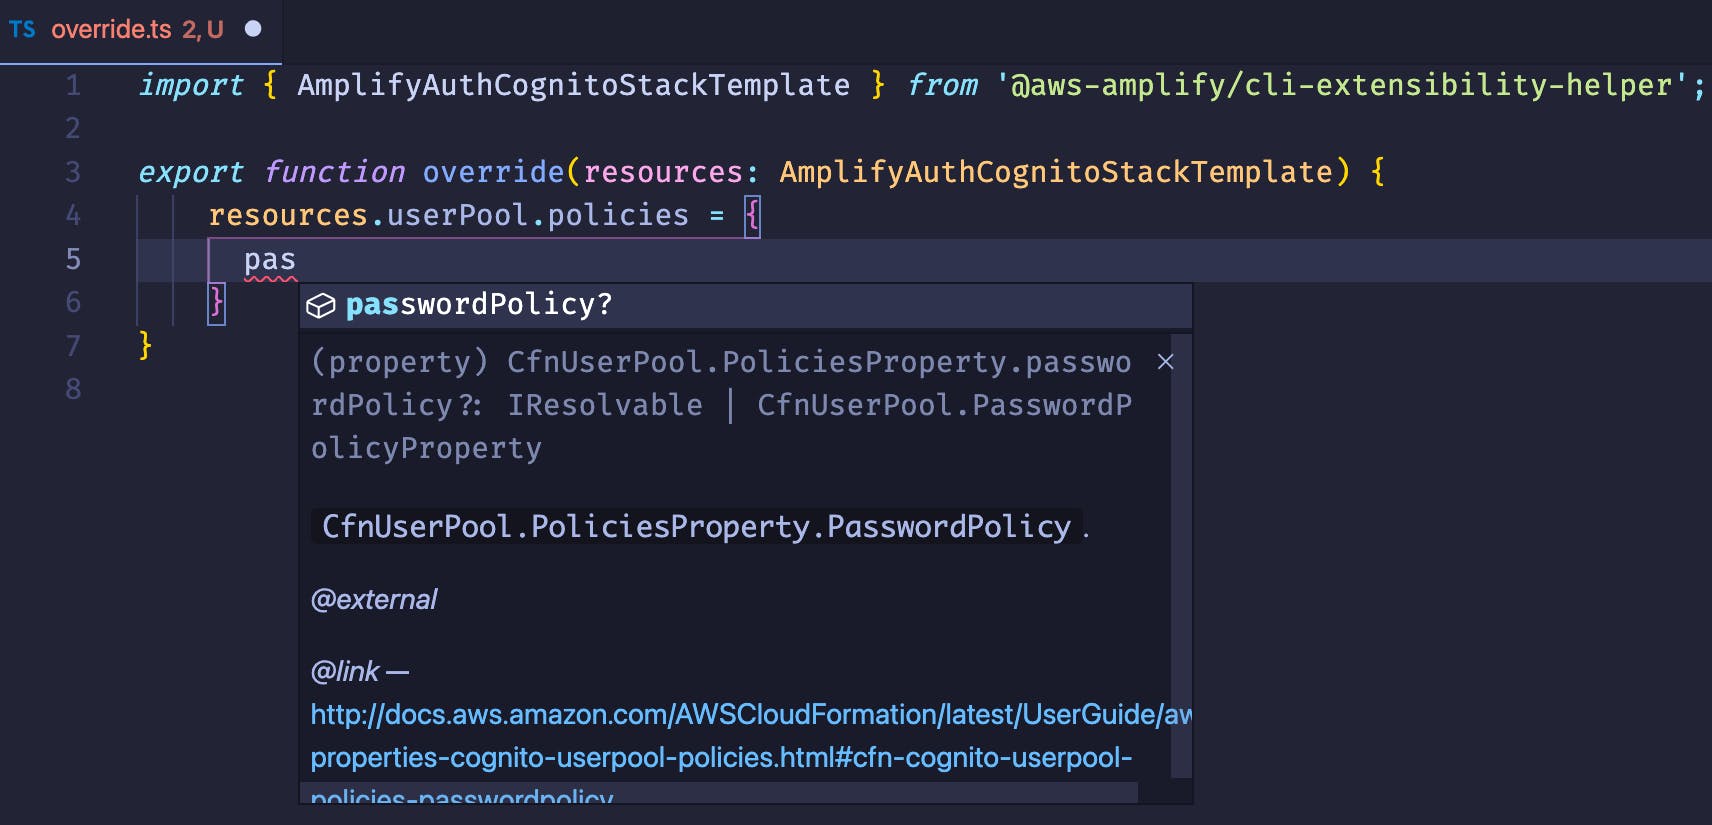
Inside of the override function, we have access to the resources parameter to reference everything pertaining to our authentication resource. Since this file is written in TypeScript, we can take advantage of intellisense to find the TemporaryPasswordValidityDays option that we need:

🗒️ Notice how there is not only information about the property, but a link to learn more.
Here is the complete example:
import { AmplifyAuthCognitoStackTemplate } from '@aws-amplify/cli-extensibility-helper';

export function override(resources: AmplifyAuthCognitoStackTemplate) {
    resources.userPool.policies = {
        passwordPolicy: {
      ...resources.userPool.policies["passwordPolicy"], // spread in all other policy values
            temporaryPasswordValidityDays: 2,
        },
    }
}
Modifying a DynamoDB Table Created By AppSync
AWS AppSync is a managed GraphQL service that is used to build production-ready, real-time applications.
Amplify takes this a step further by adding directives that make working with AppSync even easier.
One such directive is @model. Adding this to a type will tell Amplify to not only add a DyanamoDB table with the same name, but to prompt if the user would like to automatically have all CRUDL operations scaffolded out as well as websocket subscriptions 🤯
When working with AppSync in Amplify, we abstract away the database so that focus is put on the data model itself. However by running the following command, you can gain access and modify it:
amplify override api
Imagine a scenario where you'd like to not only enable a TTL on your database, but also take advantage of the new DynamoDB Standard-IA table class released at re:Invent this year.
🗒️ A Time To Live (TTL) specifies the time when an item is to be deleted in a database. For more information and an example walkthrough, checkout this post
These are the steps we'd use to accomplish that:
- Run
amplify add apiand follow the prompts.- change the auth mode from
APItoAmazon Cognito User Pool. - Select the
Todo(Single Object with Fields) schema template.
- change the auth mode from
- Once the schema opens up in the editor, paste in the below code:
type Todo @model @auth(rules: [{ allow: owner }]) { id: ID! name: String! description: String ttl: Int! } - Run
amplify override apito create anoverrides.tsfile for this resource category. - In this file, paste in the following code:
import { AmplifyApiGraphQlResourceStackTemplate } from '@aws-amplify/cli-extensibility-helper'

export function override(resources: AmplifyApiGraphQlResourceStackTemplate) {
    resources.models['Todo'].modelDDBTable.timeToLiveSpecification = {
        enabled: true,
        attributeName: 'ttl', //what we defined in our schema
    }

    resources.models['Todo'].modelDDBTable.addPropertyOverride(
        'TableClass',
        'STANDARD_INFREQUENT_ACCESS'
    )
}
That's it! 🎉
Notice how we can dive into our API to access the underlying database to set the TTL. Also, notice how we can use the addPropertyOverride feature of the CDK to change the table class since Standard-IA tables are so new, the option isn't typed out in the CDK as of this writing. 😎
Viewing the AWS Console, we can verify our overrides.


Conclusion
In this post we looked at 3 different ways an Amplify generated resource can be overridden:
- At the top-level, as shown in overriding authentication.
- By diving into the category to override underlying resources, as shown with
TTL. - By diving deep to use the CDK to modify the resource at the CloudFormation level, as shown with
addPropertyOverride.
At the time of this writing, auth, storage, and api are all able to be overridden, with function being the next to be added.
If wanting to create your own resources within Amplify, you may want to check out my last post where I showed how to do just that!
Thanks for following along, and I can't wait to see what you all have to build! If you have any questions feel free to drop a comment and follow me on Twitter to stay up to date with what I have going on!


